crwdns2915892:0crwdne2915892:0
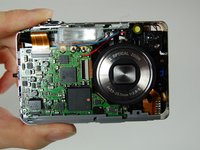
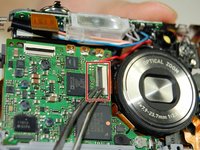
If your Casio Exilim EX-Z850 is no longer working correctly, you most likely need to replace the motherboard.
The motherboard is responsible for keeping your device functioning properly. It connects all of the principle components of the camera. If the motherboard is not working correctly, everything has the possibility of not working right. If your device continues to malfunction, you should replace the motherboard.
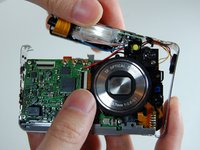
Make sure to power down your camera before you begin.
crwdns2942213:0crwdne2942213:0
-
-
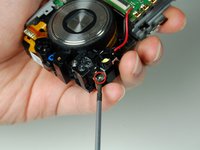
Using the Phillips #00 screwdriver, remove the four screws from the side of the speaker.
-
-
-
Using the Phillips #00 screwdriver, remove the four long screws from the bottom of the camera.
-
-
-
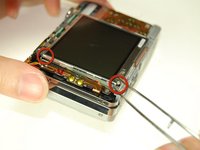
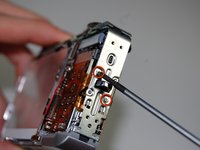
Using the Phillips #00 screwdriver, remove the four screws from the side opposite of the speaker.
-
-
crwdns2935267:0crwdne2935267:0Tweezers$4.99
-
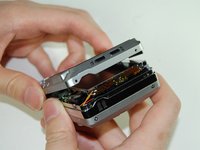
Pry open bottom casing gently after all screws have been removed.
-
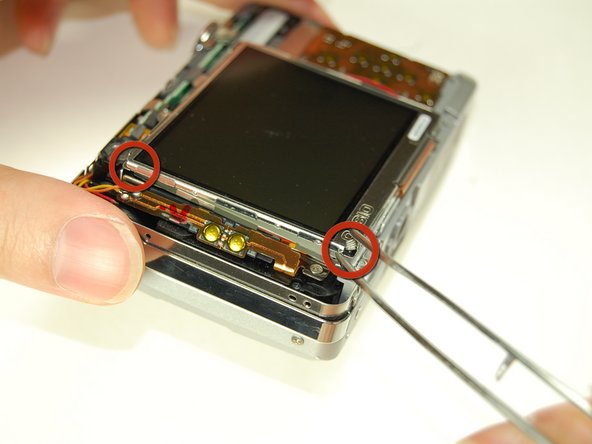
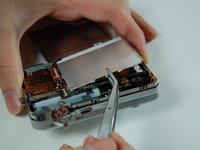
With tweezers, carefully remove the ribbon from the LCD screen.
-
Set the bottom casing aside.
-
-
-
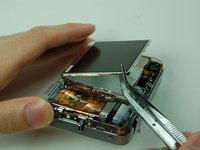
Pry apart the top casing using tweezers.
-
Set the top casing aside.
-
-
-
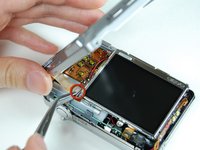
Carefully remove the pieces of black tape on the bottom of the LCD screen that attach it to the frame.
-
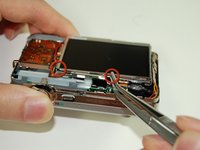
Use tweezers to pry the LCD screen off from the opening.
-
-
-
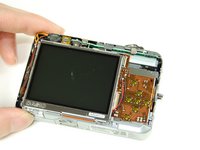
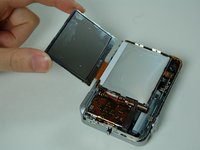
Lift the LCD screen and move it to the other side.
-
-
-
-
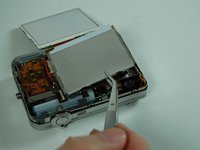
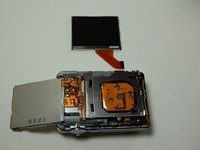
Using a pair of tweezers, pry off the LCD casing.
-
-
-
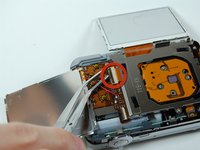
Flip open the connector holding the ribbon.
-
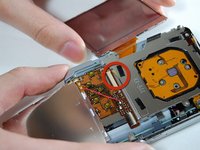
Use the tweezers to carefully pull out the LCD screen with the ribbon from the camera.
-
-
-
Using the Phillips #00 screwdriver, remove two screws on the side where the battery is located.
-
Remove the lanyard loop after the screws come off.
-
Pull the side casing so it becomes dislocated from the top of the camera frame.
-
-
-
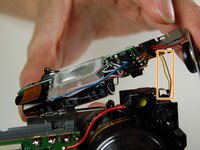
On the front of the camera near the flash, flip the connector holding the ribbon.
-
Remove the ribbon from the connector.
-
-
-
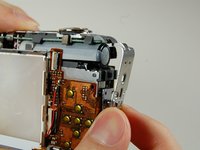
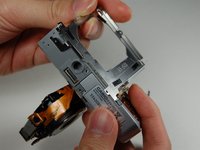
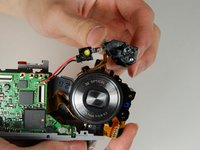
Carefully remove the L-shaped frame from the camera.
-
Pop the frame off the bumps and tabs.
-
-
-
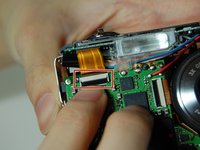
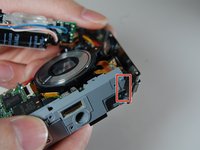
Flip the connector and remove the ribbon cable from the motherboard next to the lens.
-
-
-
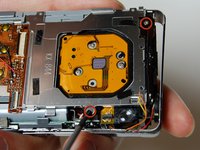
Remove the frame on the back side of the camera where the LCD screen was.
-
Use the Phillips #00 screwdriver to remove the two screws connecting the frame to the camera.
-
Slowly pry off the frame from the camera.
-
After removing the frame, a plastic piece with two yellow buttons should fall off.
-
-
-
On the back of the camera where the LCD screen was, remove the 3 screws located behind the lens using the Phillips #00 screwdriver.
-
-
-
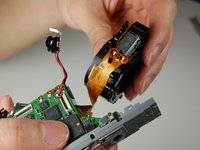
Remove the large orange ribbon previously held in by screws from the camera.
-
-
-
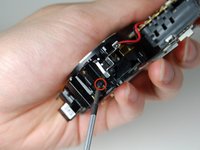
On the backside of the camera where the indicator lamp is located, remove the two screws using the Phillips #00 screwdriver.
-
-
-
On the front side of the indicator lamp remove the screw using the Phillips #00 screwdriver.
-
-
-
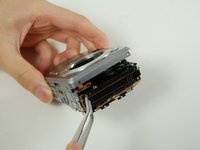
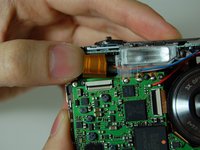
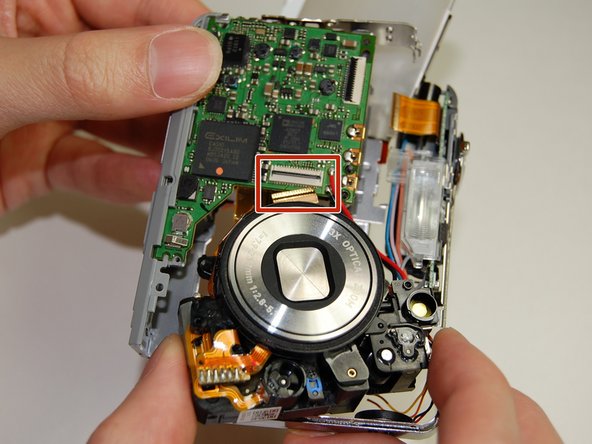
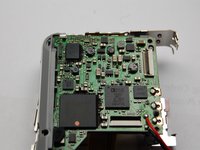
Desolder the lens from the motherboard.
-
Desolder the wire from the motherboard.
-


To reassemble your device, follow these instructions in reverse order.
crwdns2935221:0crwdne2935221:0
crwdns2935227:0crwdne2935227:0
crwdns2935287:0crwdne2935287:0

Cal Poly, Team 4-38, Regan Winter 2011 crwdns2935289:0Cal Poly, Team 4-38, Regan Winter 2011crwdne2935289:0
CPSU-REGAN-W11S4G38
crwdns2931471:04crwdne2931471:0
crwdns2935297:014crwdne2935297:0