crwdns2933423:0crwdne2933423:0

Casio Exilim EX-Z80 Back and Front Cover Replacement

crwdns2942213:0crwdne2942213:0

  1. Casio Exilim EX-Z80 Back and Front Cover Replacement, Battery: crwdns2935265:01crwdnd2935265:01crwdnd2935265:02crwdne2935265:0 Casio Exilim EX-Z80 Back and Front Cover Replacement, Battery: crwdns2935265:01crwdnd2935265:02crwdnd2935265:02crwdne2935265:0
    • Locate the battery compartment at the bottom of the camera.

    • With your thumb, gently press down on the compartment door and slide to the left to open.

  2. Casio Exilim EX-Z80 Back and Front Cover Replacement: crwdns2935265:02crwdnd2935265:01crwdnd2935265:02crwdne2935265:0 Casio Exilim EX-Z80 Back and Front Cover Replacement: crwdns2935265:02crwdnd2935265:02crwdnd2935265:02crwdne2935265:0
    • With your index finger, gently pull back gray release lever for the battery to pop out.

    • Gently pull the battery out of the slot.

  3. Casio Exilim EX-Z80 Back and Front Cover Replacement, Back and Front Cover: crwdns2935265:03crwdnd2935265:01crwdnd2935265:03crwdne2935265:0 Casio Exilim EX-Z80 Back and Front Cover Replacement, Back and Front Cover: crwdns2935265:03crwdnd2935265:02crwdnd2935265:03crwdne2935265:0 Casio Exilim EX-Z80 Back and Front Cover Replacement, Back and Front Cover: crwdns2935265:03crwdnd2935265:03crwdnd2935265:03crwdne2935265:0
    • Remove the four 3 mm black screws from the bottom of the camera using a Phillips #000 screwdriver.

    • Open the battery compartment with your thumb or index finger.

    • Remove the single 2 mm silver screw that is now exposed using a Phillips #000 screwdriver.

  4. Casio Exilim EX-Z80 Back and Front Cover Replacement: crwdns2935265:04crwdnd2935265:01crwdnd2935265:03crwdne2935265:0 Casio Exilim EX-Z80 Back and Front Cover Replacement: crwdns2935265:04crwdnd2935265:02crwdnd2935265:03crwdne2935265:0 Casio Exilim EX-Z80 Back and Front Cover Replacement: crwdns2935265:04crwdnd2935265:03crwdnd2935265:03crwdne2935265:0
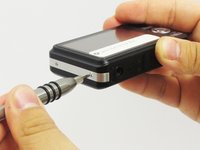
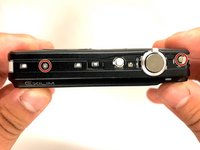
    • Open the USB port tab.

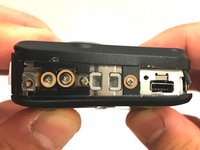
    • Remove the single 2 mm silver screw using a Phillips #000 screwdriver.

  5. Casio Exilim EX-Z80 Back and Front Cover Replacement: crwdns2935265:05crwdnd2935265:01crwdnd2935265:02crwdne2935265:0 Casio Exilim EX-Z80 Back and Front Cover Replacement: crwdns2935265:05crwdnd2935265:02crwdnd2935265:02crwdne2935265:0
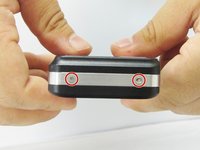
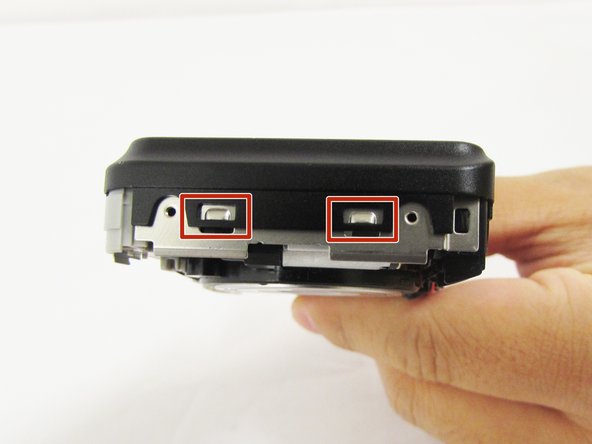
    • Remove the two 2 mm silver screws using a Phillips #000 screwdriver.

  6. Casio Exilim EX-Z80 Back and Front Cover Replacement: crwdns2935265:06crwdnd2935265:01crwdnd2935265:02crwdne2935265:0 Casio Exilim EX-Z80 Back and Front Cover Replacement: crwdns2935265:06crwdnd2935265:02crwdnd2935265:02crwdne2935265:0
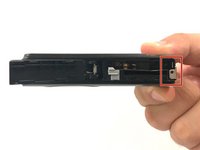
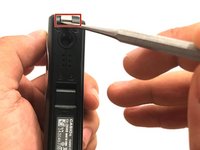
    • Carefully remove the silver strip from left side. Open the battery cover and remove the metal strip with fingers by sliding it to the left.

  7. Casio Exilim EX-Z80 Back and Front Cover Replacement: crwdns2935265:07crwdnd2935265:01crwdnd2935265:02crwdne2935265:0 Casio Exilim EX-Z80 Back and Front Cover Replacement: crwdns2935265:07crwdnd2935265:02crwdnd2935265:02crwdne2935265:0
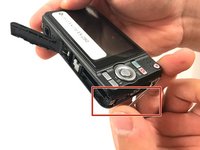
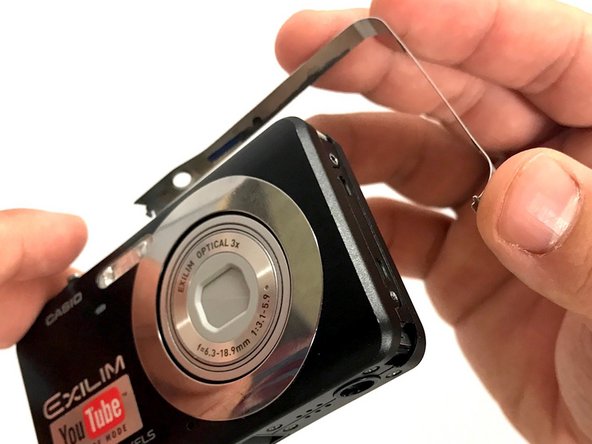
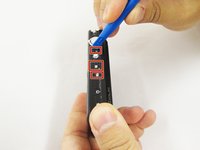
    • With the metal spudger, pry out the edge of the silver strip at the bottom right side of the camera.

    • Carefully remove the remaining part of the metal strip.

  8. Casio Exilim EX-Z80 Back and Front Cover Replacement: crwdns2935265:08crwdnd2935265:01crwdnd2935265:02crwdne2935265:0 Casio Exilim EX-Z80 Back and Front Cover Replacement: crwdns2935265:08crwdnd2935265:02crwdnd2935265:02crwdne2935265:0
    • Remove the two 2 mm silver screws from the top corners of the camera using a Phillips #000 screwdriver.

    • Remove the three 2 mm screws from the left side using a Phillips #000 screwdriver.

  9. Casio Exilim EX-Z80 Back and Front Cover Replacement: crwdns2935265:09crwdnd2935265:01crwdnd2935265:03crwdne2935265:0 Casio Exilim EX-Z80 Back and Front Cover Replacement: crwdns2935265:09crwdnd2935265:02crwdnd2935265:03crwdne2935265:0 Casio Exilim EX-Z80 Back and Front Cover Replacement: crwdns2935265:09crwdnd2935265:03crwdnd2935265:03crwdne2935265:0
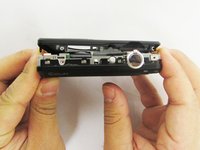
    • Using a small opening tool carefully release all lock tabs at the top and on the side of the camera from their locked position.

    • Using your hands, carefully separate the front and back panel from the camera.

crwdns2915888:0crwdne2915888:0

To reassemble your device, follow these instructions in reverse order.

Caroline Villasenor

crwdns2935283:004/11/17crwdne2935283:0

331 crwdns2915208:0crwdne2915208:0

crwdns2935297:03crwdne2935297:0

crwdns2915084:0crwdne2915084:0

Eastern Washington University, Team S1-G5, Crane Spring 2017 crwdns2935289:0Eastern Washington University, Team S1-G5, Crane Spring 2017crwdne2935289:0

EWU-CRANE-S17S1G5

crwdns2931471:03crwdne2931471:0

crwdns2935297:010crwdne2935297:0

crwdns2944067:00crwdne2944067:0

crwdns2917038:0crwdne2917038:0

crwdns2936625:0crwdne2936625:0:

crwdns2936751:024crwdne2936751:0 0

crwdns2936753:07crwdne2936753:0 6

crwdns2936753:030crwdne2936753:0 16

crwdns2942667:0crwdne2942667:0 461