crwdns2915892:0crwdne2915892:0
If your Casio Cassiopeia (model E-125) is having issues with its touchscreen—faulty control screen, cracked screen, or no visual—this guide will walk you through replacing it.
Before using this guide, be sure to carefully read the process of removing power/disconnecting batteries. The document will walk you through how to prevent device damage.
The device should be fully powered off before beginning to replace the touchscreen.
crwdns2942213:0crwdne2942213:0
-
-
Flip the device over to the back side.
-
-
-
Slide the small switch on the back to "MAIN".
-
-
-
Slide the battery cover downwards.
-
Pull off the battery cover.
-
-
-
Pull the black tab to remove the battery.
-
-
-
-
Use the Phillips #00 screwdriver to remove the two screws near the top of the device.
-
-
-
Use the Phillips #00 screwdriver to remove the two screws located inside the battery compartment.
-
-
-
Use a spudger or opening tool to separate the two halves of the case.
-
-
-
Pry the two halves of the case apart with the opening tool.
-
-
-
Lay the two halves of the outer case next to the central components as shown.
-
-
-
Use the Philips #00 screwdriver to remove the three screws in the corners of the screen.
-
-
-
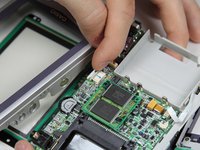
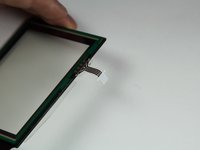
Lift the tab on the motherboard and pull out the ribbon cable.
-
After the ribbon cable is detached from the motherboard, the touch screen is completely separated from the device.
-


To reassemble your device, follow these instructions in reverse order.
To reassemble your device, follow these instructions in reverse order.
crwdns2915084:0crwdne2915084:0

Cal Poly, Team 5-4, Forte Spring 2012 crwdns2935289:0Cal Poly, Team 5-4, Forte Spring 2012crwdne2935289:0
CPSU-FORTE-S12S5G4
crwdns2931471:06crwdne2931471:0
crwdns2935297:05crwdne2935297:0