crwdns2933423:0crwdne2933423:0

Casio CZ-1000 Barrel Plug Replacement

crwdns2942213:0crwdne2942213:0

  1. Casio CZ-1000 Barrel Plug Replacement, Backplate: crwdns2935265:01crwdnd2935265:01crwdnd2935265:02crwdne2935265:0 Casio CZ-1000 Barrel Plug Replacement, Backplate: crwdns2935265:01crwdnd2935265:02crwdnd2935265:02crwdne2935265:0
    • Use a Phillips #1 screwdriver to remove the eleven 7.5 mm screws securing the back plate.

  2. Casio CZ-1000 Barrel Plug Replacement: crwdns2935265:02crwdnd2935265:01crwdnd2935265:03crwdne2935265:0 Casio CZ-1000 Barrel Plug Replacement: crwdns2935265:02crwdnd2935265:02crwdnd2935265:03crwdne2935265:0 Casio CZ-1000 Barrel Plug Replacement: crwdns2935265:02crwdnd2935265:03crwdnd2935265:03crwdne2935265:0
    • Using a Phillips #1 screwdriver, remove all 14 5.5 mm screws from the two motherboards.

    • These screws secure the motherboards to the keyboard assembly and the dial on the right side.

  3. Casio CZ-1000 Barrel Plug Replacement: crwdns2935265:03crwdnd2935265:01crwdnd2935265:03crwdne2935265:0 Casio CZ-1000 Barrel Plug Replacement: crwdns2935265:03crwdnd2935265:02crwdnd2935265:03crwdne2935265:0 Casio CZ-1000 Barrel Plug Replacement: crwdns2935265:03crwdnd2935265:03crwdnd2935265:03crwdne2935265:0
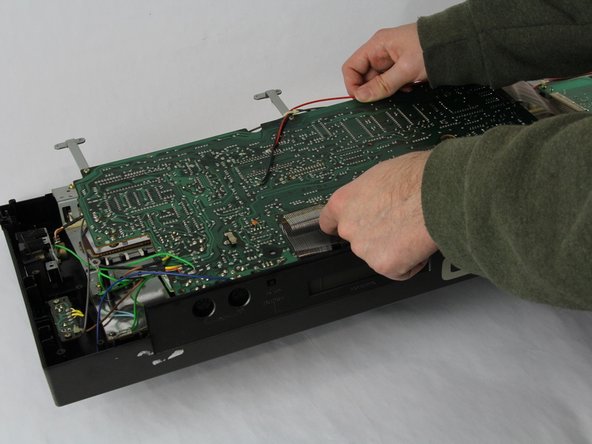
    • Carefully cut the zip tie located in the right-hand corner using a pair of scissors or wire cutters.

    • Be sure to avoid cutting any nearby wires or components.

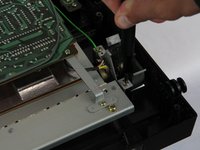
    • Gently slide all the plugs out of their sockets.

    • This will prevent them from catching on anything or damaging the connectors as you lift.

  4. Casio CZ-1000 Barrel Plug Replacement, Barrel Plug: crwdns2935265:04crwdnd2935265:01crwdnd2935265:01crwdne2935265:0
    • Clean the area around the barrel plug on the board using a lint-free cloth or a paper towel to remove dust or debris.

    • This ensures a clean working surface and better visibility of the solder joints.

  5. Casio CZ-1000 Barrel Plug Replacement: crwdns2935265:05crwdnd2935265:01crwdnd2935265:02crwdne2935265:0 Casio CZ-1000 Barrel Plug Replacement: crwdns2935265:05crwdnd2935265:02crwdnd2935265:02crwdne2935265:0
    • Hold the soldering iron against the solder joint for a few seconds to melt it, then gently pull the barrel plug out while the solder is liquid.

crwdns2915888:0crwdne2915888:0

To reassemble your device, follow these instructions in reverse order.

Jace Alexander

crwdns2935283:010/24/24crwdne2935283:0

181 crwdns2915208:0crwdne2915208:0

crwdns2935297:02crwdne2935297:0

crwdns2915084:0crwdne2915084:0

Cuesta, Team 60-3, Krynen Fall 2024 crwdns2935289:0Cuesta, Team 60-3, Krynen Fall 2024crwdne2935289:0

CUESTA-KRYNEN-F24S60G3

crwdns2931471:04crwdne2931471:0

crwdns2935297:05crwdne2935297:0

crwdns2947412:00crwdne2947412:0

crwdns2917038:0crwdne2917038:0

crwdns2936625:0crwdne2936625:0:

crwdns2936751:024crwdne2936751:0 0

crwdns2936753:07crwdne2936753:0 2

crwdns2936753:030crwdne2936753:0 3

crwdns2942667:0crwdne2942667:0 58