crwdns2915892:0crwdne2915892:0
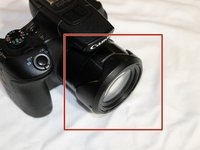
If either your screen is damaged or you cannot see an image on the screen of your Canon PowerShot SX60 HS then use this guide to replace the LCD screen.
This screen allows displays and image of what the camera is pointed at. It also enables the user to review their photos after they have taking them.
Before using this guide, please review our troubleshooting guide to ensure that this repair is necessary.
Prior to starting this guide, ensure that the device is powered completely off.
crwdns2942213:0crwdne2942213:0
-
-
Make sure to power off the device before completing any more steps.
-
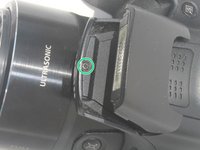
Remove the battery by releasing the orange clip in the battery compartment.
-
-
-
Remove the rubber eye piece by pulling it back.
-
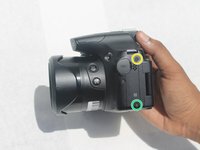
Use the Phillips #00 screwdriver to remove the two 5mm #00 screws located on the side of the viewfinder.
-
-
-
Use the Phillips #00 screwdriver to remove the 4mm #00 screw located on the bottom left of the device.
-
Use the Phillips #00 screwdriver to remove the 5mm #00 screw located on the bottom center of the device.
-
Use the Phillips #00 screwdriver to remove the 7mm #00 screw on the right top corner of the camera, just above the media ports.
-
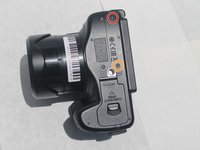
Use the Phillips #00 screwdriver to remove the two 5mm #00 screws located on the right side, under the media port dust cover.
-
-
-
crwdns2935267:0crwdne2935267:0Tweezers$4.99
-
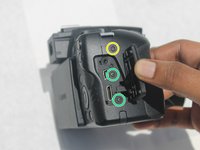
Use the iFixit opening tool to pry off the back panel.
-
Use the black spudger to unclip the ribbon located behind the battery compartment. Then remove it using the nylon tipped tweezers.
-
Once the ribbon is unplugged, remove the back panel from the camera body.
-
-
-
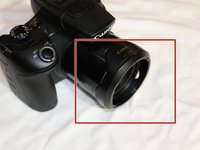
Remove the sunshade located on the front of the lens by twisting it 90 degrees in either direction, then pull straight off the lens.
-
-
-
Remove the 5mm Phillips #00 screw located on the left side below the microphone connection.
-
Remove the 4mm Phillips #00 screw located on the bottom left of the camera.
-
Remove the 5mm Phillips #00 screw located on the bottom center of the camera.
-
Pop open the flash and remove the 5mm Phillips #00 screw located under the flash.
-
-
-
Remove the front cover by pulling along the lens housing while holding the body of the camera.
-
-
crwdns2935267:0crwdne2935267:0Tweezers$4.99
-
Remove the 4mm #00 Philips screw located on the top left corner beneath the front panel.
-
Remove the 5mm #00 Philips screw located on the top left corner beneath the front panel.
-
Remove the 5mm #00 Philips screw located on the top of the left side panel near the microphone connection.
-
Remove the 4mm #00 Philips screw located on the bottom left corner beneath the front panel.
-
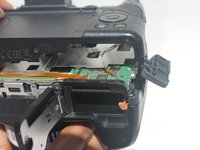
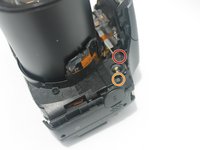
Using a black spudger, unclip the orange wire ribbon on the lower left corner of the motherboard and then remove it using the nylon tipped tweezers.
-
The side panel is now free and can be removed by pulling the panel to the left.
-
-
crwdns2935267:0crwdne2935267:0Tweezers$4.99
-
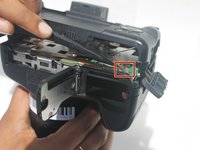
Remove two 4mm #00 Philips screws located at the hinge of the LCD Screen.
-
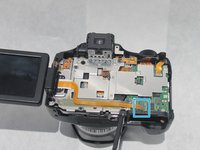
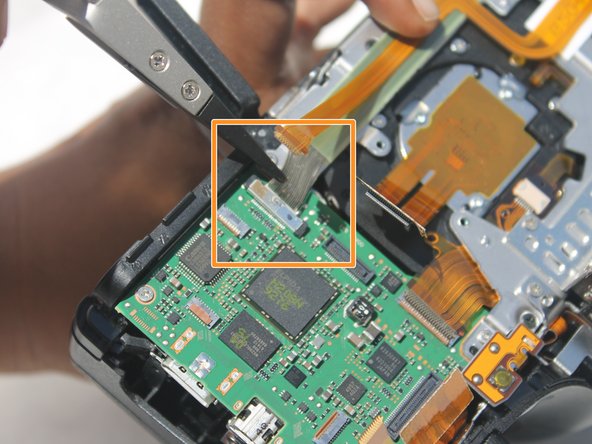
Unclip the green ribbon using the nylon tipped tweezers.
-
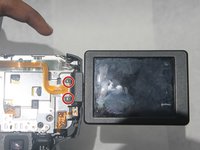
Once the ribbon is unclipped, remove the LCD screen.
-


To reassemble your device, follow these instructions in reverse order.
To reassemble your device, follow these instructions in reverse order.
crwdns2935221:0crwdne2935221:0
crwdns2935227:0crwdne2935227:0
crwdns2915084:0crwdne2915084:0

Embry-Riddle Aeronautical University, Team S3-G7, Watkins Summer 2019 crwdns2935289:0Embry-Riddle Aeronautical University, Team S3-G7, Watkins Summer 2019crwdne2935289:0
ERAU-WATKINS-SU19S3G7
crwdns2931471:04crwdne2931471:0
crwdns2935297:08crwdne2935297:0
crwdns2947412:03crwdne2947412:0
I’ve successfully replaced the LCD screen however the camera won’t power on! Can anyone help? All of the connections have been put back in correctly and the battery is fully charged however it seems to be dead
same for me as for Ultimate Bobsy - green light for camera on is light, but the camera is dead :-(
where can i find the new screen? ive look up in ebay, amazon and aliexpress but cant find it :(