crwdns2915892:0crwdne2915892:0
If the flash isn’t working on your Canon PowerShot SX60 HS then use this guide to replace the flash assembly.
The flash on this device is used to help the user take pictures in low-light conditions.
Ensure that the settings are correct for the flash to work on your device. For more clarifying information review our troubleshooting guide.
Before starting this guide, ensure that your device is powered off completely.
crwdns2942213:0crwdne2942213:0
-
-
-
Make sure to power off the device before completing any more steps.
-
Remove the battery by releasing the orange clip in the battery compartment.
 crwdns2952109:0crwdne2952109:0
-
-
-
Remove the rubber eye piece by pulling it back.
-
Use the Phillips #00 screwdriver to remove the two 5mm #00 screws located on the side of the viewfinder.
-
-
-
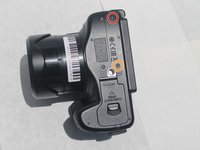
Use the Phillips #00 screwdriver to remove the 4mm #00 screw located on the bottom left of the device.
-
Use the Phillips #00 screwdriver to remove the 5mm #00 screw located on the bottom center of the device.
-
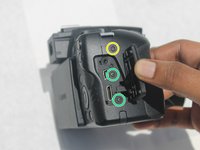
Use the Phillips #00 screwdriver to remove the 7mm #00 screw on the right top corner of the camera, just above the media ports.
-
Use the Phillips #00 screwdriver to remove the two 5mm #00 screws located on the right side, under the media port dust cover.
-
-
crwdns2935267:0crwdne2935267:0Tweezers$4.99
-
Use the iFixit opening tool to pry off the back panel.
-
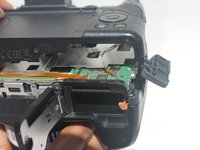
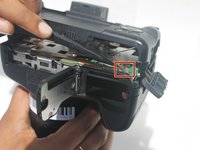
Use the black spudger to unclip the ribbon located behind the battery compartment. Then remove it using the nylon tipped tweezers.
-
Once the ribbon is unplugged, remove the back panel from the camera body.
-
-
-
-
-
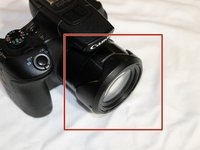
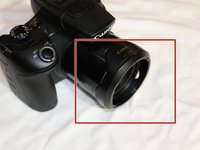
Remove the sunshade located on the front of the lens by twisting it 90 degrees in either direction, then pull straight off the lens.
-
-
-
-
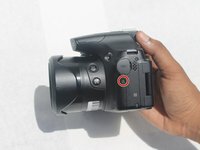
Remove the 5mm Phillips #00 screw located on the left side below the microphone connection.
-
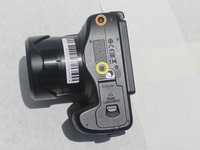
Remove the 4mm Phillips #00 screw located on the bottom left of the camera.
-
Remove the 5mm Phillips #00 screw located on the bottom center of the camera.
-
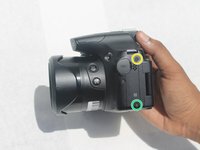
Pop open the flash and remove the 5mm Phillips #00 screw located under the flash.
-
-
-
Remove the front cover by pulling along the lens housing while holding the body of the camera.
-
-
-
-
-
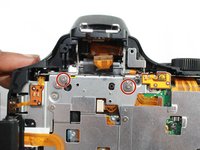
Use the Phillips #00 screwdriver to remove the two 2mm #00 silver screws located under the viewfinder.
-
Remove the plastic housing around the viewfinder by using a black spudger or opening tool to unclip the 3 plastic clips on the sides of the viewfinder.
-
-
-
Unclip the ribbon from the ZIF connector on the viewfinder.
-
Pull out the viewfinder.
-
-
-
-
crwdns2935267:0crwdne2935267:0Tweezers$4.99
-
Remove the 4mm #00 Philips screw located on the top left corner beneath the front panel.
-
Remove the 5mm #00 Philips screw located on the top left corner beneath the front panel.
-
Remove the 5mm #00 Philips screw located on the top of the left side panel near the microphone connection.
-
Remove the 4mm #00 Philips screw located on the bottom left corner beneath the front panel.
-
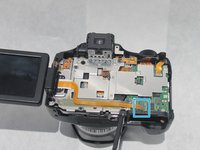
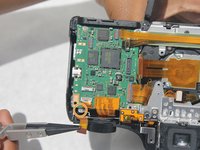
Using a black spudger, unclip the orange wire ribbon on the lower left corner of the motherboard and then remove it using the nylon tipped tweezers.
-
The side panel is now free and can be removed by pulling the panel to the left.
-
-
-
-
-
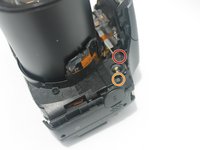
Remove one silver 2mm #00 Philips screw on the front side located next the flash assembly.
-
-
crwdns2935267:0crwdne2935267:0Tweezers$4.99
-
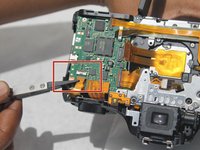
Use the black spudger to unclip the ribbon on the top right corner and then remove it using the nylon tipped tweezers.
-
Remove one silver 2mm #00 Philips screw found underneath the ribbon.
-
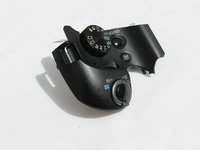
Once the screw is removed, the top panel is completely detached from the device. To remove it, grab it by hand and gently pull it off the device.
-
-
-
-
-
Remove the four 2mm #00 Phillips head screws from the metal back plate.
-
Remove the 4mm #00 Phillips head screw from the top corner of the metal back plate.
-
-
-
Remove two silver 2mm #00 Phillips head screws located near the top of the back panel.
-
Remove the two silver 2mm #00 Phillips head screws on the top side.
-
Use the black spudger to unclip the ribbon on the top right corner and remove it.
-
-
-
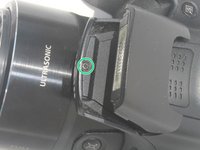
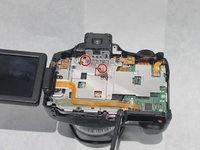
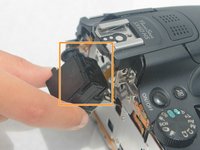
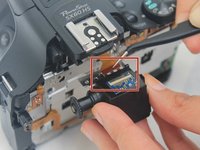
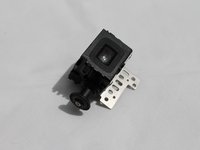
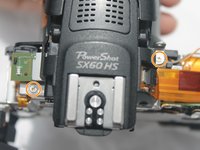
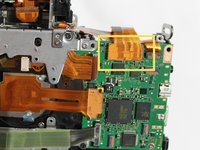
Once the above steps are completed, gently pull the flash assembly from the device and snap out the capacitor located on the front side of the camera
-
-



















To reassemble your device, follow these instructions in reverse order.

crwdns2935287:0crwdne2935287:0

Embry-Riddle Aeronautical University, Team S3-G7, Watkins Summer 2019 crwdns2935289:0Embry-Riddle Aeronautical University, Team S3-G7, Watkins Summer 2019crwdne2935289:0
ERAU-WATKINS-SU19S3G7
crwdns2931471:04crwdne2931471:0
crwdns2935297:08crwdne2935297:0
