crwdns2915892:0crwdne2915892:0
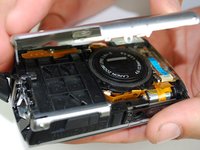
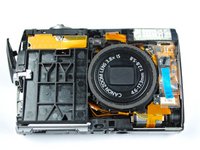
Use this repair guide to replace a broken LCD screen on your Canon PowerShot SD870 IS.
crwdns2942213:0crwdne2942213:0
-
-
Remove the wrist strap, if present.
-
Remove the lithium-ion battery.
-
-
-
Remove the two 4 mm Phillips #00 screws on the bottom of the camera.
-
Remove the screw next to the wrist strap attachment.
-
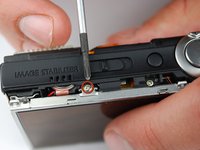
Pull up the “A/V OUT DIGITAL” cover and remove the screw above the USB port.
Note: The PH000 bit from my iFixit toolkit fits the screws better than the PH00 described above. The 00 bit is too pointed to bottom out in the screw and therefore does not engage as well.
-
-
-
Carefully unhook the “A/V OUT DIGITAL” cover from the hinge.
With the camera I was repairing, to remove the front cover as shown below, it was necessary to first remove the two smaller screws on the opposite end of the body from the “A/V OUT DIGITAL” cover. That is . . . the screws shown in step 5 which in my camera also hold the front cover in place (design change apparently).
RWM
-
-
-
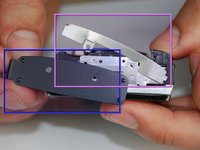
Pull the front cover from the camera by using gentle upward pressure.
-
-
-
-
Remove the two Phillips #00 screws from the flat end of the camera.
-
Remove the black L-shaped side cover plate.
-
Remove the silver u-shaped retainer plate.
-
-
-
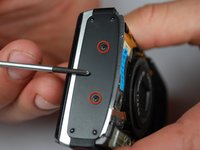
The first screw that needs to be removed is located on the bottom of the camera, on the left hand side.
-
Using a Phillips #00 screwdriver remove the 0.133in silver screw on the bottom left-hand side.
-
-
-
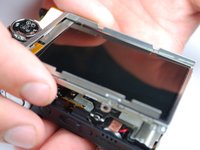
The second screw that needs to be removed is located on the top of the camera.
-
Using the same Phillips head screwdriver, remove the last 0.133in silver screw.
-
This will detach a silver U-shaped piece that was holding LCD screen on. Remove the piece and put it to the side.
-
-
-
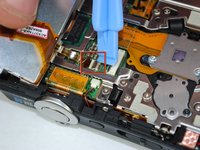
The LCD screen should now only be attached by the LCD data cable.
-
Lift the screen from the right side and use a small screwdriver or other small opening device to flip the black portion of the connector upward to unlock it.
-
Carefully slide the data cable out of the connector.
-
The LCD should still be connected by the backlight cable.
-
-
-
To remove the backlight cable, use another small opening device to unlock the backlight cable.
-
Carefully slide out the backlight cable.
-
The LCD screen should now be fully detached from the camera body.
-
-
-
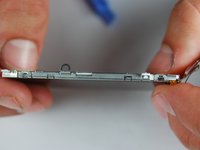
The LCD screen casing is connected by 4 claws located on the top and bottom on the left and right hand side.
-
Carefully disengage the claws by gently prying them off one by one.
-
Once the claws are disengaged, the back of the casing will still be connected to the front casing by the backlight cable.
-
Carefully peel the backlight cable off of the casing.
-
-
-
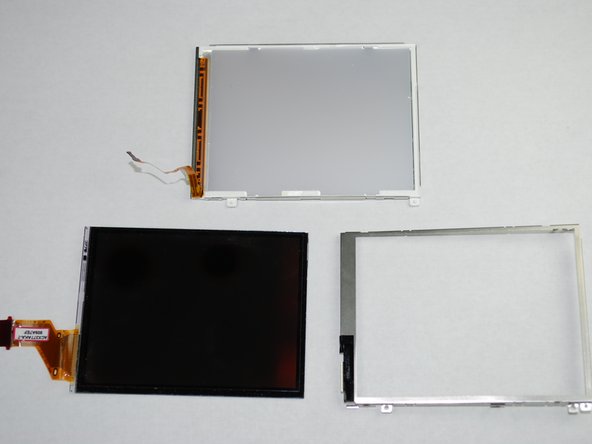
The LCD screen and housing should now be in three pieces:
-
LCD screen
-
LCD screen frame
-
LCD screen back housing
-
The LCD screen itself can now be removed and fixed/replaced.
-


To reassemble your device, follow these instructions in reverse order.
To reassemble your device, follow these instructions in reverse order.
crwdns2935221:0crwdne2935221:0
crwdns2935229:05crwdne2935229:0
crwdns2915084:0crwdne2915084:0

Cal Poly, Team 10-45, Garner Spring 2010 crwdns2935289:0Cal Poly, Team 10-45, Garner Spring 2010crwdne2935289:0
CPSU-GARNER-S10S10G45
crwdns2931471:04crwdne2931471:0
crwdns2935297:06crwdne2935297:0
crwdns2947412:02crwdne2947412:0
if not taking the battery out before beginning this repair damaged the camera... thanks for not making mention of that...
my 870sd has a grey dot on the screen. does the whole screen need to be replaced. also the lens comes out but does not focus at all. what could that be. thank you jim