crwdns2915892:0crwdne2915892:0
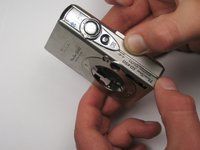
You need to remove the casing before you can start getting into any internal parts of the Camera. This can also be a good start to helping the camera dry out in case of a water accident.
crwdns2942213:0crwdne2942213:0
-
-
Unscrew the six screws on the casing. Two are on the bottom as pictured; two more are on each side of the camera.
-
-
-
Pull the lanyard mount off of the camera using a spudger or your fingers.
-
-
-
-
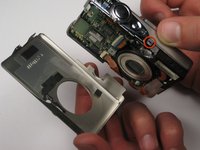
Find the line that separates the casing into its two halves. Hold each half separately, and gently pull apart.
-
Note that there is a small metal clip holding the two halves together. It might help to press down on the back half (indicated) while pulling upward slightly on the front half.
-
-
-
Take hold of the inside of the camera, and gently pull away from the back casing.
-
-
-
Remove the square, clear, rubber protector from the front of the logic board. This is not necessary to remove, but can easily fall off and get lost during later steps.
-
-
-
When you reassemble the camera, make sure the switch on the casing matches the position of the switch on the camera internals.
-
The black viewfinder padding can easily fall off the casing. Make sure you don't lose it when moving around parts.
-


To reassemble your device, follow these instructions in reverse order.
To reassemble your device, follow these instructions in reverse order.
crwdns2935221:0crwdne2935221:0
crwdns2935229:02crwdne2935229:0
crwdns2915084:0crwdne2915084:0

Cal Poly, Team 25-85, Amido Spring 2010 crwdns2935289:0Cal Poly, Team 25-85, Amido Spring 2010crwdne2935289:0
CPSU-AMIDO-S10S25G85
crwdns2931471:04crwdne2931471:0
crwdns2935297:05crwdne2935297:0