crwdns2915892:0crwdne2915892:0
The motherboard can be damaged because of overheat and a short circuit which can cause the camera to stop working. This guide will show how to replace the motherboard in the device.
crwdns2942213:0crwdne2942213:0
-
-
Remove two 2mm Phillips #00 screws on both sides of the camera.
-
-
-
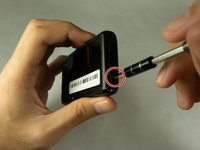
Remove the 4mm Phillips #000 screw from the bottom.
-
-
-
Remove the front face panel of the camera.
-
-
-
Remove the rear panel of the camera by using hand with firm pressure.
-
-
-
-
Remove the 3mm Phillips #000 screw from the top of the camera.
-
-
-
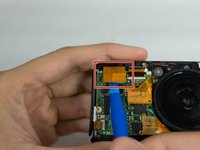
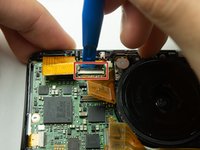
Pry the three golden ribbons off the motherboard using a plastic opening tool.
-
-
-
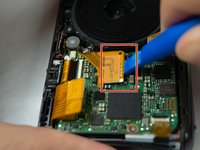
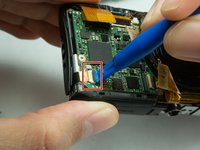
Use a plastic opening tool to flip up the retaining flap on the ribbon cable ZIF socket.
-
Once released, the small black tab will point straight away from the front face of the camera and the golden film will no longer be attached to the motherboard.
-
-
crwdns2935267:0crwdne2935267:0Tweezers$4.99
-
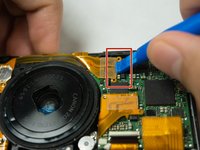
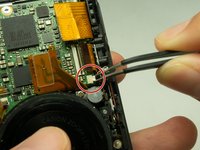
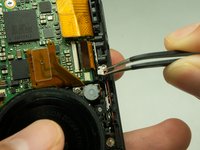
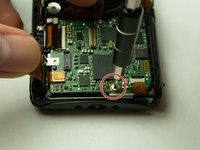
Unplug the small chip from the face of the camera using a pair of tweezers.
-
-
-
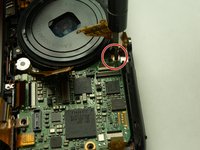
Remove the three 3mm Phillips #000 screws from the motherboard.
-
-
-
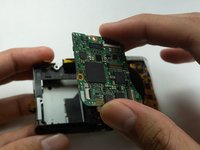
Remove the 3mm Phillips #000 screw from the rear face of the camera.
-
-
-
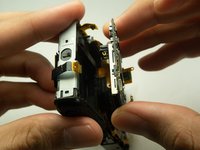
Remove the top panel from the camera.
-


To reassemble your device, follow these instructions in reverse order.
To reassemble your device, follow these instructions in reverse order.
crwdns2915084:0crwdne2915084:0

IUPUI, Team S1-G2, Harley Spring 2018 crwdns2935289:0IUPUI, Team S1-G2, Harley Spring 2018crwdne2935289:0
IUPUI-HARLEY-S18S1G2
crwdns2931471:07crwdne2931471:0
crwdns2935297:04crwdne2935297:0