crwdns2915892:0crwdne2915892:0
This guide shows you how to remove and replace the front cover of your Canon PowerShot S410 camera. You may need to replace the front cover if you've damaged it or if you need to access the internal components of the camera for additional repairs.
crwdns2942213:0crwdne2942213:0
-
-
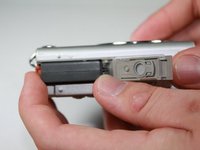
Locate the panel labeled "Batt. Open"
-
Place your finger on the panel and slide it in the direction of the arrow.
-
The slot will swing open revealing the battery pack.
-
-
-
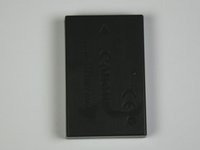
Pull the orange lever and the battery will spring out slightly.
-
-
-
Grasp the battery and fully pull it out of its slot.
-
-
-
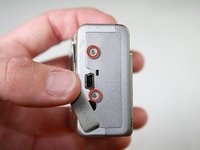
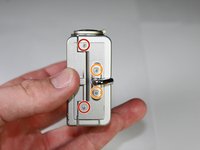
Using the Phillips #0 screwdriver, remove the 3.8mm screw in the upper right corner.
-
-
-
-
Twist the screwdriver counter-clockwise to remove the 4.8mm screw.
-
Repeat to remove the two 2.3mm screws.
-
-
-
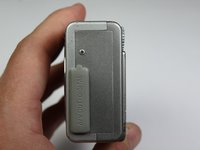
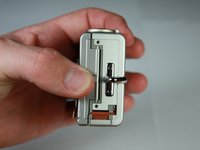
Slide the rubber tab to reveal the bottom screw.
-
Using the screwdriver, remove the two 3.7mm screws.
-
-
-
Grip the edges of the back plate, and carefully slide it off.
-
-
-
Remove the two 2.3mm outer screws using the Phillips #0 screwdriver.
-
Remove the two 3.8mm screws near the strap bracket.
-
Remove the small panel covering the mounting bracket.
-
Remove the door covering the memory card.
-
-
-
Remove the 3.8mm screw below the mounting bracket using the Phillips screwdriver.
-
-
-
Grasp the sides of the front cover and carefully pull the front panel off of the camera.
-


To reassemble your device, follow these instructions in reverse order.
To reassemble your device, follow these instructions in reverse order.
crwdns2915084:0crwdne2915084:0

Cal Poly, Team 11-27, Maness Winter 2011 crwdns2935289:0Cal Poly, Team 11-27, Maness Winter 2011crwdne2935289:0
CPSU-MANESS-W11S11G27
crwdns2931471:04crwdne2931471:0
crwdns2935297:07crwdne2935297:0