crwdns2915892:0crwdne2915892:0
This camera has a GPS that tracks where pictures have been taken. If the GPS board malfunctions, it can be removed and replaced.
crwdns2942213:0crwdne2942213:0
-
-
Remove the 2 screws (3.2mm, Phillips #00) found on the bottom side of the camera.
-
Remove the 2 screws (3.2mm, Phillips #00) found on the side of the camera.
-
Remove the 2 screws (3.2mm, Phillips #00) found on the side of the camera where the terminals are.
-
Open the flap revealing the cable inputs and remove the final screw (3.8mm, Phillips #00) found inside.
-
-
-
Turn the camera so that the LCD screen is facing you.
-
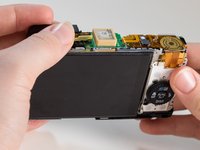
Remove the back panel by pulling it off of the camera.
-
-
crwdns2935267:0crwdne2935267:0Tweezers$4.99
-
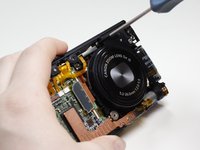
Turn the camera so that the lens is facing you.
-
Slowly lift the front panel from the camera.
-
The ribbon cable is connecting the front panel to the camera. Using the tweezers, gently pull the ribbon cable out of its socket.
-
Remove the rubber guard that rests on top of the lens.
-
-
-
-
Turn the camera over on its side so that the terminals are facing you.
-
Remove the screw (3.9mm, Phillips #00) that is connecting the top panel to the metal frame.
-
-
-
Turn the camera so that the lens is facing you.
-
Remove the screw (2.9mm, Phillips #00) that is directly above the camera lens.
-
-
crwdns2935267:0crwdne2935267:0Tweezers$4.99
-
Using the spudger, remove the center ribbon cable that is connecting the top panel to the motherboard.
-
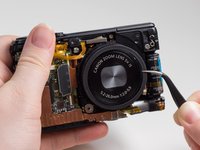
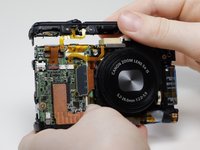
Gently lift the top panel off the camera.
-
-
crwdns2935267:0crwdne2935267:0Tweezers$4.99
-
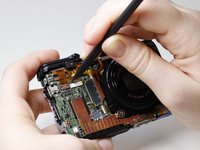
Turn the camera over so that the camera lens is facing you.
-
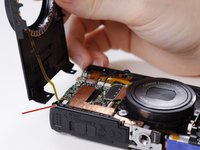
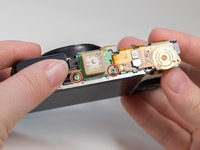
Using the spudger, detach the ribbon cable that is connecting the GPS tracker to the motherboard.
-
-
-
Turn the camera over so that the top edge is facing you, and the lens is away from you.
-
Gently lift the folded ribbon cable piece off of the camera body.
-
-
-
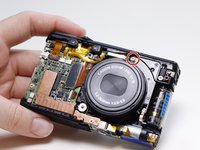
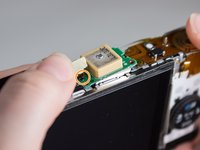
Lift to expose the Phillips #00 screw located beneath it.
-
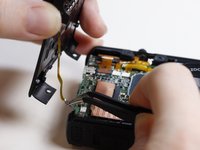
Unscrew the 2 screws (4.1mm, 1.8mm, both Phillips #00) connecting the GPS tracker to the camera.
-
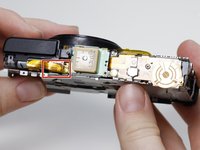
Remove the GPS tracker by gently lifting it off of the pin that holds it to the top of the camera.
-


To reassemble your device, follow these instructions in reverse order.
crwdns2935221:0crwdne2935221:0
crwdns2935229:02crwdne2935229:0
crwdns2935287:0crwdne2935287:0

USF Tampa, Team 1-4, Leahy Winter 2015 crwdns2935289:0USF Tampa, Team 1-4, Leahy Winter 2015crwdne2935289:0
USFT-LEAHY-W15S1G4
crwdns2931471:04crwdne2931471:0
crwdns2935297:05crwdne2935297:0