crwdns2933423:0crwdne2933423:0

Canon PowerShot G7X Flash Replacement

crwdns2942213:0crwdne2942213:0

  1. Canon PowerShot G7X Flash Replacement, Dial: crwdns2935265:01crwdnd2935265:01crwdnd2935265:01crwdne2935265:0
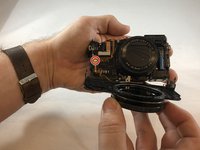
    • Remove the five 2mm Phillips #000 screws that are under the screen of the camera.

  2. Canon PowerShot G7X Flash Replacement: crwdns2935265:02crwdnd2935265:01crwdnd2935265:01crwdne2935265:0
    • Remove the two 3mm Phillips #000 screws under the AV-out digital flap.

    • Remove the two 3 mm Phillips #000 screws from the side of the camera.

  3. Canon PowerShot G7X Flash Replacement: crwdns2935265:03crwdnd2935265:01crwdnd2935265:01crwdne2935265:0
    • Remove the two 3 mm Phillips #000 screws on the side of camera with the flash toggle.

  4. Canon PowerShot G7X Flash Replacement: crwdns2935265:04crwdnd2935265:01crwdnd2935265:01crwdne2935265:0
    • Remove the four 4 mm Phillips #000 screws from the plate on the bottom of the camera.

  5. Canon PowerShot G7X Flash Replacement: crwdns2935265:05crwdnd2935265:01crwdnd2935265:01crwdne2935265:0
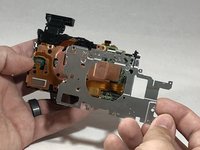
    • Remove the back plate.

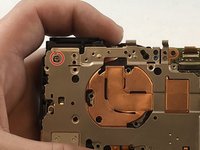
  6. Canon PowerShot G7X Flash Replacement: crwdns2935265:06crwdnd2935265:01crwdnd2935265:01crwdne2935265:0
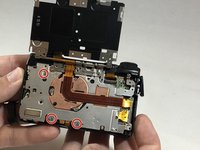
    • Remove the three 3 mm Phillips #000 screws around the dial.

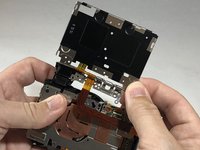
  7. Canon PowerShot G7X Flash Replacement: crwdns2935265:07crwdnd2935265:01crwdnd2935265:02crwdne2935265:0 Canon PowerShot G7X Flash Replacement: crwdns2935265:07crwdnd2935265:02crwdnd2935265:02crwdne2935265:0
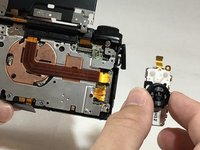
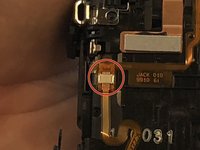
    • Using the nylon spudger, gently lift the ZIF tab.

    • Disconnect the ribbon cable that connects the dial to the motherboard.

    • Remove the dial from the device.

  8. Canon PowerShot G7X Flash Replacement, Flash: crwdns2935265:08crwdnd2935265:01crwdnd2935265:02crwdne2935265:0 Canon PowerShot G7X Flash Replacement, Flash: crwdns2935265:08crwdnd2935265:02crwdnd2935265:02crwdne2935265:0
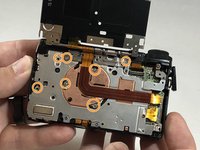
    • Remove the three, blue 5 mm Phillips screws from the back plate.

    • Remove seven 2 mm Phillips #000 screws.

  9. Canon PowerShot G7X Flash Replacement: crwdns2935265:09crwdnd2935265:01crwdnd2935265:02crwdne2935265:0 Canon PowerShot G7X Flash Replacement: crwdns2935265:09crwdnd2935265:02crwdnd2935265:02crwdne2935265:0
    • While using the plastic opening tool, gently pry the top plate off the camera.

  10. Canon PowerShot G7X Flash Replacement: crwdns2935265:010crwdnd2935265:01crwdnd2935265:02crwdne2935265:0 Canon PowerShot G7X Flash Replacement: crwdns2935265:010crwdnd2935265:02crwdnd2935265:02crwdne2935265:0
    • Using the black nylon spudger, gently lift the ribbon cable connected to the LCD screen housing until it comes out then remove the housing.

  11. Canon PowerShot G7X Flash Replacement: crwdns2935265:011crwdnd2935265:01crwdnd2935265:02crwdne2935265:0 Canon PowerShot G7X Flash Replacement: crwdns2935265:011crwdnd2935265:02crwdnd2935265:02crwdne2935265:0
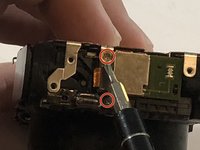
    • Remove the 2 mm Phillips #000 screw underneath the top plate.

    • Remove silver plate.

  12. Canon PowerShot G7X Flash Replacement: crwdns2935265:012crwdnd2935265:01crwdnd2935265:01crwdne2935265:0
    • Take the Phillips #000 and remove the three 5 mm screws from the front plate.

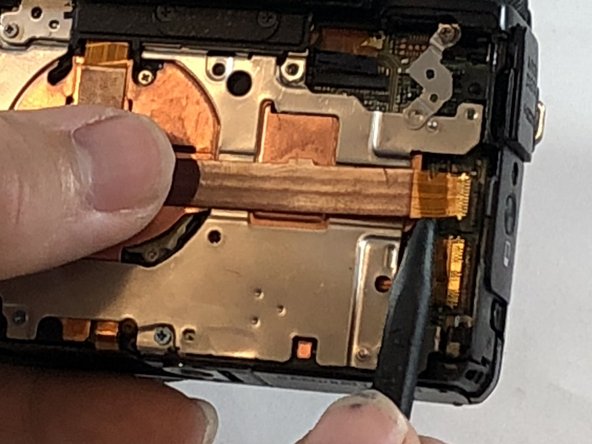
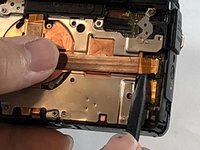
  13. Canon PowerShot G7X Flash Replacement: crwdns2935265:013crwdnd2935265:01crwdnd2935265:02crwdne2935265:0 Canon PowerShot G7X Flash Replacement: crwdns2935265:013crwdnd2935265:02crwdnd2935265:02crwdne2935265:0
    • Using the spudger, gently lift the ribbon cable from underneath the front plate.

    • Remove the front plate.

  14. Canon PowerShot G7X Flash Replacement: crwdns2935265:014crwdnd2935265:01crwdnd2935265:02crwdne2935265:0 Canon PowerShot G7X Flash Replacement: crwdns2935265:014crwdnd2935265:02crwdnd2935265:02crwdne2935265:0
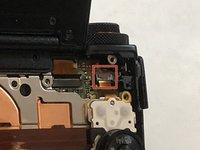
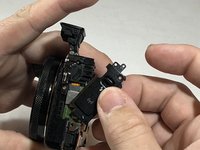
    • Remove flash toggle plate.

    • Remove the 2mm Phillips #000 screws under the flash toggle.

  15. Canon PowerShot G7X Flash Replacement: crwdns2935265:015crwdnd2935265:01crwdnd2935265:02crwdne2935265:0 Canon PowerShot G7X Flash Replacement: crwdns2935265:015crwdnd2935265:02crwdnd2935265:02crwdne2935265:0
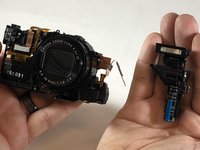
    • Flash contains charged capacitor. Shock hazard.

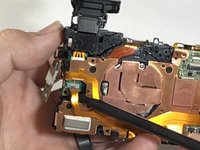
    • Using the black nylon spudger, gently lift the ribbon cable that connects the flash to motherboard and remove the flash from the device.

crwdns2915888:0crwdne2915888:0

To reassemble your device, follow these instructions in reverse order.

Kyle Pellham

crwdns2935283:004/09/18crwdne2935283:0

420 crwdns2915208:0crwdne2915208:0

crwdns2935297:02crwdne2935297:0

crwdns2915084:0crwdne2915084:0

Eastern Washington University, Team S1-G3, Carnegie Spring 2018 crwdns2935289:0Eastern Washington University, Team S1-G3, Carnegie Spring 2018crwdne2935289:0

EWU-CARNEGIE-S18S1G3

crwdns2931471:04crwdne2931471:0

crwdns2935297:06crwdne2935297:0

crwdns2917034:0crwdne2917034:0

Hi,

great guide, thanks!. Where can I buy the flash?

Best

david olivelli - crwdns2934203:0crwdne2934203:0

crwdns2917038:0crwdne2917038:0

crwdns2936625:0crwdne2936625:0:

crwdns2936751:024crwdne2936751:0 5

crwdns2936753:07crwdne2936753:0 17

crwdns2936753:030crwdne2936753:0 62

crwdns2942667:0crwdne2942667:0 1,889