crwdns2915892:0crwdne2915892:0
This guide will allow you to repair or replace the viewfinder of the Canon PowerShot A95.
crwdns2942213:0crwdne2942213:0
-
-
Locate the black “BATT OPEN” button on the underside of the camera.
-
Slide the black “BATT OPEN” button to the right.
-
Remove four AA batteries from the device.
-
-
-
Locate and remove three screws on the underside of the camera (3x small Phillips head).
-
Keep all screws separated by step and in a place where they will not be lost.
-
-
-
Locate and remove two screws on the same side of the camera as the marked A/V port (2x small Phillips head).
-
-
-
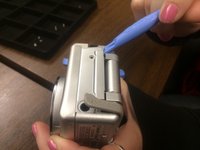
Using the blue plastic opening tool, remove the plastic covering you just removed screws from on the left side of camera.
-
Gently pull up around edges until the plastic flap inside is pulled out and the piece swings upward (piece should pull free).
-
-
-
-
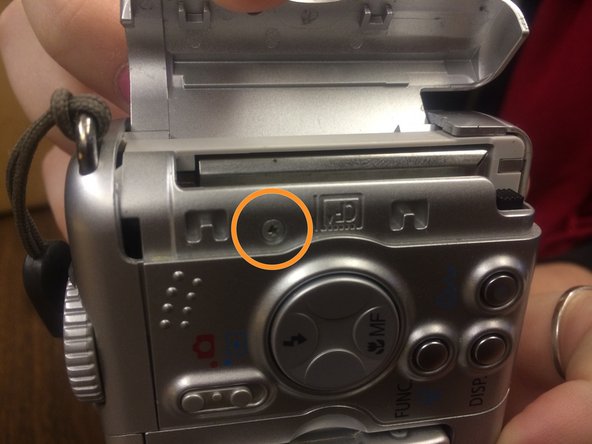
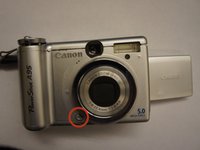
Remove indicated screw holding front of camera in place.
-
-
-
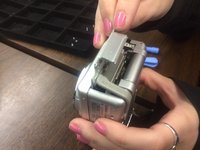
Push against the memory card cover in order to pull it outward toward you to reveal a screw underneath.
-
Remove this screw (Phillips head).
-
-
-
Re-open the battery cover. Locate and remove the three screws under the battery cover (3x small, long Phillips head).
-
Tip: using a magnetic screwdriver is very helpful, as the screws are difficult to reach.
-
-
-
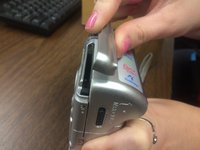
Locate and lift the shutter button, speaker, and option wheel from the top of the camera.
-
The memory card cover will pop off in this process.
-
-
-
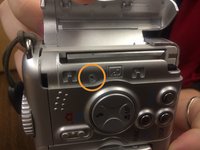
Locate and press the button on the lower left corner of the lens.
-
Separate the back casing from the front casing of the camera.
-
Removing the casing may require the use of a spudger.
-
-
-
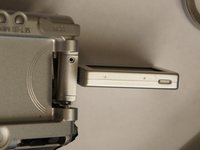
Twist the LCD screen so it is perpendicular to the camera and snap the back casing off.
-
-
-
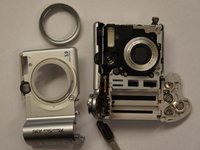
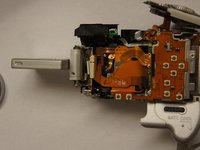
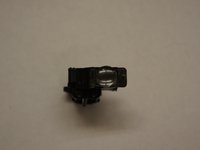
Carefully jiggle the viewfinder until it comes loose from the camera.
-


To reassemble your device, follow these instructions in reverse order.
To reassemble your device, follow these instructions in reverse order.