crwdns2933423:0crwdne2933423:0

Canon PowerShot A630 Back Panel Replacement

crwdns2942213:0crwdne2942213:0

  1. Canon PowerShot A630 Back Panel Replacement, Front Panel: crwdns2935265:01crwdnd2935265:01crwdnd2935265:02crwdne2935265:0 Canon PowerShot A630 Back Panel Replacement, Front Panel: crwdns2935265:01crwdnd2935265:02crwdnd2935265:02crwdne2935265:0
    • Open the battery door by sliding the tab on the battery door while pushing the battery door away from the camera.

    • Remove batteries.

  2. Canon PowerShot A630 Back Panel Replacement: crwdns2935265:02crwdnd2935265:01crwdnd2935265:02crwdne2935265:0 Canon PowerShot A630 Back Panel Replacement: crwdns2935265:02crwdnd2935265:02crwdnd2935265:02crwdne2935265:0
    • Remove the three indicated .2mm screws using a Phillips #00 screwdriver.

    • Gently pull off side-panel to remove it.

  3. Canon PowerShot A630 Back Panel Replacement: crwdns2935265:03crwdnd2935265:01crwdnd2935265:01crwdne2935265:0
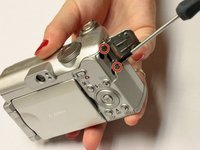
    • Remove the two indicated .2mm screws using a Phillips #00 screwdriver.

  4. Canon PowerShot A630 Back Panel Replacement: crwdns2935265:04crwdnd2935265:01crwdnd2935265:02crwdne2935265:0 Canon PowerShot A630 Back Panel Replacement: crwdns2935265:04crwdnd2935265:02crwdnd2935265:02crwdne2935265:0
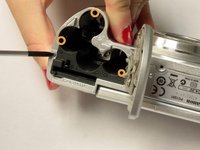
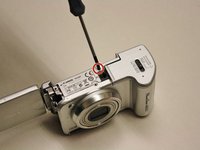
    • Remove the indicated .2mm screw using a Phillips #00 screwdriver.

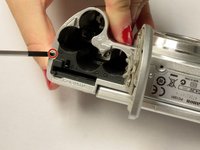
    • Remove the three .2mm screws located on the internal side of the top panel within the battery chamber using a Phillips #00 screwdriver.

  5. Canon PowerShot A630 Back Panel Replacement: crwdns2935265:05crwdnd2935265:01crwdnd2935265:02crwdne2935265:0 Canon PowerShot A630 Back Panel Replacement: crwdns2935265:05crwdnd2935265:02crwdnd2935265:02crwdne2935265:0
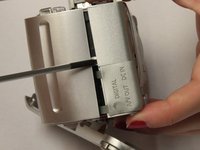
    • Open 'DIGITAL A/V OUT' door on camera.

    • Remove the two indicated .2mm screws using a Phillips #00 screwdriver.

  6. Canon PowerShot A630 Back Panel Replacement: crwdns2935265:06crwdnd2935265:01crwdnd2935265:01crwdne2935265:0
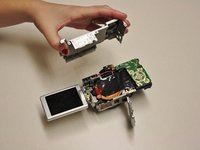
    • Grip the sides of the top panel and gently pull to separate the top panel from the camera body.

    • The top panel will not completely detach.

  7. Canon PowerShot A630 Back Panel Replacement: crwdns2935265:07crwdnd2935265:01crwdnd2935265:02crwdne2935265:0 Canon PowerShot A630 Back Panel Replacement: crwdns2935265:07crwdnd2935265:02crwdnd2935265:02crwdne2935265:0
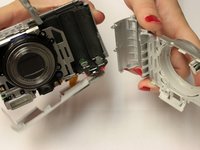
    • Gently pull the front and back panels apart, and use a Phillips #00 screwdriver to remove the screw connecting the panels.

    • Gripping the top and bottom, gently pull the front panel away from the camera body to remove it.

  8. Canon PowerShot A630 Back Panel Replacement, Back Panel: crwdns2935265:08crwdnd2935265:01crwdnd2935265:02crwdne2935265:0 Canon PowerShot A630 Back Panel Replacement, Back Panel: crwdns2935265:08crwdnd2935265:02crwdnd2935265:02crwdne2935265:0
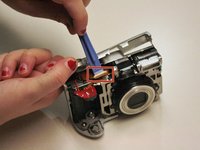
    • Use the spudger to gently pull back the retaining clip and pull the ribbon out.

    • The top panel should now be completely detached from the camera.

    • Applying too much force to the spudger may damage the retaining clip.

  9. Canon PowerShot A630 Back Panel Replacement: crwdns2935265:09crwdnd2935265:01crwdnd2935265:02crwdne2935265:0 Canon PowerShot A630 Back Panel Replacement: crwdns2935265:09crwdnd2935265:02crwdnd2935265:02crwdne2935265:0
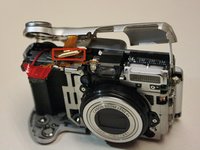
    • Remove .2 mm screw using a #00 Philips screwdriver.

    • Gently pry off back panel to remove it.

crwdns2915888:0crwdne2915888:0

To reassemble your device, follow these instructions in reverse order.

crwdns2935227:0crwdne2935227:0

Alicia Burns

crwdns2935283:010/13/14crwdne2935283:0

574 crwdns2915208:0crwdne2915208:0

crwdns2935297:05crwdne2935297:0

crwdns2915084:0crwdne2915084:0

Clemson, Team 2-5, Benson Fall 2014 crwdns2935289:0Clemson, Team 2-5, Benson Fall 2014crwdne2935289:0

CLEM-BENSON-F14S2G5

crwdns2931471:04crwdne2931471:0

crwdns2935297:018crwdne2935297:0

crwdns2944067:00crwdne2944067:0

crwdns2917038:0crwdne2917038:0

crwdns2936625:0crwdne2936625:0:

crwdns2936751:024crwdne2936751:0 0

crwdns2936753:07crwdne2936753:0 1

crwdns2936753:030crwdne2936753:0 14

crwdns2942667:0crwdne2942667:0 1,176