crwdns2915892:0crwdne2915892:0
The Canon Powershot is made of a plastic casing that holds all of the internal parts inside. This is the prerequisite for any other repairs or replacements. Ensure to be careful when disassembling the camera.
crwdns2942213:0crwdne2942213:0
-
-
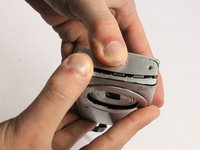
Remove the knot holding the wrist lanyard onto the camera
-
-
-
Open the latch at the bottom corner of the device to reveal the battery and SD card housing.
-
There is an orange latch holding the battery in place which must be pushed back in order to free the battery.
-
Once the battery is removed push the SD card and this will activate a spring ejecting the card from the camera.
-
-
-
-
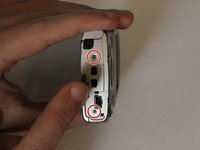
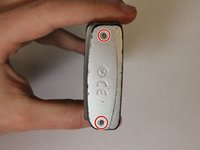
Remove the 6 Phillips #00 exterior screws from the camera. Two are located on the bottom and two are located on either side as shown. Notice that one of the screws is under the AV Out Digital flap on the side. All exterior screws should be 2.4mm in length
-
-
-
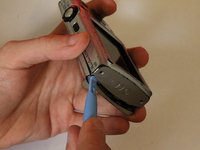
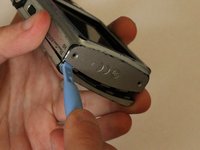
Pry apart the camera casing using the plastic opening tool tool provided. Once the casing has begun to separate pull the two sides apart with your hands.
-


To reassemble your device, follow these instructions in reverse order.
To reassemble your device, follow these instructions in reverse order.
crwdns2935221:0crwdne2935221:0
crwdns2935227:0crwdne2935227:0
crwdns2915084:0crwdne2915084:0

UMass Dartmouth, Team 3-4, Duarte Spring 2015 crwdns2935289:0UMass Dartmouth, Team 3-4, Duarte Spring 2015crwdne2935289:0
UMASSD-DUARTE-S15S3G4
crwdns2931471:04crwdne2931471:0
crwdns2935297:012crwdne2935297:0