crwdns2915892:0crwdne2915892:0
This replacement guide requires you to use a Phillips head screwdriver to remove the front cover of the device.
crwdns2942213:0crwdne2942213:0
-
-
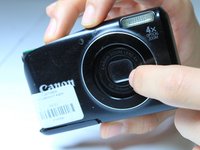
First, remove the batteries and memory card.
-
Remove the 5.0 mm black screw with a Phillips #00 screwdriver.
-
Remove the 5.0 mm silver screw with a Phillips #00 screwdriver.
-
-
-
Remove the 5.0 mm black screw on the right with a Phillips #00 screwdriver.
-
-
-
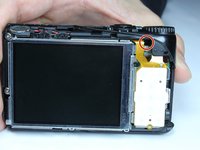
Remove the 5.0 mm screw on the left with a Phillips #00 screwdriver.
-
-
-
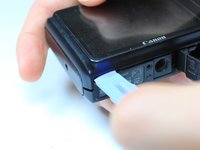
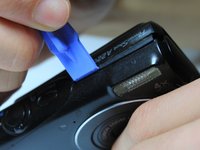
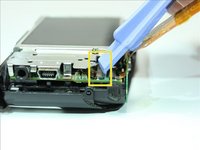
Begin taking off the back cover with a plastic opening tool.
-
Begin by wedging the plastic opening tool behind the bottom left corner of the LCD screen as shown.
-
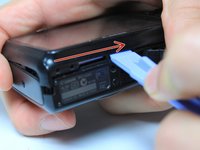
Slide the plastic opening tool to the right, along the mating edge, to pry off the back cover.
-
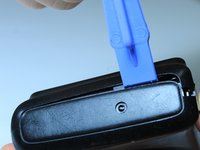
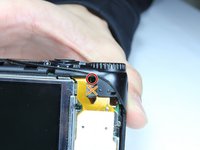
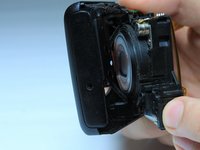
Continue taking off the back cover along the left side of the camera as seen in the third picture.
-
-
-
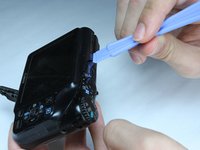
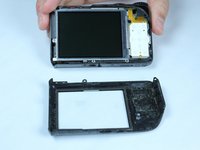
Use the plastic opening tool to separate the top section of the back cover from the frame.
-
Once there is enough separation between the back cover and the frame, remove the back cover for replacement.
-
-
-
Remove the internal 4.4mm screw with a Phillips 00 screwdriver.
-
-
-
Gently lift of the buttons for replacement. They should come off without excessive force.
-
If the buttons do not lift off easily, you may have unscrewed the wrong screw. Revert to previous step.
-
-
-
-
Lift up the electrical ribbon shown to access the next screw.
-
Remove the 3.9 mm screw with a Phillips #00 screwdriver.
-
-
-
Remove the 3.9 mm screw with a Phillips #00 screwdriver.
-
-
-
Remove the two 3.9 mm screws shown with a Phillips #00 screwdriver.
-
-
-
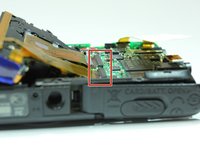
There is an electrical flap that holds the LCD ribbon down. Note the flap in is closed position.
-
Lift up the flap with a plastic opening tool.
-
-
-
Holding the outer frame of the LCD screen, gently lift the LCD screen for replacement.
-
-
-
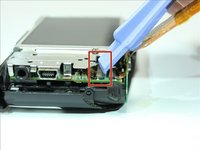
Locate ribbon flap, enclosed in red. (picture 1)
-
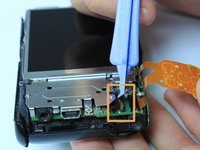
Using a plastic opening tool, lift up the ribbon flap to allow insertion of the LCD ribbon. (picture 2)
-
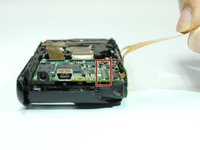
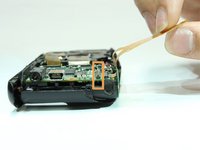
Place the LCD screen on the camera and align the ribbon underneath the open ribbon flap. Close the ribbon flap onto the ribbon. (picture 3)
-
-
-
Remove the two 5.3 mm screws circled in red with a Phillips #00 screwdriver.
-
Remove the 4.4 mm screw circled in orange with a Phillips #00 screwdriver.
-
-
-
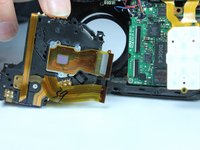
Gently press the front of the lens to begin to remove it from the frame.
-
Gently angle out the lens from the frame as seen in picture 2.
-
-
-
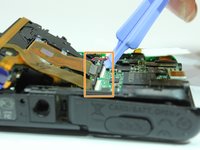
Locate the two electrical ribbons that are attached to the main motherboard.
-
Lift up the two black flaps on the motherboard that hold the electrical ribbons in place.
-
Gently remove the lens for replacement.
-
-
-
Remove the two 4.4 mm screws shown with a Phillips #00 screwdriver.
-
-
-
Remove the 4.4 mm screw shown with a Phillips #00 screwdriver.
-
-
-
Gently remove the front cover for replacement.
-
To reassemble your device, follow these instructions in reverse order.
To reassemble your device, follow these instructions in reverse order.
crwdns2935221:0crwdne2935221:0
crwdns2935229:02crwdne2935229:0


