crwdns2933423:0crwdne2933423:0

Canon EOS Rebel G Lens Connector Replacement

crwdns2942213:0crwdne2942213:0

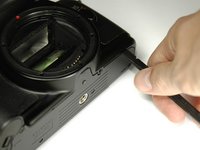
  1. Canon EOS Rebel G Lens Connector Replacement, Front Panel: crwdns2935265:01crwdnd2935265:01crwdnd2935265:01crwdne2935265:0
    • Using a #00 Phillips screw driver, remove three 4.4 mm Phillips screws as indicated by the red circles.

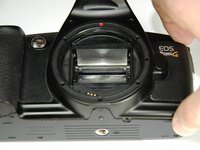
  2. Canon EOS Rebel G Lens Connector Replacement: crwdns2935265:02crwdnd2935265:01crwdnd2935265:02crwdne2935265:0 Canon EOS Rebel G Lens Connector Replacement: crwdns2935265:02crwdnd2935265:02crwdnd2935265:02crwdne2935265:0
    • Using your finger, peel back the textured grip so the components are separated.

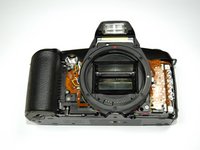
  3. Canon EOS Rebel G Lens Connector Replacement: crwdns2935265:03crwdnd2935265:01crwdnd2935265:03crwdne2935265:0 Canon EOS Rebel G Lens Connector Replacement: crwdns2935265:03crwdnd2935265:02crwdnd2935265:03crwdne2935265:0 Canon EOS Rebel G Lens Connector Replacement: crwdns2935265:03crwdnd2935265:03crwdnd2935265:03crwdne2935265:0
    • Using the flat end of a spudger, loosen the connection between the front panel and the device.

    • Remove the front panel using your hands.

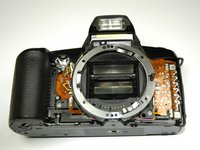
  4. Canon EOS Rebel G Lens Connector Replacement, Lens Connector: crwdns2935265:04crwdnd2935265:01crwdnd2935265:01crwdne2935265:0
    • Using a Phillips #00 screwdriver, remove the 5 indicated screws

    • Five 6.2 mm Phillips screws

  5. Canon EOS Rebel G Lens Connector Replacement: crwdns2935265:05crwdnd2935265:01crwdnd2935265:01crwdne2935265:0
    • Using your hands, remove the top black ring.

    • WARNING! The indicated piece is spring loaded. Prepare for it to eject when taking off top ring.

    • Spring located here.

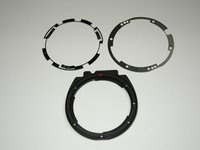
  6. Canon EOS Rebel G Lens Connector Replacement: crwdns2935265:06crwdnd2935265:01crwdnd2935265:02crwdne2935265:0 Canon EOS Rebel G Lens Connector Replacement: crwdns2935265:06crwdnd2935265:02crwdnd2935265:02crwdne2935265:0
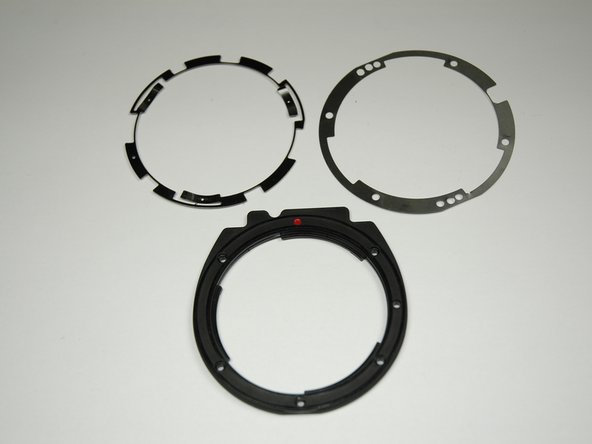
    • There are two silver metal rings.

    • Remove the top silver metal ring.

  7. Canon EOS Rebel G Lens Connector Replacement: crwdns2935265:07crwdnd2935265:01crwdnd2935265:01crwdne2935265:0
    • Remove the bottom silver ring.

crwdns2915888:0crwdne2915888:0

To reassemble your device, follow these instructions in reverse order.

crwdns2935229:02crwdne2935229:0

Zach

crwdns2935283:004/04/12crwdne2935283:0

43 crwdns2915208:0crwdne2915208:0

crwdns2935297:08crwdne2935297:0

crwdns2915084:0crwdne2915084:0

Cal Poly, Team 14-9, Forte Spring 2012 crwdns2935289:0Cal Poly, Team 14-9, Forte Spring 2012crwdne2935289:0

CPSU-FORTE-S12S14G9

crwdns2931471:05crwdne2931471:0

crwdns2935297:036crwdne2935297:0

crwdns2944067:00crwdne2944067:0

crwdns2917038:0crwdne2917038:0

crwdns2936625:0crwdne2936625:0:

crwdns2936751:024crwdne2936751:0 0

crwdns2936753:07crwdne2936753:0 1

crwdns2936753:030crwdne2936753:0 13

crwdns2942667:0crwdne2942667:0 1,776