crwdns2915892:0crwdne2915892:0
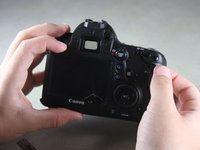
Use this guide to replace the front or top body panels of your EOS 6D or to access damaged internal components.
crwdns2942213:0crwdne2942213:0
-
-
Remove the viewfinder cover by pinching the sides and sliding it upward.
-
-
-
Open the battery door on the bottom of the camera.
-
Use your thumb to slide the small black tab on the inside of the battery door up and pull the door off the camera.
-
-
-
Slide your fingernail or the flat end of the spudger underneath the rubber covering and gently peel it off all sides of the camera.
-
-
-
Open the covers to the HDMI/AV/MIC ports on the side of the camera by gently pulling outward on the bottom of the covers.
-
Rotate the covers to the side so that you can see the connection ports inside.
-
Remove the following screws:
-
Two silver 5mm Phillips #00
-
One black 6mm Phillips #00
-
-
-
Remove the cover to the HDMI/AV/MIC ports by gently lifting the tab on the bottom edge of the camera.
-
-
-
Rotate your camera so the bottom side is facing you.
-
Remove the following screws:
-
One 6mm Phillips #00
-
Two 3mm Phillips #00
-
-
-
Rotate your camera so the back is facing you.
-
Remove the following screws:
-
Three silver 5mm Phillips #00
-
Two black 6mm Phillips #00
-
One black 4mm Phillips #00
-
-
-
Carefully use your fingers to tilt the back panel downward to about a 90 degree angle.
-
Use the flat end of the spudger to gently pry off the ribbon wire from the inside of the camera.
-
-
-
-
Remove the 8mm Phillips #00 screw from the bottom of the front of the camera.
-
-
-
Rotate the camera so the side with the SD card slot is facing you.
-
Remove the 4mm Phillips #00 screw from the bottom edge of this side.
-
-
-
Rotate the camera so the bottom is facing you.
-
Remove the following screws:
-
Two 8mm Phillips #00
-
One 4mm Phillips #00
-
-
-
Remove the bottom panel from the camera by using your fingers to pull outward on the tab inside the battery compartment.
-
-
-
Rotate the camera so the front is facing you.
-
Remove the following screws:
-
Three 5mm Phillips #00
-
Two 6mm Phillips #00
-
One 4mm Phillips #00
-
-
-
Rotate the camera so the side with the SD card slot is facing you.
-
Remove the following screws:
-
One 4mm fine-thread Phillips #00
-
Two 4mm coarse-thread Phillips #00
-
-
-
Slowly fold the front panel to the right without pulling it away from the right edge of the camera.
-
-
-
Remove the 4mm Phillips #00 screw on the inside of the front panel to separate the panel from the speaker wire.
-
-
-
Remove the 4mm Phillips #00 screw from the inside of the top panel, below the strap hook.
-
-
-
Remove the 4mm Phillips #00 screw from the inside of the top panel, below the shutter button.
-
-
-
Rotate the camera so the top is facing you.
-
Remove the 6mm Phillips #00 screw from next to the analog screen.
-
-
-
Rotate the camera so the back is facing you.
-
Remove the Phillips #00 screw from the viewfinder focus.
-
-
crwdns2935267:0crwdne2935267:0Tweezers$4.99
-
Carefully detach the two light brown ribbon wires on the top panel:
-
The right ribbon by prying it out with the flat end of the spudger.
-
The left ribbon by using tweezers to gently wiggle it out toward the top.
-
-
-
Slowly lift the top panel to about an inch above the body of the camera.
-
Carefully use the flat end of the spudger to detach the ribbon wire from the top of the camera.
-
-
-
Grip the remaining side panel with your fingers and gently pop it off the camera.
-


To reassemble your device, follow these instructions in reverse order.
To reassemble your device, follow these instructions in reverse order.
crwdns2935221:0crwdne2935221:0
crwdns2935229:013crwdne2935229:0
crwdns2915084:0crwdne2915084:0

Cal Poly, Team 11-48, Amido Spring 2014 crwdns2935289:0Cal Poly, Team 11-48, Amido Spring 2014crwdne2935289:0
CPSU-AMIDO-S14S11G48
crwdns2931471:04crwdne2931471:0
crwdns2935297:018crwdne2935297:0
crwdns2947412:07crwdne2947412:0
Actually, it would be perfect to note the color of the screws throughout the manual. This would help to get it right!
But thanks anyway, you saved me!!
In step 11 one of the red circles marks incorrect screw - should point the one near plate not the one in battery compartment (compare to step 6)
Agreed.
But thanks, apart from this minor error it was a great help and really clear. Cleaned the gunge out of the menu button and it now releases perfectly.
I found getting the ribbon cable back in (step 21) a bit difficult, combo wiggled and pushed it back in. Might recommend doing that one before the right one, and maybe before finally mounting the top cover.
Blakey -
My DSLR don't want to start after remount :(
Thanks. You folks did a great job. It help me replacing the main dial in 3 hours in just the first attempt.