crwdns2933423:0crwdne2933423:0

Canon EOS 300 Front Panel Replacement

crwdns2942213:0crwdne2942213:0

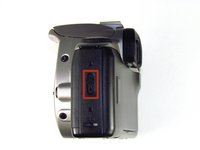
  1. Canon EOS 300 Front Panel Replacement, Batteries: crwdns2935265:01crwdnd2935265:01crwdnd2935265:03crwdne2935265:0 Canon EOS 300 Front Panel Replacement, Batteries: crwdns2935265:01crwdnd2935265:02crwdnd2935265:03crwdne2935265:0 Canon EOS 300 Front Panel Replacement, Batteries: crwdns2935265:01crwdnd2935265:03crwdnd2935265:03crwdne2935265:0
    • Open up the battery door.

  2. Canon EOS 300 Front Panel Replacement: crwdns2935265:02crwdnd2935265:01crwdnd2935265:02crwdne2935265:0 Canon EOS 300 Front Panel Replacement: crwdns2935265:02crwdnd2935265:02crwdnd2935265:02crwdne2935265:0
    • Remove the batteries from the camera by sliding them out into your palm.

  3. Canon EOS 300 Front Panel Replacement, Side Panel with Lever: crwdns2935265:03crwdnd2935265:01crwdnd2935265:02crwdne2935265:0 Canon EOS 300 Front Panel Replacement, Side Panel with Lever: crwdns2935265:03crwdnd2935265:02crwdnd2935265:02crwdne2935265:0
    • Release the side latch to open the back panel.

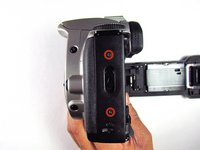
  4. Canon EOS 300 Front Panel Replacement: crwdns2935265:04crwdnd2935265:01crwdnd2935265:02crwdne2935265:0 Canon EOS 300 Front Panel Replacement: crwdns2935265:04crwdnd2935265:02crwdnd2935265:02crwdne2935265:0
    • Remove the two black 4.5mm screws above and below the latch.

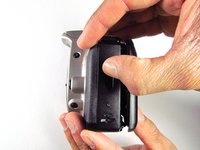
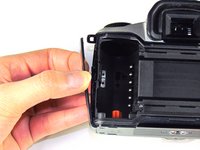
  5. Canon EOS 300 Front Panel Replacement: crwdns2935265:05crwdnd2935265:01crwdnd2935265:02crwdne2935265:0 Canon EOS 300 Front Panel Replacement: crwdns2935265:05crwdnd2935265:02crwdnd2935265:02crwdne2935265:0
    • Using your finger, carefully pry open the side panel from the top of camera.

    • Pull panel downwards to remove.

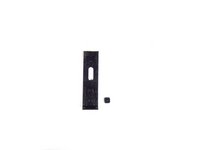
    • Make sure to keep track of the small black piece of rubber under the latch.

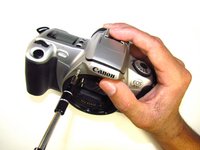
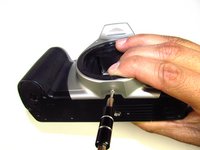
  6. Canon EOS 300 Front Panel Replacement, Front Panel: crwdns2935265:06crwdnd2935265:01crwdnd2935265:02crwdne2935265:0 Canon EOS 300 Front Panel Replacement, Front Panel: crwdns2935265:06crwdnd2935265:02crwdnd2935265:02crwdne2935265:0
    • Remove the two silver 6mm Phillips #1 screws.

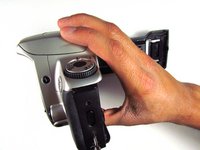
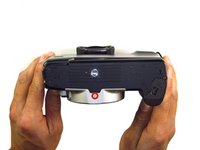
  7. Canon EOS 300 Front Panel Replacement: crwdns2935265:07crwdnd2935265:01crwdnd2935265:02crwdne2935265:0 Canon EOS 300 Front Panel Replacement: crwdns2935265:07crwdnd2935265:02crwdnd2935265:02crwdne2935265:0
    • Flip camera over to the bottom.

    • Remove the one 5mm Phillips #1 silver screw.

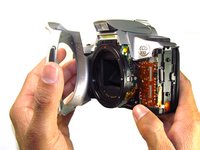
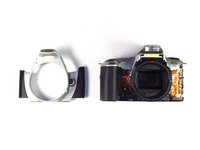
  8. Canon EOS 300 Front Panel Replacement: crwdns2935265:08crwdnd2935265:01crwdnd2935265:02crwdne2935265:0 Canon EOS 300 Front Panel Replacement: crwdns2935265:08crwdnd2935265:02crwdnd2935265:02crwdne2935265:0
    • Remove the front panel by pulling away from the side with the lever.

crwdns2915888:0crwdne2915888:0

To reassemble your device, follow these instructions in reverse order.

crwdns2935227:0crwdne2935227:0

Jordan Tang

crwdns2935283:001/24/14crwdne2935283:0

590 crwdns2915208:0crwdne2915208:0

crwdns2935297:05crwdne2935297:0

crwdns2915084:0crwdne2915084:0

Cal Poly, Team 6-20, Maness Winter 2014 crwdns2935289:0Cal Poly, Team 6-20, Maness Winter 2014crwdne2935289:0

CPSU-MANESS-W14S6G20

crwdns2931471:04crwdne2931471:0

crwdns2935297:032crwdne2935297:0

crwdns2944067:00crwdne2944067:0

crwdns2917038:0crwdne2917038:0

crwdns2936625:0crwdne2936625:0:

crwdns2936751:024crwdne2936751:0 1

crwdns2936753:07crwdne2936753:0 5

crwdns2936753:030crwdne2936753:0 13

crwdns2942667:0crwdne2942667:0 868