crwdns2915892:0crwdne2915892:0
The battery cover for the Canon 10x30 IS binocular frequently breaks and pieces are lost. A replacement cover is available but instructions for installing the cover are not available. I found several articles with partial instructions, and I was able to repair my binoculars. This guide documents the procedures I used.
crwdns2942213:0crwdne2942213:0
-
-
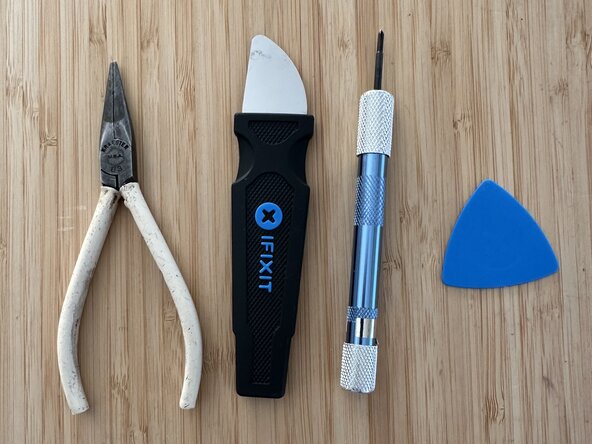
The first step is to remove the bottom cover which contains the battery compartment. I used the tools shown in the first photo.
-
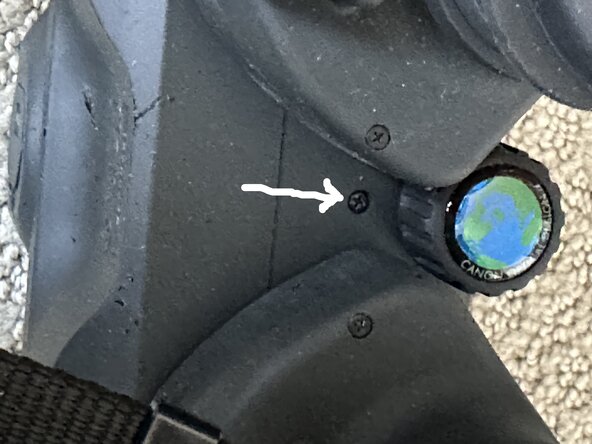
Loosen the two very small philips screws located deep in the holes on each side as indicated in the photo.
-
Remove the single philips screw between the adjustable oculars as show in the photo. This is a very short screw, don't lose it!
-
Carefully pry up and remove the plastic name plate. It is held on with double-sided adhesive tape. Remove the adhesive residue.
-
-
-
-
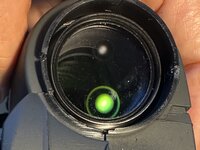
Remove the rubber guards around the objective lens.
-
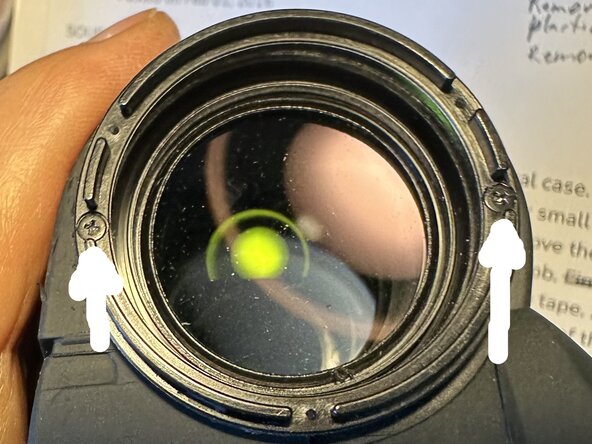
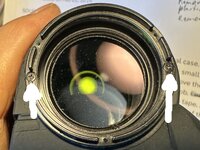
For each objective lens, remove the two screws holding the plastic ring around the lens. as indicated in the photo.
-
For each objective lens, remove the plastic ring around the lens. The second photo shows the ring removed.
-
Now carefully pry all around the bottom half cover using a plastic tool. If you need to pry with a metal tool, do so where the plastic cover was removed so any marring of the plastic will be hidden by the cover.
-
Remove the bottom cover and set aside the binocular lens/electronics assembly.
-
-
-
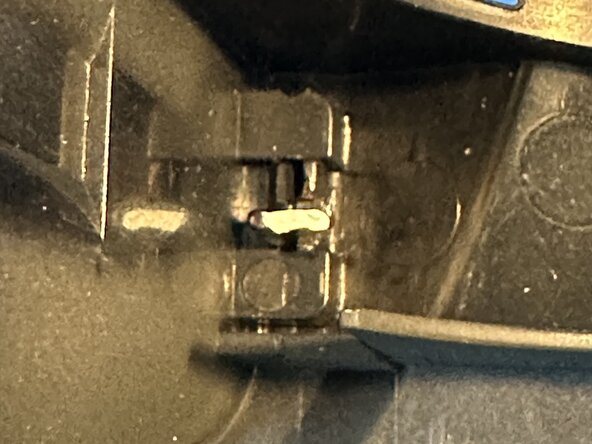
Look inside the cover behind the battery cover hinge. There is a small metal part keeping the hinged door in place. The tab keeping the part in place must be bent so the keeper will slide through the slot. (this is not easy, take your time!) The tab is marked in white in the photo. A strong small-nosed pliers will be needed.
-
After bending the tab, turn over the cover. From the outside, the keeper can be pried up so that the old battery cover can be removed and the new battery cover can be inserted. Make sure the new battery cover opens and closes correctly.
-
Inside the cover, bend the keeper tab so the keeper can't fall out. You don't have to bend it back fully to the original position. If you break the tab, I think you could glue the keeper on the outside so it won't fall out.
-
To reassemble the binoculars, follow these instructions in reverse order.
-


To reassemble your device, follow these instructions in reverse order.
To reassemble your device, follow these instructions in reverse order.