crwdns2933423:0crwdne2933423:0

Bush Pump Riser Main Slider Replacement

crwdns2942213:0crwdne2942213:0

  1. Bush Pump Riser Main Slider Replacement, Head and Handle: crwdns2935265:01crwdnd2935265:01crwdnd2935265:02crwdne2935265:0 Bush Pump Riser Main Slider Replacement, Head and Handle: crwdns2935265:01crwdnd2935265:02crwdnd2935265:02crwdne2935265:0
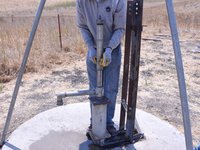
    • Test pump performance by pumping 40 strokes.

    • An effective pump should return at least 10 liters.

  2. Bush Pump Riser Main Slider Replacement: crwdns2935265:02crwdnd2935265:01crwdnd2935265:02crwdne2935265:0 Bush Pump Riser Main Slider Replacement: crwdns2935265:02crwdnd2935265:02crwdnd2935265:02crwdne2935265:0
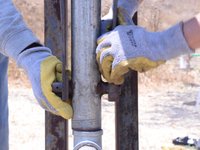
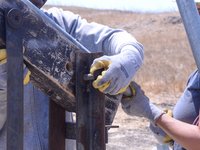
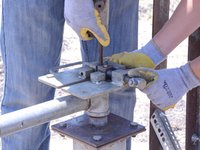
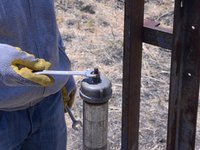
    • Remove the two pins connecting the handle to the slider.

  3. Bush Pump Riser Main Slider Replacement: crwdns2935265:03crwdnd2935265:01crwdnd2935265:02crwdne2935265:0 Bush Pump Riser Main Slider Replacement: crwdns2935265:03crwdnd2935265:02crwdnd2935265:02crwdne2935265:0
    • Pull the two lever arms away from the slider.

  4. Bush Pump Riser Main Slider Replacement: crwdns2935265:04crwdnd2935265:01crwdnd2935265:02crwdne2935265:0 Bush Pump Riser Main Slider Replacement: crwdns2935265:04crwdnd2935265:02crwdnd2935265:02crwdne2935265:0
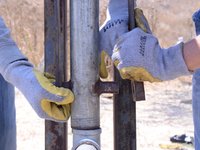
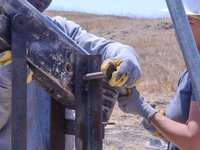
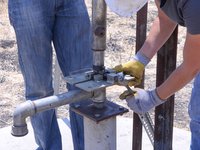
    • Lift the two pins attaching the pump frame to the head and handle up, off of the pump frame.

  5. Bush Pump Riser Main Slider Replacement: crwdns2935265:05crwdnd2935265:01crwdnd2935265:03crwdne2935265:0 Bush Pump Riser Main Slider Replacement: crwdns2935265:05crwdnd2935265:02crwdnd2935265:03crwdne2935265:0 Bush Pump Riser Main Slider Replacement: crwdns2935265:05crwdnd2935265:03crwdnd2935265:03crwdne2935265:0
    • Throughout this step, make sure you support the handle and head with at least three hands.

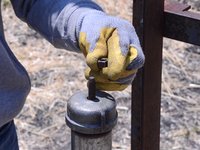
    • Slide the bearing rod out of the head.

    • Inspect the bearing rod and head for any wear or tear.

  6. Bush Pump Riser Main Slider Replacement: crwdns2935265:06crwdnd2935265:01crwdnd2935265:01crwdne2935265:0
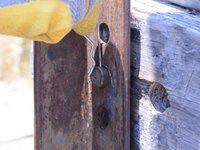
    • Remove the head and handle, and place them on a clean surface to prevent contamination.

  7. Bush Pump Riser Main Slider Replacement, Riser Main Slider: crwdns2935265:07crwdnd2935265:01crwdnd2935265:02crwdne2935265:0 Bush Pump Riser Main Slider Replacement, Riser Main Slider: crwdns2935265:07crwdnd2935265:02crwdnd2935265:02crwdne2935265:0
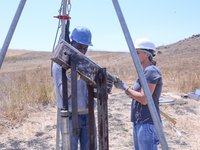
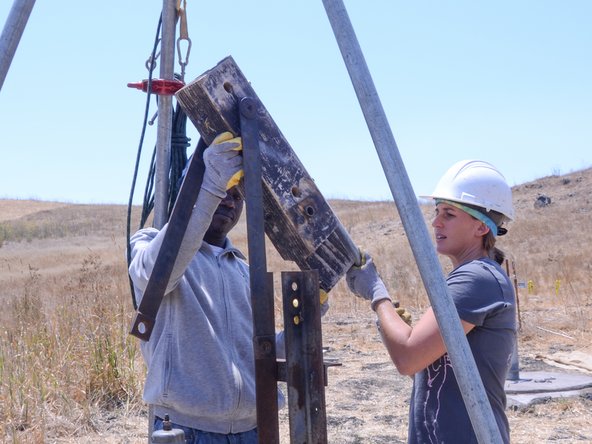
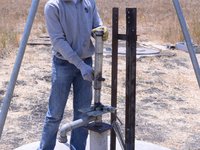
    • Firmly lift the riser main slider with two hands.

    • Use caution not to drop the riser main, as this can damage the pump cylinder.

  8. Bush Pump Riser Main Slider Replacement: crwdns2935265:08crwdnd2935265:01crwdnd2935265:03crwdne2935265:0 Bush Pump Riser Main Slider Replacement: crwdns2935265:08crwdnd2935265:02crwdnd2935265:03crwdne2935265:0 Bush Pump Riser Main Slider Replacement: crwdns2935265:08crwdnd2935265:03crwdnd2935265:03crwdne2935265:0
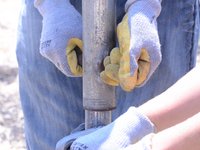
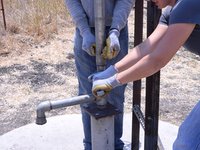
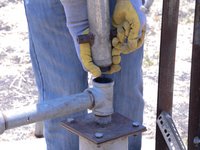
    • Use a pipe wrench to fully loosen the above grade riser pipe.

  9. Bush Pump Riser Main Slider Replacement: crwdns2935265:09crwdnd2935265:01crwdnd2935265:03crwdne2935265:0 Bush Pump Riser Main Slider Replacement: crwdns2935265:09crwdnd2935265:02crwdnd2935265:03crwdne2935265:0 Bush Pump Riser Main Slider Replacement: crwdns2935265:09crwdnd2935265:03crwdnd2935265:03crwdne2935265:0
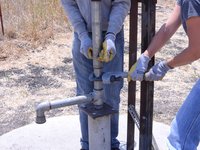
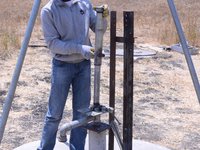
    • Lift the slider and riser main pipe.

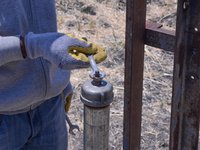
    • Place a pump rod clamp around the rod, and tighten it securely against the pump rod.

    • Carefully lower the riser main and slider to allow it to rest on the rod clamp.

  10. Bush Pump Riser Main Slider Replacement: crwdns2935265:010crwdnd2935265:01crwdnd2935265:03crwdne2935265:0 Bush Pump Riser Main Slider Replacement: crwdns2935265:010crwdnd2935265:02crwdnd2935265:03crwdne2935265:0 Bush Pump Riser Main Slider Replacement: crwdns2935265:010crwdnd2935265:03crwdnd2935265:03crwdne2935265:0
    • Loosen and remove both the pump rod jam nut and pump rod nut on the top of the slider.

  11. Bush Pump Riser Main Slider Replacement: crwdns2935265:011crwdnd2935265:01crwdnd2935265:02crwdne2935265:0 Bush Pump Riser Main Slider Replacement: crwdns2935265:011crwdnd2935265:02crwdnd2935265:02crwdne2935265:0
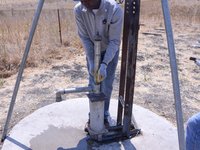
    • Remove the riser main slider, and inspect it for wear and tear.

    • Set the slider in a sanitary place to prevent contamination.

crwdns2915888:0crwdne2915888:0

To reassemble your device, follow these instructions in reverse order.

Jake Devincenzi

crwdns2935283:004/18/11crwdne2935283:0

117,328 crwdns2915208:0crwdne2915208:0

crwdns2935297:057crwdne2935297:0

crwdns2944067:00crwdne2944067:0

crwdns2917038:0crwdne2917038:0

crwdns2936625:0crwdne2936625:0:

crwdns2936751:024crwdne2936751:0 0

crwdns2936753:07crwdne2936753:0 0

crwdns2936753:030crwdne2936753:0 15

crwdns2942667:0crwdne2942667:0 183