crwdns2915892:0crwdne2915892:0
The entire motor/gear assembly housing should be removed before starting.
crwdns2942213:0crwdne2942213:0
-
-
Push on the side of the cover, and remove it.
-
-
-
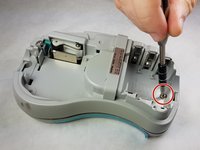
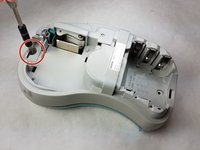
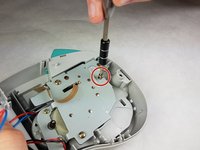
Unscrew the two 9 mm Phillips #1 screws from the top and bottom.
-
-
-
First: To separate the top cover from the body, insert a spudger between the two halves.
-
Gently twist the spudger until the two halves separate. Do this in multiple spots around the perimeter of the cover to distribute the pressure.
-
-
-
-
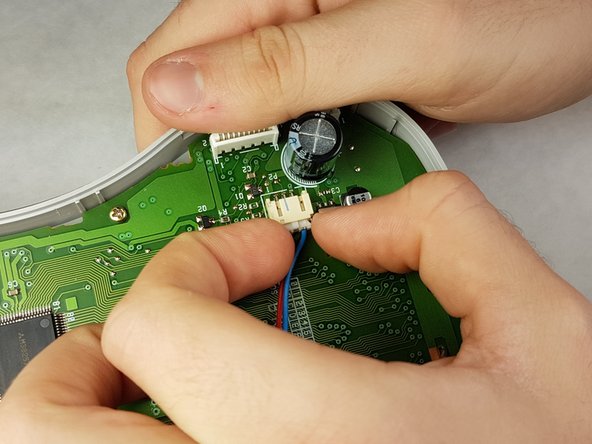
Gently grasp the ribbon wire and top cover, then gently pull the ribbon wire out of its connection.
-
-
-
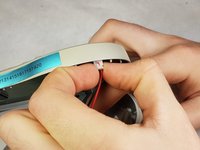
Carefully pinch the top of the connector.
-
Pull perpendicular to the device until the wire is disconnected.
-
-
-
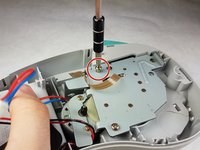
Unscrew the three 9 mm Phillips #1 screws shown.
-
-
-
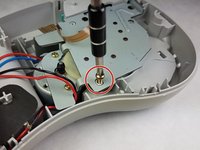
Using the metal spudger, swivel the pin so that the print roller lever loosens.
-
-
-
Gently pull the print roller lever out.
J'aimerais bien trouver cette piece du numéro 10 .la piece de plastique blanche. Le petit bras est brisé. Oui je peux trouver ces piece .Merci vous pouvez me réponds à Pierrepicotte@gmail.com serait apprécié
If the roller is broken, where do you buy a new one? My roller mechanism doesn't move but looks in good condition...
Did you ever find a source for the broken roller ??
Suggestion: Brother says no replacement parts are sold or available.
The print head control arm is a bad design, coupled with a too strong arm spring and under constant pressure once the cartridge door is snapped shut, the control arm fails.
When storing the label maker, remove the batteries and do NOT snap the cartridge area door shut.
If you do disassemble, take photos of the process to help reassembly as things shift.
Fix: This can be done but is not easy. Take the unit apart as the above video shows and put a mark on the motor for orientation as it will shift. Once you have it apart complete. Fish out the broken control arm. This arm can be plastic welded back in its original location and reinforced. This can be done with a small pencil type soldering iron, something to hold the 2 parts correctly while doing the plastic welding. Look on YouTube for hints. After the welds are done check the alignment as this is crucial. Next use very fine steel wire strands and carefully plastic melt these in the same area.
-


To reassemble your device, follow these instructions in reverse order.
To reassemble your device, follow these instructions in reverse order.
crwdns2935221:0crwdne2935221:0
crwdns2935229:02crwdne2935229:0
crwdns2915084:0crwdne2915084:0

IUPUI, Team 1-1, Harley Fall 2016 crwdns2935289:0IUPUI, Team 1-1, Harley Fall 2016crwdne2935289:0
IUPUI-HARLEY-F16S1G1
crwdns2931471:03crwdne2931471:0
crwdns2935297:07crwdne2935297:0
crwdns2947412:05crwdne2947412:0
Hi everybody ,does anyone knows were I can by such a lever ?
TBH
BONJOUR, (I’m French)
Same question: does anyone knows were I can by such a lever ?
Did anyone find a source for this part?
Unfortunately very discontinued. Until someone adds it to thingverse there's not much that can be done.
UN8026001 ROLLER HOLDER ASSY PT100/110
UN8031001 ROLLER HOLDER SPRING PT100
UN8032000 ROLLER RELEASE LEVER PT100/110
I can fix these by using plastic weld to rebuild the edging. I was totally successful.