crwdns2915892:0crwdne2915892:0
In order to replace or repair the motors, gears, etc., the back plate has to be removed. Ensure the batteries are not in the device before starting this guide.
crwdns2942213:0crwdne2942213:0
-
-
Push on the side of the cover, and remove it.
-
-
-
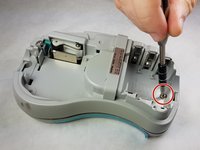
Unscrew the two 9 mm Phillips #1 screws from the top and bottom.
-
-
-
-
First: To separate the top cover from the body, insert a spudger between the two halves.
-
Gently twist the spudger until the two halves separate. Do this in multiple spots around the perimeter of the cover to distribute the pressure.
-
-
-
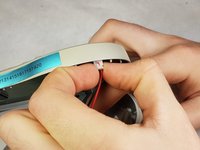
Gently grasp the ribbon wire and top cover, then gently pull the ribbon wire out of its connection.
-
-
-
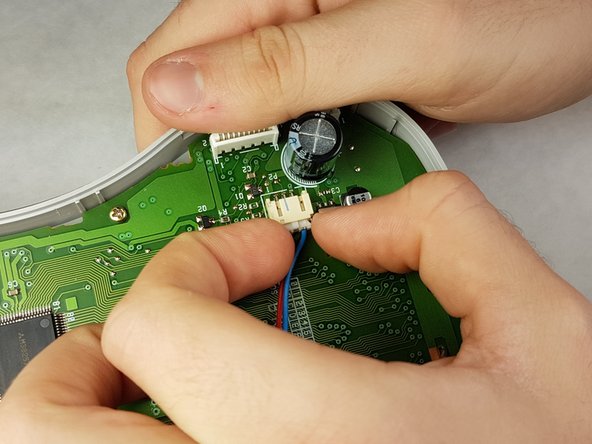
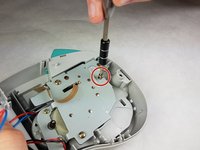
Carefully pinch the top of the connector.
-
Pull perpendicular to the device until the wire is disconnected.
-
-
-
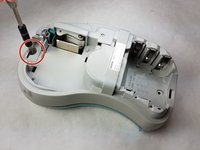
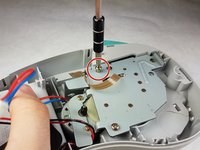
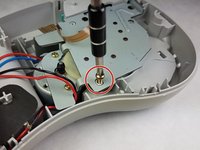
Unscrew the three 9 mm Phillips #1 screws shown.
-


To reassemble your device, follow these instructions in reverse order.
To reassemble your device, follow these instructions in reverse order.
crwdns2915084:0crwdne2915084:0

IUPUI, Team 1-1, Harley Fall 2016 crwdns2935289:0IUPUI, Team 1-1, Harley Fall 2016crwdne2935289:0
IUPUI-HARLEY-F16S1G1
crwdns2931471:03crwdne2931471:0
crwdns2935297:07crwdne2935297:0