crwdns2915892:0crwdne2915892:0
You will be removing the safety locking arm. Make sure the juicer is off and unplugged before disassembly. If you have trouble starting the juicer, keep in mind that the safety locking arm has to be properly engaged in order for the juicer to work.
crwdns2942213:0crwdne2942213:0
-
-
Place the juicer on a flat surface. Make sure the juicer is unplugged and in the "off" position. For the following steps, the pulp basket is on the left.
-
-
-
Tilt the juicer slightly to the right so the pulp basket is off of your surface.
-
-
-
-
Pull the pulp basket down and out from under the juicer cover.
-
-
-
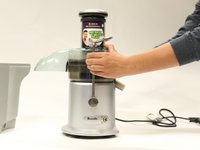
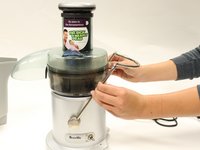
Place one hand on either side of the safety locking arm.
-
Disengage the locking mechanism by pulling down on the lever with even pressure. The lever should be free to move up or down once it has been properly disengaged.
-
-
-
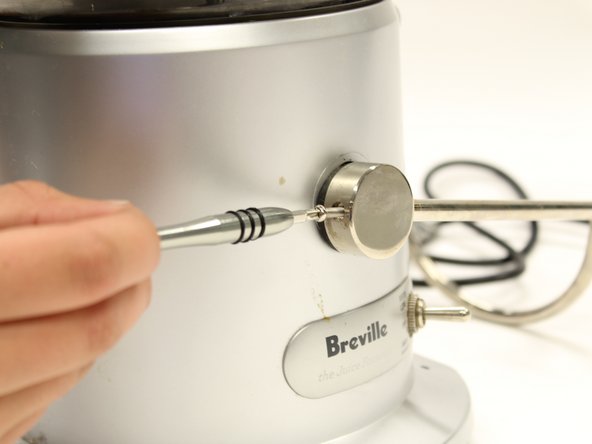
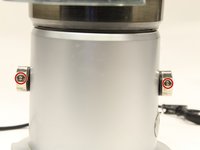
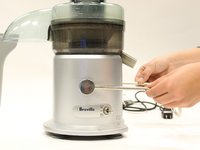
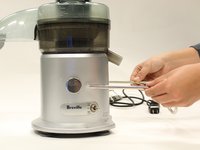
Locate the two 1 inch Phillips #1 screws on the back of the safety arm.
-
-
-
Remove the safety locking arm by gripping both sides and pulling horizontally away from the juicer.
-


To reassemble your device, follow these instructions in reverse order.
To reassemble your device, follow these instructions in reverse order.
crwdns2915084:0crwdne2915084:0

Cal Poly, Team 15-1, Livingston Fall 2016 crwdns2935289:0Cal Poly, Team 15-1, Livingston Fall 2016crwdne2935289:0
CPSU-LIVINGSTON-F16S15G1
crwdns2931471:03crwdne2931471:0
crwdns2935297:04crwdne2935297:0