crwdns2933423:0crwdne2933423:0

Brentwood TS-292B Browning Dial Circuitboard Replacement

crwdns2942213:0crwdne2942213:0

  1. Brentwood TS-292B Browning Dial Circuitboard Replacement, Browning Dial Circuitboard: crwdns2935265:01crwdnd2935265:01crwdnd2935265:03crwdne2935265:0 Brentwood TS-292B Browning Dial Circuitboard Replacement, Browning Dial Circuitboard: crwdns2935265:01crwdnd2935265:02crwdnd2935265:03crwdne2935265:0 Brentwood TS-292B Browning Dial Circuitboard Replacement, Browning Dial Circuitboard: crwdns2935265:01crwdnd2935265:03crwdnd2935265:03crwdne2935265:0
    • Remove the five screws indicated using a Philips head screwdriver.

  2. Brentwood TS-292B Browning Dial Circuitboard Replacement: crwdns2935265:02crwdnd2935265:01crwdnd2935265:02crwdne2935265:0 Brentwood TS-292B Browning Dial Circuitboard Replacement: crwdns2935265:02crwdnd2935265:02crwdnd2935265:02crwdne2935265:0
    • Pull hard on the browning lever until it detaches from the toaster.

    • It will take some force to pull it off.

    • Once the tab is off, lift up on the housing to remove it from the toaster.

  3. Brentwood TS-292B Browning Dial Circuitboard Replacement: crwdns2935265:03crwdnd2935265:01crwdnd2935265:01crwdne2935265:0
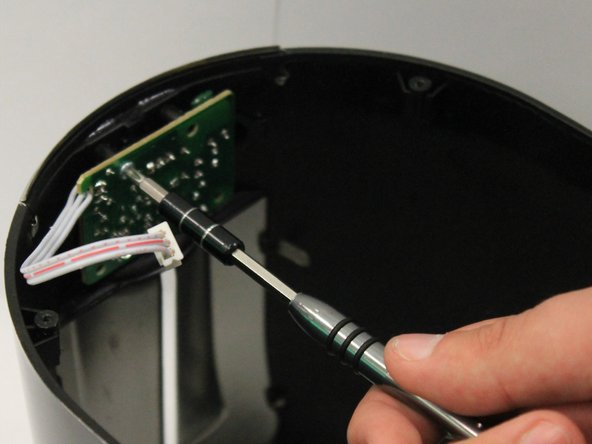
    • Once the housing has been pulled upwards, carefully uplug the wire connecting the browning dial circuit board to the main circuit board.

  4. Brentwood TS-292B Browning Dial Circuitboard Replacement: crwdns2935265:04crwdnd2935265:01crwdnd2935265:02crwdne2935265:0 Brentwood TS-292B Browning Dial Circuitboard Replacement: crwdns2935265:04crwdnd2935265:02crwdnd2935265:02crwdne2935265:0
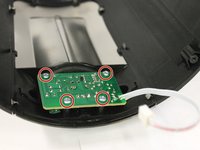
    • There are four screws on the circuit board for the browning dial.

    • Unscrew each of them with a Philips head screwdriver to detach the board and remove the board and dial from the toaster housing.

  5. Brentwood TS-292B Browning Dial Circuitboard Replacement: crwdns2935265:05crwdnd2935265:01crwdnd2935265:02crwdne2935265:0 Brentwood TS-292B Browning Dial Circuitboard Replacement: crwdns2935265:05crwdnd2935265:02crwdnd2935265:02crwdne2935265:0
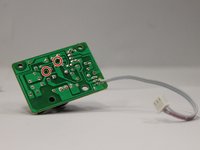
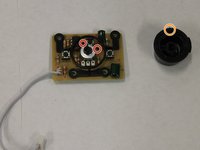
    • There are two holes on the board where the pin from the browning dial can align.

    • Refer to the images if you are having trouble finding them.

    • Replace the browning dial by inserting the pin on the dial into one of the holes indicated.

    • Replace the entire circuit board if need be.

crwdns2915888:0crwdne2915888:0

To reassemble your device, follow these instructions in reverse order.

Elly Ayala

crwdns2935283:009/21/18crwdne2935283:0

739 crwdns2915208:0crwdne2915208:0

crwdns2935297:05crwdne2935297:0

crwdns2915084:0crwdne2915084:0

University of North Texas, Team S8-G7, Riccardelli Fall 2018 crwdns2935289:0University of North Texas, Team S8-G7, Riccardelli Fall 2018crwdne2935289:0

UNT-RICCARDELLI-F18S8G7

crwdns2931471:04crwdne2931471:0

crwdns2935297:05crwdne2935297:0

crwdns2944067:00crwdne2944067:0

crwdns2917038:0crwdne2917038:0

crwdns2936625:0crwdne2936625:0:

crwdns2936751:024crwdne2936751:0 0

crwdns2936753:07crwdne2936753:0 2

crwdns2936753:030crwdne2936753:0 4

crwdns2942667:0crwdne2942667:0 219