crwdns2933423:0crwdne2933423:0

Braven BRV-X Battery Replacement

crwdns2942213:0crwdne2942213:0

  1. Braven BRV-X Battery Replacement, Bottom Outer Casing: crwdns2935265:01crwdnd2935265:01crwdnd2935265:03crwdne2935265:0 Braven BRV-X Battery Replacement, Bottom Outer Casing: crwdns2935265:01crwdnd2935265:02crwdnd2935265:03crwdne2935265:0 Braven BRV-X Battery Replacement, Bottom Outer Casing: crwdns2935265:01crwdnd2935265:03crwdnd2935265:03crwdne2935265:0
    • Flip the Braven BRV-X upside down so you are facing the bottom side.

    • With the H1.5 Head Screwdriver, unscrew the four screws.

    • All screws on this device can be stripped easily. Hold your screwdriver with the thumb on top and swivel with the opposite hand's thumb and index finger.

    • Using the #0 Phillips screwdriver, unscrew the four screws on the four corners of the bottom side.

    • Gently remove the outer casing, which should reveal the inner shell.

  2. Braven BRV-X Battery Replacement: crwdns2935265:02crwdnd2935265:01crwdnd2935265:02crwdne2935265:0 Braven BRV-X Battery Replacement: crwdns2935265:02crwdnd2935265:02crwdnd2935265:02crwdne2935265:0
    • With a Jimmy, cut the two warranty seals on either side.

    • You may also use a tech knife instead of a Jimmy.

    • WARNING: Once warranty seals are broken, you may no longer return the product.

    • Next, remove the 18 screws with a #00 Phillips screwdriver.

  3. Braven BRV-X Battery Replacement: crwdns2935265:03crwdnd2935265:01crwdnd2935265:02crwdne2935265:0 Braven BRV-X Battery Replacement: crwdns2935265:03crwdnd2935265:02crwdnd2935265:02crwdne2935265:0
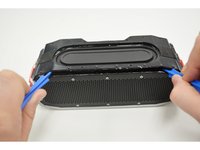
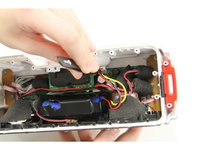
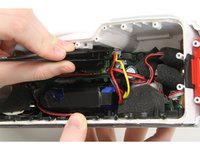
    • Using two plastic opening tools, slide under the cover and slowly lift.

    • There is glue nearly all around the inner shell, so strength will be necessary. When both tools are inserted, you can slide out along the edges.

  4. Braven BRV-X Battery Replacement, Battery: crwdns2935265:04crwdnd2935265:01crwdnd2935265:01crwdne2935265:0
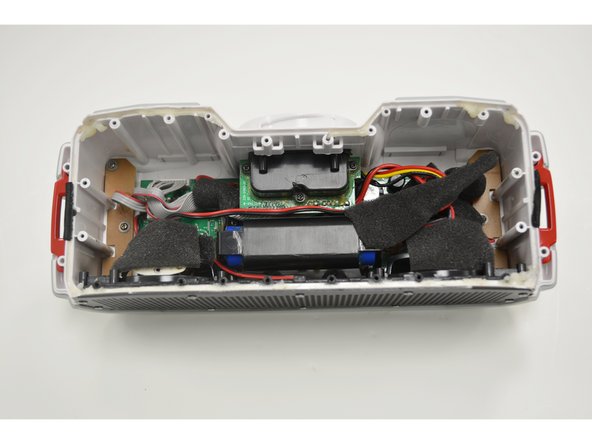
    • Remove the black foam squares from the red, yellow, and black wire on the top right side of the device.

  5. Braven BRV-X Battery Replacement: crwdns2935265:05crwdnd2935265:01crwdnd2935265:03crwdne2935265:0 Braven BRV-X Battery Replacement: crwdns2935265:05crwdnd2935265:02crwdnd2935265:03crwdne2935265:0 Braven BRV-X Battery Replacement: crwdns2935265:05crwdnd2935265:03crwdnd2935265:03crwdne2935265:0
    crwdns2935267:0crwdne2935267:0
    Tweezers
    $4.99
    crwdns2942207:0crwdne2942207:0
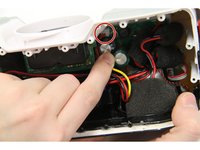
    • Now that the three wires are exposed, follow the wires to the white base that is plugged into the motherboard.

    • Using the tech knife, carefully remove the glue that keeps the plug in place.

    • Using the tweezers, carefully disconnect the plug from the motherboard.

    • WARNING: Make sure the battery is drained of all power for safety reasons.

    • There should still be a small white base attached to the motherboard, where the plug will eventually be plugged back in.

  6. Braven BRV-X Battery Replacement: crwdns2935265:06crwdnd2935265:01crwdnd2935265:01crwdne2935265:0
    • The battery's black shell is connected to the motherboard with four screws. Use the #00 Phillips screwdriver to remove the four screws.

    • The screws near the speaker side of the device will be a tight squeeze to get to.

  7. Braven BRV-X Battery Replacement: crwdns2935265:07crwdnd2935265:01crwdnd2935265:01crwdne2935265:0
    • Now, you should be able to lift the battery along with the black container up.

    • Pull the battery pack straight out so you do not damage other wires or the motherboard.

  8. Braven BRV-X Battery Replacement: crwdns2935265:08crwdnd2935265:01crwdnd2935265:01crwdne2935265:0
    • Slide the blue battery out from the black container. Your battery is now removed from the device and is ready for replacement.

crwdns2915888:0crwdne2915888:0

To reassemble your device, follow these instructions in reverse order.

crwdns2935229:05crwdne2935229:0

Courtney Crockett

crwdns2935283:009/29/15crwdne2935283:0

324 crwdns2915208:0crwdne2915208:0

crwdns2935297:02crwdne2935297:0

crwdns2915084:0crwdne2915084:0

Texas Tech, Team 19-4, Rauch Fall 2015 crwdns2935289:0Texas Tech, Team 19-4, Rauch Fall 2015crwdne2935289:0

TTU-RAUCH-F15S19G4

crwdns2931471:04crwdne2931471:0

crwdns2935297:02crwdne2935297:0

crwdns2944067:010crwdne2944067:0

Thank you for the replacement steps - do you know where I could buy a replacement battery?

jmckeag7 - crwdns2934203:0crwdne2934203:0

Anyone ever figure out what battery they needed?

Aaron Eisenbarth -

I also would love to know what battery is actually needed for this.

grenchpickle - crwdns2934203:0crwdne2934203:0

The batteries are two 18650's in tandem. You can get these from batteries plus

nick - crwdns2934203:0crwdne2934203:0

Parallel or series connection?

Vladimir Skrbic -

crwdns2917038:0crwdne2917038:0

crwdns2936625:0crwdne2936625:0:

crwdns2936751:024crwdne2936751:0 1

crwdns2936753:07crwdne2936753:0 15

crwdns2936753:030crwdne2936753:0 61

crwdns2942667:0crwdne2942667:0 10,374