crwdns2915892:0crwdne2915892:0
This guide will help walk you through the process of identifying the speaker wires for your Braven BRV-1s. If your device isn't working, despite having power and being properly connected, you could have damaged or a disconnected speaker wire. This guide will show you how to access these speaker wires and how to replace and solder them back into their proper place.
crwdns2942213:0crwdne2942213:0
-
-
To remove the outer case, remove 4 phillips screws (Phillips #00 headtype, 9.3mm long)
-
-
-
Using a metal spudger, gently pry the side of the defective case.
-
-
-
Still using the metal spudger, continue to work your way around the outer case.
-
-
-
-
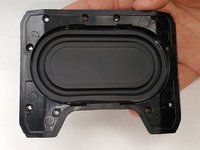
Remove the broken outer case. Replace with used/new out case.
-
-
-
To remove the speaker cone plate, remove 10 phillips screws (Phillips #00 headtype, 9.3mm long)
-
-
-
Using a metal spudger, gently pry the side of the defective speaker cone plate.
-
Remember to pry all around the side of the speaker cone plate.
-
Keep in mind that the adhesive will make it difficult to pry the plate off. To loosen the adhesive, heat the plate with a device such as a hair dryer.
-
-
-
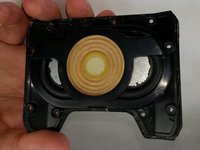
Remove the broken speaker cone plate. Replace with used/new out plate.
-
-
-
Once outer cover and speak cone/cover are removed, locate speaker wires
-
Each speaker has two wires: 1 red wire, 1 black wire
-
Check each wire for damage or if it has been disconnected from the speaker terminal
-
-
-
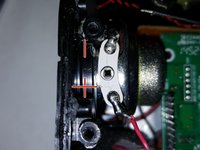
Once locating the damaged or disconnected wire, locate the proper speaker terminal to solder the wire to
-
On each speaker terminal you can see the (+) and a (-) next to each terminal. The black wire correlates to the (-) and the red wire correlates to the (+)
-
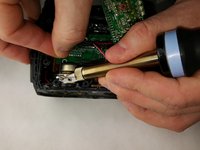
If necessary, use wire strippers to strip off some of the plastic casing at the end wire to expose the metal fibers
-
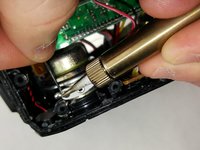
Using a soldering iron, carefully solder wire back to it's proper place on the speaker terminal
-


To reassemble your device, follow these instructions in reverse order. You may need to refer to previous guides.
crwdns2935221:0crwdne2935221:0
crwdns2935227:0crwdne2935227:0
crwdns2935287:0crwdne2935287:0

IUPUI, Team S2-G2, Harley Spring 2017 crwdns2935289:0IUPUI, Team S2-G2, Harley Spring 2017crwdne2935289:0
IUPUI-HARLEY-S17S2G2
crwdns2931471:04crwdne2931471:0
crwdns2935297:03crwdne2935297:0