crwdns2933423:0crwdne2933423:0

Bowers and Wilkins T7 Motherboard Replacement

crwdns2942213:0crwdne2942213:0

  1. Bowers and Wilkins T7 Motherboard Replacement, Access Panel: crwdns2935265:01crwdnd2935265:01crwdnd2935265:01crwdne2935265:0
    • As with all electronic devices, make sure your device is powered off before you begin.

    • Gently lift up the access panel; it should easily "pop" open.

  2. Bowers and Wilkins T7 Motherboard Replacement: crwdns2935265:02crwdnd2935265:01crwdnd2935265:01crwdne2935265:0
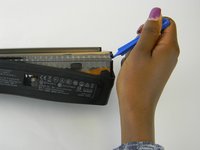
    • Remove 14mm screws on the front panel with a J1 Phillips head screwdriver.

    • There are 8 screws in total.

  3. Bowers and Wilkins T7 Motherboard Replacement: crwdns2935265:03crwdnd2935265:01crwdnd2935265:02crwdne2935265:0 Bowers and Wilkins T7 Motherboard Replacement: crwdns2935265:03crwdnd2935265:02crwdnd2935265:02crwdne2935265:0
    • Be gentle, the rubber seal is fragile and easy to tear, resulting in cosmetic damage to your device.

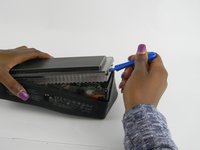
    • Using the ifixit Opening Tool, carefully pry off the rubber seal around the sides.

    • The seal is held by adhesive, if this is proving difficult you can use a heat gun to help the process.

  4. Bowers and Wilkins T7 Motherboard Replacement: crwdns2935265:04crwdnd2935265:01crwdnd2935265:02crwdne2935265:0 Bowers and Wilkins T7 Motherboard Replacement: crwdns2935265:04crwdnd2935265:02crwdnd2935265:02crwdne2935265:0
    • The cover is the most difficult part to remove. As you work, pry continuously, moving the tool around the device, working it a little further as you go.

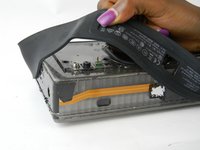
    • Using the ifixit Opening Tool, pry open at the seam found under the rubber seal.

    • As the cover starts to come off, you can lift up using your hand.

  5. Bowers and Wilkins T7 Motherboard Replacement: crwdns2935265:05crwdnd2935265:01crwdnd2935265:03crwdne2935265:0 Bowers and Wilkins T7 Motherboard Replacement: crwdns2935265:05crwdnd2935265:02crwdnd2935265:03crwdne2935265:0 Bowers and Wilkins T7 Motherboard Replacement: crwdns2935265:05crwdnd2935265:03crwdnd2935265:03crwdne2935265:0
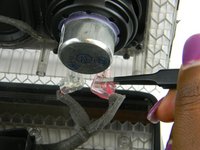
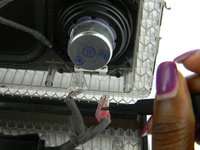
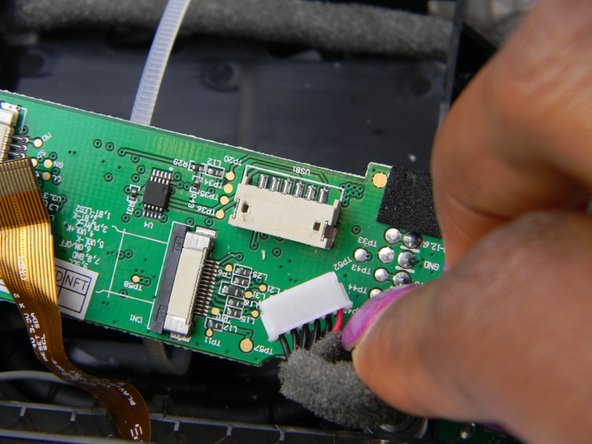
    • Gently squeeze the internal locking mechanism inside the red and white terminals with either your fingers or a pair of precision tweezers.

    • While squeezing the internal locking mechanism, pull back the terminal.

    • Repeat this process for the second speaker.

  6. Bowers and Wilkins T7 Motherboard Replacement, Motherboard: crwdns2935265:06crwdnd2935265:01crwdnd2935265:03crwdne2935265:0 Bowers and Wilkins T7 Motherboard Replacement, Motherboard: crwdns2935265:06crwdnd2935265:02crwdnd2935265:03crwdne2935265:0 Bowers and Wilkins T7 Motherboard Replacement, Motherboard: crwdns2935265:06crwdnd2935265:03crwdnd2935265:03crwdne2935265:0
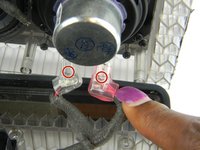
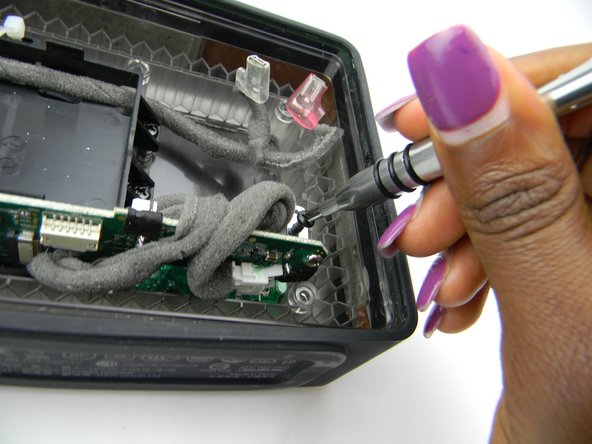
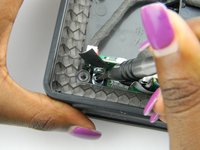
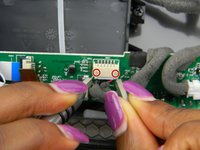
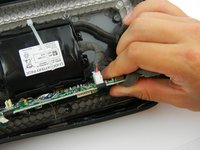
    • Remove the leftmost 14mm screw with the J1 screwdriver tip.

    • Remove the rightmost 14mm screw with the J1 screwdriver tip.

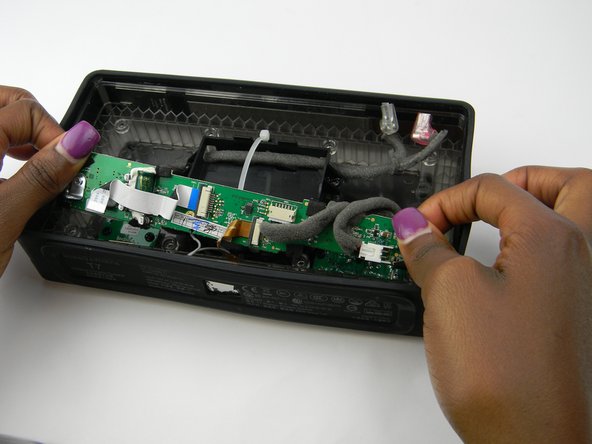
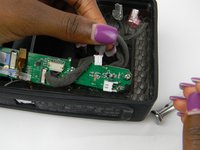
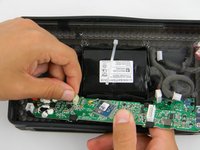
    • With the screws removed, the motherboard is now loose.

  7. Bowers and Wilkins T7 Motherboard Replacement: crwdns2935265:07crwdnd2935265:01crwdnd2935265:03crwdne2935265:0 Bowers and Wilkins T7 Motherboard Replacement: crwdns2935265:07crwdnd2935265:02crwdnd2935265:03crwdne2935265:0 Bowers and Wilkins T7 Motherboard Replacement: crwdns2935265:07crwdnd2935265:03crwdnd2935265:03crwdne2935265:0
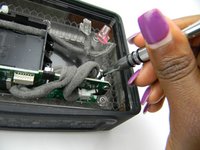
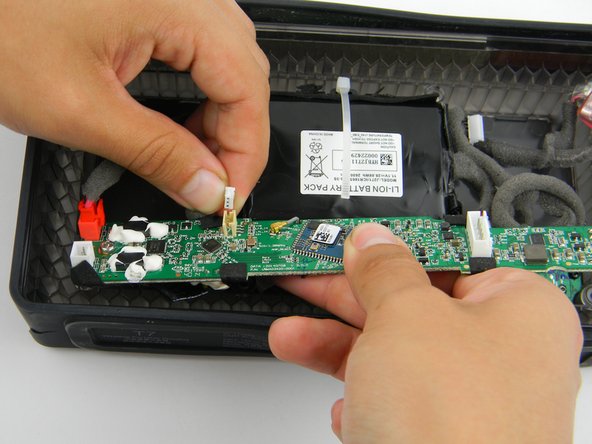
    • Ensure you position your fingers, or a screwdriver tool with the 0.8 tip, in a position on the outside of the black tab.

    • It is advisable to use a nylon spudger to accomplish this task, because using a metal screwdriver like the one used in the image, can be unnecessarily dangerous around delicate connectors and the motherboard in general.

    • When working with electronics, it's important to choose a tool that's ESD-safe to avoid accidental damage.

    • Slide the black tab out so the cable is able to be removed.

    • At this point, the cable is removed.

    • These ports are difficult, as you need to simultaneously push the black tab while pulling the cable.

  8. Bowers and Wilkins T7 Motherboard Replacement: crwdns2935265:08crwdnd2935265:01crwdnd2935265:01crwdne2935265:0
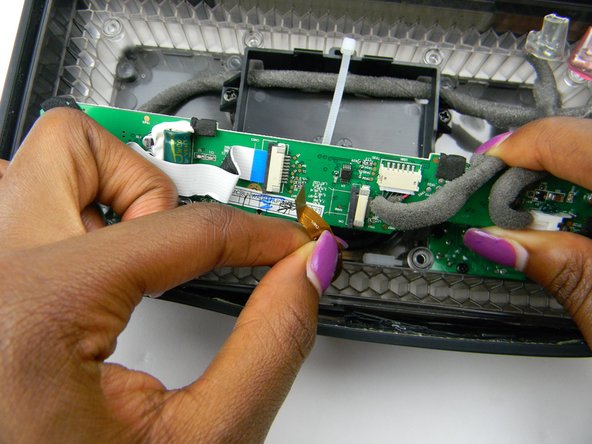
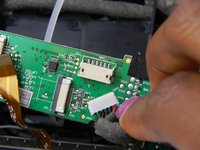
    • Pull out the cable that is attached to a port under the motherboard.

  9. Bowers and Wilkins T7 Motherboard Replacement: crwdns2935265:09crwdnd2935265:01crwdnd2935265:02crwdne2935265:0 Bowers and Wilkins T7 Motherboard Replacement: crwdns2935265:09crwdnd2935265:02crwdnd2935265:02crwdne2935265:0
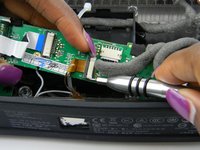
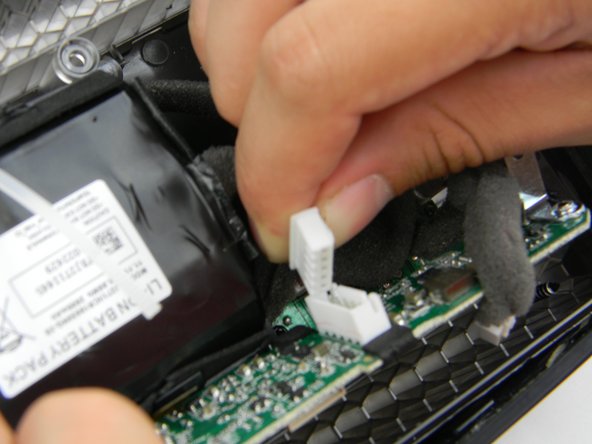
    • Use the 0.8 and 1.0 screwdriver tips to press on the pins to release this cable.

    • The cable should slide out when the releases are pressed.

    • This cable can be difficult, as you need to simultaneously push the pins as you pull out the cable.

  10. Bowers and Wilkins T7 Motherboard Replacement: crwdns2935265:010crwdnd2935265:01crwdnd2935265:02crwdne2935265:0 Bowers and Wilkins T7 Motherboard Replacement: crwdns2935265:010crwdnd2935265:02crwdnd2935265:02crwdne2935265:0
    • Use the 0.8 screwdriver tip to press in the tabs keeping this cable in place.

    • The cable should easily slide out.

  11. Bowers and Wilkins T7 Motherboard Replacement: crwdns2935265:011crwdnd2935265:01crwdnd2935265:02crwdne2935265:0 Bowers and Wilkins T7 Motherboard Replacement: crwdns2935265:011crwdnd2935265:02crwdnd2935265:02crwdne2935265:0
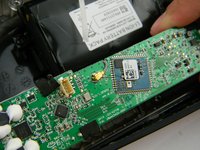
    • Rotated the motherboard to access this cable.

    • Use your fingers to pull out the cable.

  12. Bowers and Wilkins T7 Motherboard Replacement: crwdns2935265:012crwdnd2935265:01crwdnd2935265:02crwdne2935265:0 Bowers and Wilkins T7 Motherboard Replacement: crwdns2935265:012crwdnd2935265:02crwdnd2935265:02crwdne2935265:0
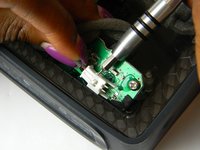
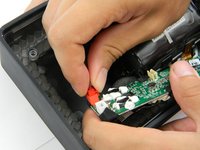
    • The battery cable needs to be removed.

    • Use your fingers to pull the cable out of the port.

  13. Bowers and Wilkins T7 Motherboard Replacement: crwdns2935265:013crwdnd2935265:01crwdnd2935265:02crwdne2935265:0 Bowers and Wilkins T7 Motherboard Replacement: crwdns2935265:013crwdnd2935265:02crwdnd2935265:02crwdne2935265:0
    • The red cable has a tab to press in order to release the cable.

    • Slide out the cable while continuing to press and hold the tab.

  14. Bowers and Wilkins T7 Motherboard Replacement: crwdns2935265:014crwdnd2935265:01crwdnd2935265:02crwdne2935265:0 Bowers and Wilkins T7 Motherboard Replacement: crwdns2935265:014crwdnd2935265:02crwdnd2935265:02crwdne2935265:0
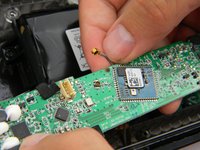
    • Rotate the motherboard to access the last cable.

    • Pull on the gold connector to disconnect the cable.

crwdns2915888:0crwdne2915888:0

To reassemble your device, follow these instructions in reverse order.

Adam Kosianowski

crwdns2935283:003/09/17crwdne2935283:0

101 crwdns2915208:0crwdne2915208:0

crwdns2935295:0crwdne2935295:0

crwdns2915084:0crwdne2915084:0

USF Tampa, Team S7-G1, Cagle Spring 2017 crwdns2935289:0USF Tampa, Team S7-G1, Cagle Spring 2017crwdne2935289:0

USFT-CAGLE-S17S7G1

crwdns2931471:05crwdne2931471:0

crwdns2935297:04crwdne2935297:0

crwdns2917034:0crwdne2917034:0

OK, so now the motherboard is out. What can that acomplish? Where can you get a replacement? and where is there a circuit diagram to fault find??

james scanlon - crwdns2934203:0crwdne2934203:0

crwdns2917038:0crwdne2917038:0

crwdns2936625:0crwdne2936625:0:

crwdns2936751:024crwdne2936751:0 4

crwdns2936753:07crwdne2936753:0 5

crwdns2936753:030crwdne2936753:0 9

crwdns2942667:0crwdne2942667:0 842