crwdns2915892:0crwdne2915892:0
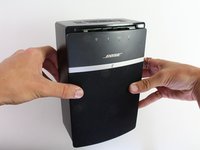
The back panel houses the motherboard for the speaker. It needs to be removed in order to replace the motherboard as well as several other components.
The motherboard in this guide contains capacitors which can hold a charge even when the speaker is powered off. Do not touch the as it may result in a shock.
crwdns2942213:0crwdne2942213:0
-
-
Turn the speaker over so that the rubber strips along the bottom are facing you.
-
Use the iFixit Opening Tool to peel back the rubber strip on the bottom-front edge.
-
-
-
Use a #2 Phillips screwdriver to remove each of the three 20mm screws on the bottom front edge of the speaker.
-
-
-
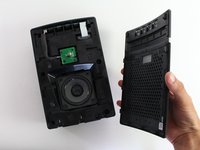
Slide the front panel with the mesh covering downwards to disconnect it from the SoundTouch 10 body.
-
Lift the panel away to reveal the speaker head.
-
-
-
-
Use a #2 Phillips screwdriver to remove each of the six 20mm screws located underneath the front panel.
-
-
-
Flip the speaker onto its back.
-
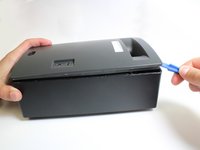
Loosen the adhesive by sliding a Metal Spudger under the edge where the back panel meets the speaker's body.
-
-
-
Use force with an iFixit Plastic Opening Tool to pry the back panel up from the speaker frame.
-
-
crwdns2935267:0crwdne2935267:0Tweezers$4.99
-
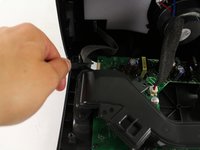
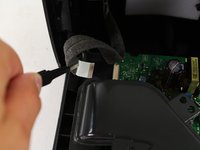
Use ESD Safe Tweezers (Blunt Nose) to pull out the wire ribbon at the end of the motherboard.
What is the serial number or spare part number of that ribbon.
-
-
-
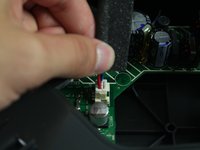
Pull up on the base of the speaker wire plug to disconnect it from the motherboard.
Only the upper part takes off (the one that is whiter). The other part coresponds to the base, and it is unremovable
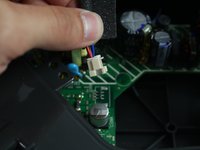
To remove the plug, squeeze the very top of the plug to unlatch the plug, then pull on the plug to remove it.
Where can I buy parts at?
-


To reassemble your device, follow these instructions in reverse order.
To reassemble your device, follow these instructions in reverse order.
crwdns2935221:0crwdne2935221:0
crwdns2935229:04crwdne2935229:0
crwdns2915084:0crwdne2915084:0

Cal Poly, Team S13-G1, Forte Spring 2017 crwdns2935289:0Cal Poly, Team S13-G1, Forte Spring 2017crwdne2935289:0
CPSU-FORTE-S17S13G1
crwdns2931471:04crwdne2931471:0
crwdns2935297:05crwdne2935297:0
crwdns2947410:01crwdne2947410:0
How can I install a 12v battery?