crwdns2915892:0crwdne2915892:0
My 23 year old small simple (no defrost etc ) under-counter fridge (Bosch logixx Easy access Maxx Freedom Performance with sliding drawers) became more erratic over several months. If it was too warm (flashing LED's) there was a 'super' button to press to turn on the compressor continuously, but this no longer worked.
First I replaced the 4uF start pump capacitor (£9) as it was out of spec (2.8uF), but that made no difference. Then I replaced the pump PTC thermistor relay (£13) as it was marked 25ohms and measured 45ohms. But even a new one measured 38ohm, so that made no difference. The pump coils' resistances seemed satisfactory (15 and 48 kohms). The fridge's thermostat (thermistors) also seemed OK (about 12 and15 kohms at 10C) and went up in resistance when the temperature went down.
Thus by process of elimination, it was concluded that the fault must lie in the control board (the most expensive item up to £300 if you can find one).
By chance, I found that when you disconnected the two thermistors (one inside the fridge and one outside I think) from the control board, the fridge starts working again but now in a timed mode. The compressor turned on for 15mins then off for 45 mins irrespective of the temperature, (25% duty cycle) ie if the control board appeared to think that the temperature sensors have failed, so it went into a 'safe mode' to protect the fridge contents. (I don't know if other fridges do this- I could find nothing on the internet).
In winter this maked the fridge too cold at 0C, but by putting the fridge on a mains timer e.g. to turn off overnight, I could manage the temperature better. Conversely, if the fridge was too warm, due to lots of door openings, I could manually (or with a mains timer) turn it off and on again to start the cooling.
This guide tells you how to fairly easily disconnect the temperature sensors (thermistors) so you can still use the fridge until a replacement/repair is possible.
Later, I did a second repair to control the temperature more automatically by buying an STC1000 temperature controller (£8.50 on eBay).
These simple external controllers are normally bought by people brewing beer that want to better control fridges, freezers etc.
There was no need to empty the fridge for either of these repairs.
These repairs may broadly apply to other fridges.
crwdns2942213:0crwdne2942213:0
-
-
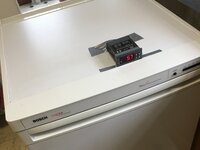
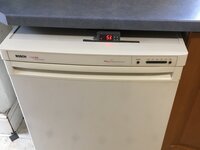
First image shows the small (150litre) basic fridge. The added digital room thermometer on top is useful but not essential. Disconnect power and pull fridge out from under counter to access the rear. No need to empty fridge, though it does make it easier to move. Fridge contents will remain cool for hours.
-
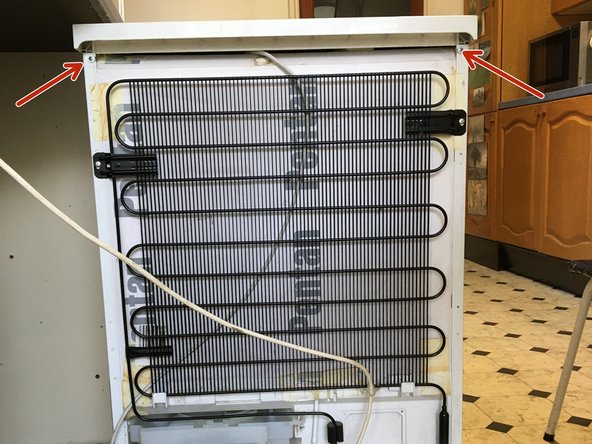
Second image shows the back of the fridge. Undo two Philips screws arrowed. Lift the back of released panel slightly and push slightly forward and lift off and turn over. Note that there are cables attached to the top panel so twist it so it can lie upside down without straining the cables.
-
-
-
Image shows part of top panel upside down and twisted round 90deg so the cables are not taut.
-
Remove recessed (red arrow) screw with a torx 10 screw head
-
Then the white plastic module containing all the electronics can be pulled rearwards and up, after pressing down the two similar catches (blue arrow). The catches can be released one at a time. When free, the module can be turned over to expose all the electrics (shown in next step)
-
-
-
-
The single thick 3-core cable supplies the mains power input to the control board and an output wire to the pump. This can be left alone. The two small 2-core wires go into a single 3-pin connector from the thermistors (temperature sensors). This connector can be pulled off from the control circuit board.
-
Now you can reassemble the fridge without attaching the thermistor cables. Now when you turn on the fridge, you should hear the pump working (it's quite quiet) for 15 mins every hour i.e. a constant 25% duty cycle, irrespective of the temperature.
-
-
-
Optional second repair. To fully automate the temperature control throughout the seasons, an STC1000 temperature controller was added. (This should only be attempted by those with electrical knowledge, so only a brief outline is given here).
-
With mains power disconnected, all wires are cut from the control board and extended, ideally with the same size and colour of wire, though holes drilled in the top of the fridge's work-surface (wood/plastic). If you don't want to drill any holes, use longer extension wires and route them through the slot in the back where the mains cable enters.
-
The mains live is connected to screw terminal 1 and extended to 7 (see circuit diagram in image). The mains neutral is connected to 2 to complete power to the unit. The black wire connects to 8 to complete a switched-live to the pump relay. There is no heater present, so no connections to 5 and 6.
-
The thermistor wires are connected to 3 and 4. I could have used the thermistor that came with the STC1000, but to save drilling a hole into the fridge chamber, I used one already in the fridge as it appeared to have a very similar resistance (eg 24kohm at 7C). Note: this fridge has two thermistors (see below).
-
Note: one thermistor is inside and one outside the fridge chamber (I think). If the fridge is colder than room temperature, choose the thermistor with the higher resistance. If the fridge is warmer than room temperature by use of a hair drier, choose the thermistor with the lower resistance.
-
There are 4 setup adjustments (F1-F4) that can be made to the STC1000, hold button S for 3 secs. F1 is the required temp ( -50C to 100C, default 10C). F2 difference between turn on and turn off (0.3C to 10C default 0.5C). F3 is compressor protection delay time (1 to 10 mins, default 3mins). F4 Thermistor calibration adjustment (+- 10C default 0C).
-
The temp was set to 7C. The calibration, determined using a separate digital room thermometer, was set in my case to -2C. Other functions used the above default values. More detailed instructions for the stc1000 controller can be found online.
-
With the above values, (winter room temperature 16C) the compressor turned on for about 5 mins every 35mins and displayed temperature cycling between about 3C and 8C ie a mean of about 5C. Note: the automatic fridge light and off/on switch still work, though the lights and switches on the original control board do not work of course.
-
-
-
As a temporary measure, the wires and unit were duct taped in position. The unit could be hidden below the fridge's work-surface, once I am happy with the set up parameters. Alternatively, the stc1000 could be mounted on the side wall of the removable top section by cutting a rectangular opening, using the supplied mounting clips.
-
Note: in the image the illuminated dot next to the work 'HEAT', though there is no active heater here and just means the fridge is naturally heating up as the compressor is off. When the dot next to the word 'COOL' is illuminated the compressor is on (if flashing, it is waiting to come on due to the compressor protection delay).
-


Initially the fridge was modified (no cost) by running in timed interval mode rather than by temperature requirement. Later a STC1000 temperature controller (£8) was added so that it was fully automatic and didn't need adjustments with the seasons.
Initially the fridge was modified (no cost) by running in timed interval mode rather than by temperature requirement. Later a STC1000 temperature controller (£8) was added so that it was fully automatic and didn't need adjustments with the seasons.
crwdns2935221:0crwdne2935221:0
crwdns2935227:0crwdne2935227:0