crwdns2933423:0crwdne2933423:0

Bosch 3727DEVS On/Off Switch Replacement

crwdns2942213:0crwdne2942213:0

  1. Bosch 3727DEVS On/Off Switch Replacement, On/Off Switch: crwdns2935265:01crwdnd2935265:01crwdnd2935265:03crwdne2935265:0 Bosch 3727DEVS On/Off Switch Replacement, On/Off Switch: crwdns2935265:01crwdnd2935265:02crwdnd2935265:03crwdne2935265:0 Bosch 3727DEVS On/Off Switch Replacement, On/Off Switch: crwdns2935265:01crwdnd2935265:03crwdnd2935265:03crwdne2935265:0
    • Ensure that the power chord is not plugged into an outlet.

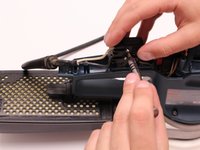
    • Using the T20 Torx Screwdriver, remove the four 15.6 mm screws securing the top cover to the sander.

    • Lift the top cover off the sander.

  2. Bosch 3727DEVS On/Off Switch Replacement: crwdns2935265:02crwdnd2935265:01crwdnd2935265:03crwdne2935265:0 Bosch 3727DEVS On/Off Switch Replacement: crwdns2935265:02crwdnd2935265:02crwdnd2935265:03crwdne2935265:0 Bosch 3727DEVS On/Off Switch Replacement: crwdns2935265:02crwdnd2935265:03crwdnd2935265:03crwdne2935265:0
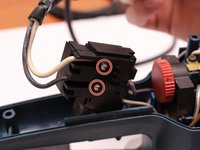
    • Using the T20 Torx Screwdriver, remove the two 15.6 mm screws securing the cable clip to the motor housing.

    • Lift the cable clip and cord from motor housing.

  3. Bosch 3727DEVS On/Off Switch Replacement: crwdns2935265:03crwdnd2935265:01crwdnd2935265:03crwdne2935265:0 Bosch 3727DEVS On/Off Switch Replacement: crwdns2935265:03crwdnd2935265:02crwdnd2935265:03crwdne2935265:0 Bosch 3727DEVS On/Off Switch Replacement: crwdns2935265:03crwdnd2935265:03crwdnd2935265:03crwdne2935265:0
    crwdns2935267:0crwdne2935267:0
    Flathead 3/32" or 2.5 mm Screwdriver
    $5.49
    crwdns2942207:0crwdne2942207:0
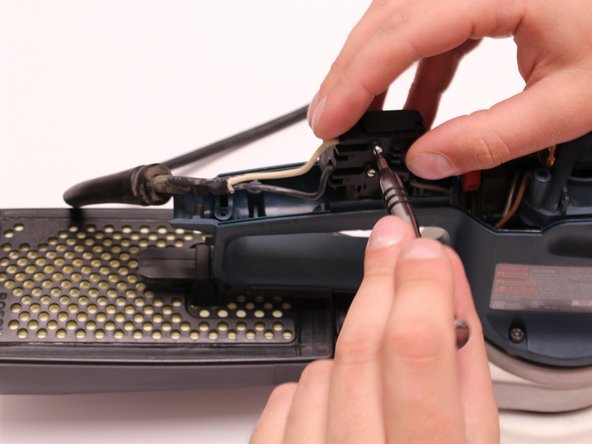
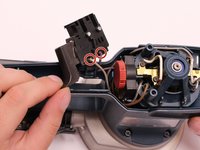
    • Using the 2.5 mm Flathead Screwdriver, loosen the two screws securing the white and black wires to the On/Off Switch.

  4. Bosch 3727DEVS On/Off Switch Replacement: crwdns2935265:04crwdnd2935265:01crwdnd2935265:03crwdne2935265:0 Bosch 3727DEVS On/Off Switch Replacement: crwdns2935265:04crwdnd2935265:02crwdnd2935265:03crwdne2935265:0 Bosch 3727DEVS On/Off Switch Replacement: crwdns2935265:04crwdnd2935265:03crwdnd2935265:03crwdne2935265:0
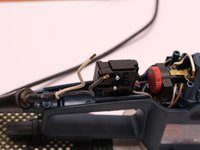
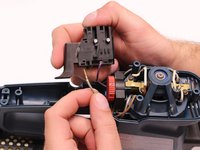
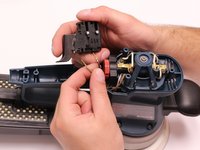
    • Remove the gray and purple wires by pulling on the wire terminals.

crwdns2915888:0crwdne2915888:0

To reassemble your device, follow these instructions in reverse order.

crwdns2935227:0crwdne2935227:0

Peter Brouhle

crwdns2935283:001/29/16crwdne2935283:0

146 crwdns2915208:0crwdne2915208:0

crwdns2935295:0crwdne2935295:0

crwdns2915084:0crwdne2915084:0

Western Carolina University, Team 1-1, Virtue Spring 2016 crwdns2935289:0Western Carolina University, Team 1-1, Virtue Spring 2016crwdne2935289:0

WCU-VIRTUE-S16S1G1

crwdns2931471:05crwdne2931471:0

crwdns2935297:05crwdne2935297:0

crwdns2944067:00crwdne2944067:0

crwdns2917038:0crwdne2917038:0

crwdns2936625:0crwdne2936625:0:

crwdns2936751:024crwdne2936751:0 1

crwdns2936753:07crwdne2936753:0 2

crwdns2936753:030crwdne2936753:0 5

crwdns2942667:0crwdne2942667:0 429