crwdns2915892:0crwdne2915892:0
Follow this guide to replace the motherboard on a Blackberry Curve 8900. The motherboard is a crucial component to keep the phone functioning correctly. If the Blackberry Curve 8900 randomly powers down or unexplainably malfunctions, it might be time for a replacement. To find a replacement, it is recommended to search for the part online using the device name (Blackberry Curve 8900) and the part (motherboard). This guide requires the small iFixit opening tool, a T6 Torx Screwdriver and a gentle touch. This simple 10-step guide is beginner friendly, allowing for an easy replacement.
crwdns2942213:0crwdne2942213:0
-
-
Remove the back cover of the phone.
-
The battery will now be visible.
-
-
-
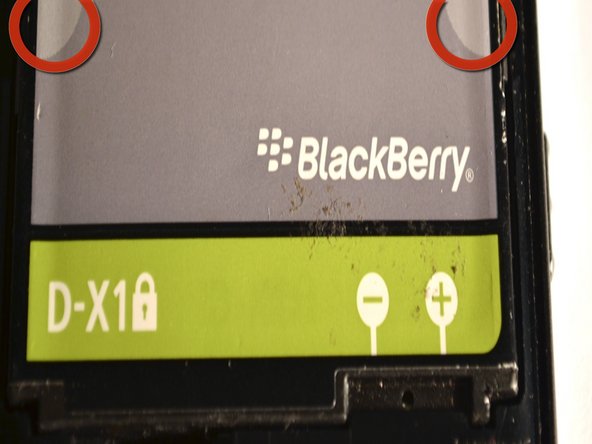
Pinch the battery at the grey semi-circles on the top left and top right corners of the battery using your fingers and remove it from the device.
-
-
-
Remove the lower rear cover, using a small iFixit opening tool.
-
-
-
Remove the six screws from the mid-frame of the device, using the T6 Torx Screwdriver.
-
-
-
-
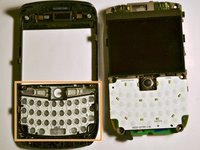
Gently remove the mid-frame from the phone, exposing the motherboard.
-
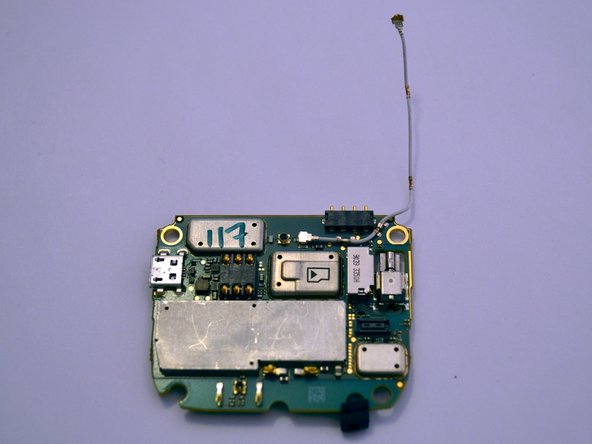
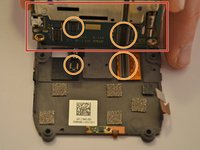
This is the motherboard.
-
-
-
Gently pull back the plastic tabs that secure the motherboard to the case.
-
Slowly pull the tabs, working your way around the case, until they are lifted and the motherboard is free.
-
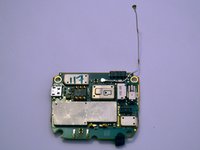
Remove the motherboard.
-
-
-
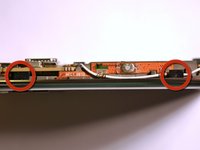
Carefully detach the antenna from the two clips on the side of the motherboard.
-
Disconnect the antenna from the motherboard in the same manner.
-
-
-
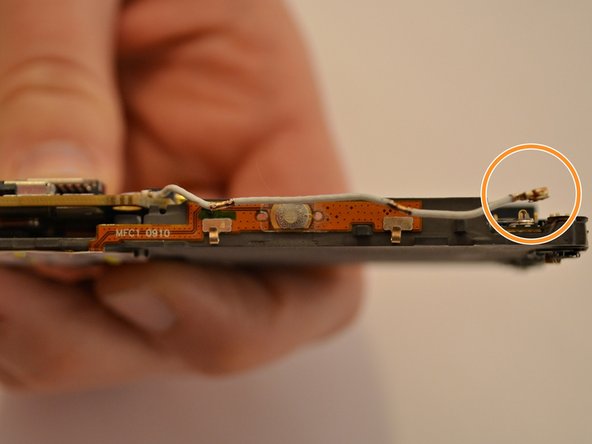
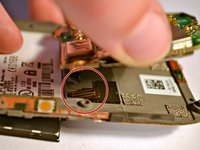
Carefully disconnect the ribbon cable located on the bottom right of the motherboard.
-
-
-
Locate the chip underneath the screen.
-
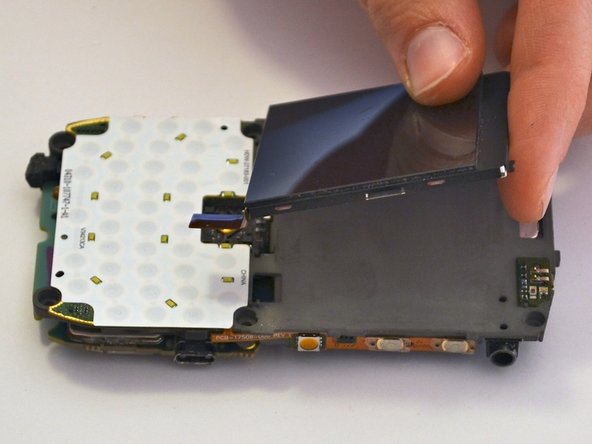
Gently remove the screen, without applying too much pressure, taking care not to damage it.
-
-
-
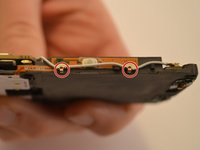
Lift up the motherboard from the bottom edge to reveal the ribbon cables.
-
Carefully disconnect the two ribbon cables connecting the motherboard to the display on either side.
-
Remove the motherboard and place off to the side.
-


To reassemble your device, follow these instructions in reverse order.
crwdns2935221:0crwdne2935221:0
crwdns2935229:03crwdne2935229:0
crwdns2935287:0crwdne2935287:0

Cuesta, Team 1-3, Zipperian Fall 2011 crwdns2935289:0Cuesta, Team 1-3, Zipperian Fall 2011crwdne2935289:0
CUESTA-ZIPPERIAN-F11S1G3
crwdns2931471:03crwdne2931471:0
crwdns2935297:08crwdne2935297:0