crwdns2933423:0crwdne2933423:0

BlackBerry 7100g Screen Replacement

crwdns2942213:0crwdne2942213:0

  1. BlackBerry 7100g Screen Replacement, Battery: crwdns2935265:01crwdnd2935265:01crwdnd2935265:01crwdne2935265:0
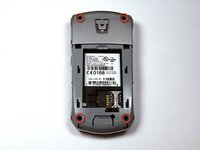
    • Turn over your BalckBerry 7100g so that the back cover is facing up.

    • Locate the battery cover release button near the bottom of the back panel.

  2. BlackBerry 7100g Screen Replacement: crwdns2935265:02crwdnd2935265:01crwdnd2935265:03crwdne2935265:0 BlackBerry 7100g Screen Replacement: crwdns2935265:02crwdnd2935265:02crwdnd2935265:03crwdne2935265:0 BlackBerry 7100g Screen Replacement: crwdns2935265:02crwdnd2935265:03crwdnd2935265:03crwdne2935265:0
    • Push down on the release button with one thumb.

    • Slide the battery cover off with the other thumb.

  3. BlackBerry 7100g Screen Replacement: crwdns2935265:03crwdnd2935265:01crwdnd2935265:01crwdne2935265:0
    • Remove the battery from the battery housing by flipping up the top of the battery.

  4. BlackBerry 7100g Screen Replacement, Housing: crwdns2935265:04crwdnd2935265:01crwdnd2935265:03crwdne2935265:0 BlackBerry 7100g Screen Replacement, Housing: crwdns2935265:04crwdnd2935265:02crwdnd2935265:03crwdne2935265:0 BlackBerry 7100g Screen Replacement, Housing: crwdns2935265:04crwdnd2935265:03crwdnd2935265:03crwdne2935265:0
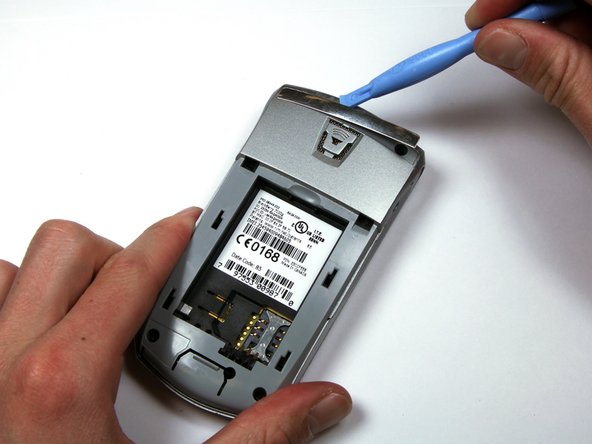
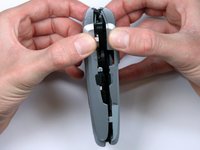
    • Locate the silver strip near the top of your BlackBerry.

    • Use a plastic opening tool to pry off the edge of the silver lining.

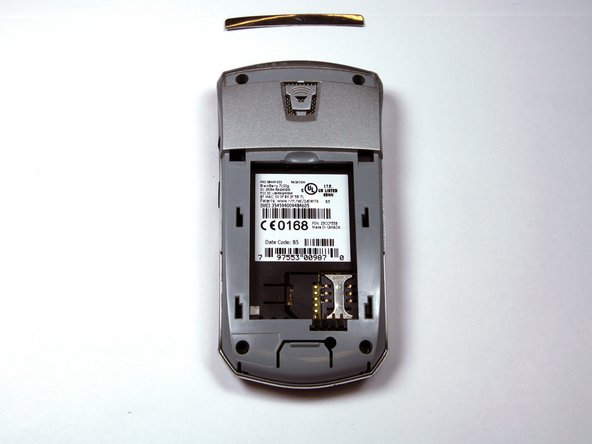
    • Slide the tool along the length of the silver strip to completely remove it.

  5. BlackBerry 7100g Screen Replacement: crwdns2935265:05crwdnd2935265:01crwdnd2935265:02crwdne2935265:0 BlackBerry 7100g Screen Replacement: crwdns2935265:05crwdnd2935265:02crwdnd2935265:02crwdne2935265:0
    • Do not lose the screws. They are quite small and can easily be misplaced.

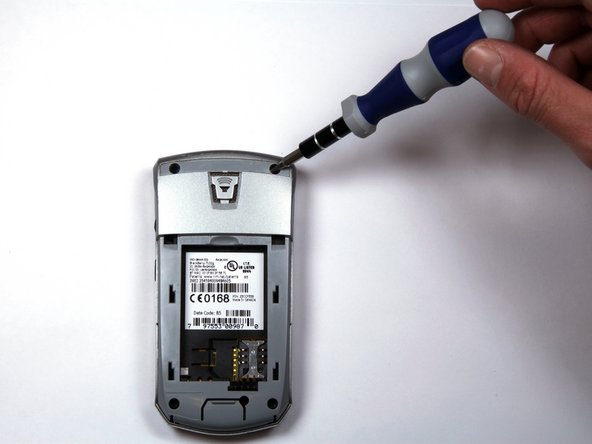
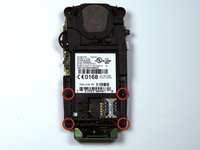
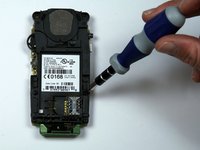
    • Locate and unscrew the four (4) screws using a T6 screwdriver.

  6. BlackBerry 7100g Screen Replacement: crwdns2935265:06crwdnd2935265:01crwdnd2935265:03crwdne2935265:0 BlackBerry 7100g Screen Replacement: crwdns2935265:06crwdnd2935265:02crwdnd2935265:03crwdne2935265:0 BlackBerry 7100g Screen Replacement: crwdns2935265:06crwdnd2935265:03crwdnd2935265:03crwdne2935265:0
    • The keypad cover may fall out of the housing when prying the housing apart.

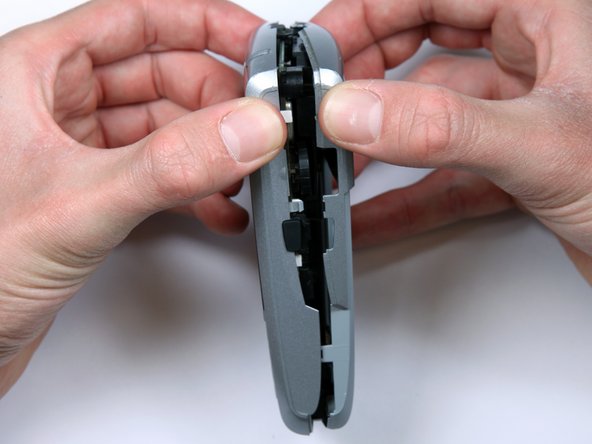
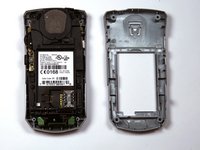
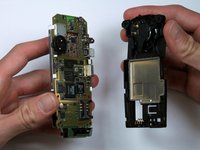
    • Tightly pinch the top of the front and back halves of the housing.

    • Carefully pry the two halves of the housing apart.

  7. BlackBerry 7100g Screen Replacement: crwdns2935265:07crwdnd2935265:01crwdnd2935265:01crwdne2935265:0
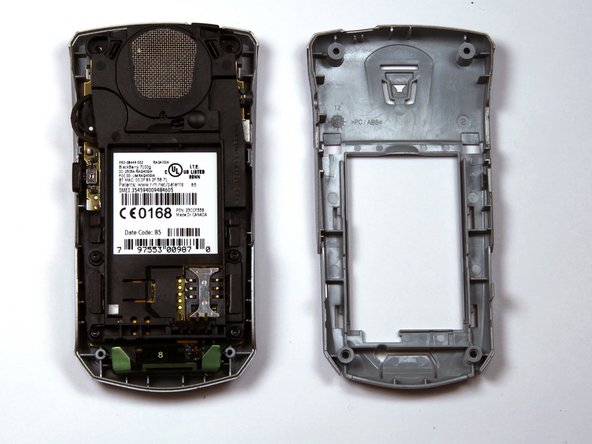
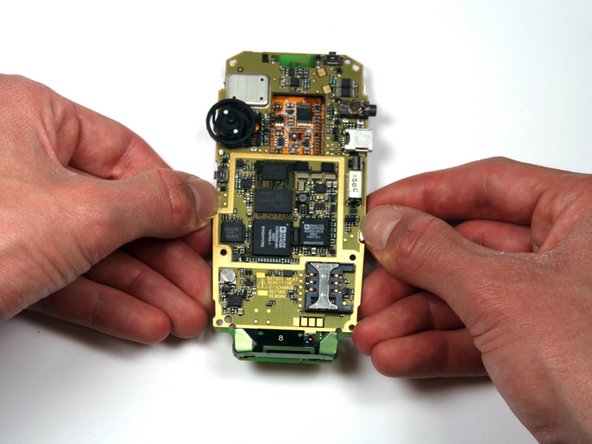
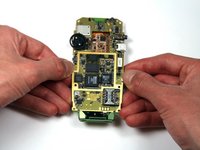
    • You can now easily remove the "guts" of the phone from the housing.

  8. BlackBerry 7100g Screen Replacement, Keypad: crwdns2935265:08crwdnd2935265:01crwdnd2935265:03crwdne2935265:0 BlackBerry 7100g Screen Replacement, Keypad: crwdns2935265:08crwdnd2935265:02crwdnd2935265:03crwdne2935265:0 BlackBerry 7100g Screen Replacement, Keypad: crwdns2935265:08crwdnd2935265:03crwdnd2935265:03crwdne2935265:0
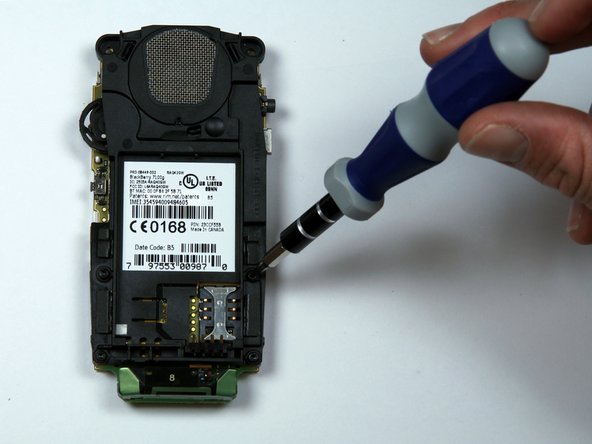
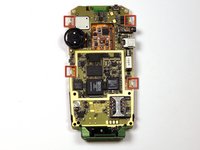
    • Turn the "guts" over so the speaker is facing up.

    • Locate and unscrew the four (4) screws near the bottom of the motherboard, using a T6 screwdriver.

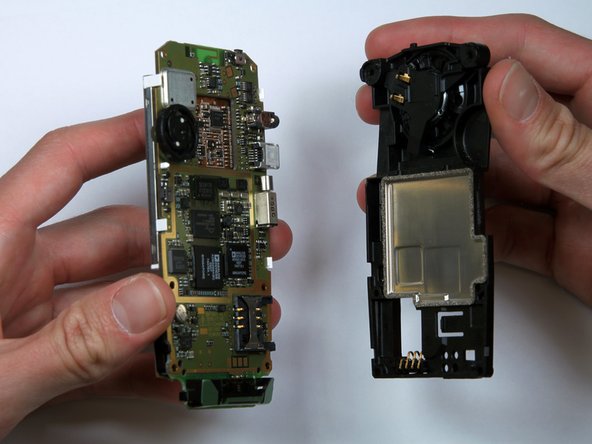
    • Separate the battery housing from the motherboard.

  9. BlackBerry 7100g Screen Replacement: crwdns2935265:09crwdnd2935265:01crwdnd2935265:01crwdne2935265:0
    • Pull the keypad off of the motherboard.

    • It should come off with little effort. If not, there are several tabs that can be released on either side of the keypad.

  10. BlackBerry 7100g Screen Replacement, Screen: crwdns2935265:010crwdnd2935265:01crwdnd2935265:02crwdne2935265:0 BlackBerry 7100g Screen Replacement, Screen: crwdns2935265:010crwdnd2935265:02crwdnd2935265:02crwdne2935265:0
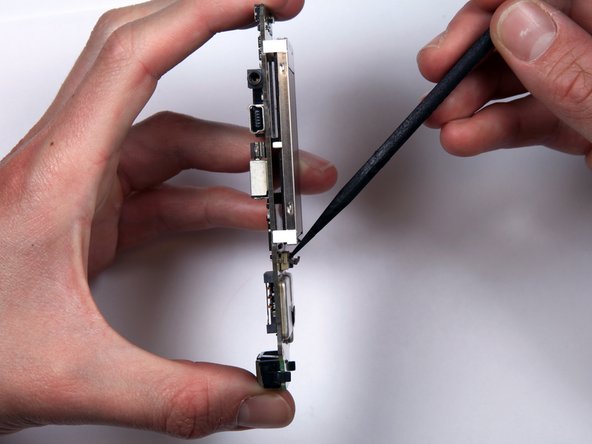
    • Locate the ribbon connector below the bottom of the screen.

    • Use a spudger to flip up the connector.

  11. BlackBerry 7100g Screen Replacement: crwdns2935265:011crwdnd2935265:01crwdnd2935265:03crwdne2935265:0 BlackBerry 7100g Screen Replacement: crwdns2935265:011crwdnd2935265:02crwdnd2935265:03crwdne2935265:0 BlackBerry 7100g Screen Replacement: crwdns2935265:011crwdnd2935265:03crwdnd2935265:03crwdne2935265:0
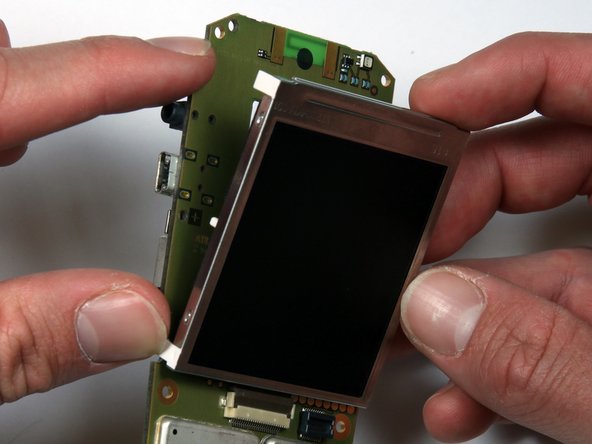
    • Locate the four (4) white tabs that attach the screen to the motherboard.

    • Carefully detach the tabs from the motherboard.

    • The screen can now be removed from the motherboard.

crwdns2915888:0crwdne2915888:0

To reassemble your device, follow these instructions in reverse order.

crwdns2935227:0crwdne2935227:0

Adriel Salinas

crwdns2935283:004/11/10crwdne2935283:0

42 crwdns2915208:0crwdne2915208:0

crwdns2935297:02crwdne2935297:0

crwdns2915084:0crwdne2915084:0

Cal Poly, Team 25-87, Amido Spring 2010 crwdns2935289:0Cal Poly, Team 25-87, Amido Spring 2010crwdne2935289:0

CPSU-AMIDO-S10S25G87

crwdns2931471:04crwdne2931471:0

crwdns2935297:016crwdne2935297:0

crwdns2917034:0crwdne2917034:0

just a heads up don't do this with a iPhone it does not work at All!

Jaxson HUTCHINSON - crwdns2934203:0crwdne2934203:0

crwdns2917038:0crwdne2917038:0

crwdns2936625:0crwdne2936625:0:

crwdns2936751:024crwdne2936751:0 3

crwdns2936753:07crwdne2936753:0 7

crwdns2936753:030crwdne2936753:0 11

crwdns2942667:0crwdne2942667:0 1,866