crwdns2933423:0crwdne2933423:0

Black and Decker WP900 Exterior Casing Replacement

crwdns2942213:0crwdne2942213:0

  1. Black and Decker WP900 Exterior Casing Replacement, Exterior Casing: crwdns2935265:01crwdnd2935265:01crwdnd2935265:01crwdne2935265:0
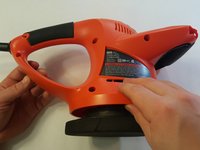
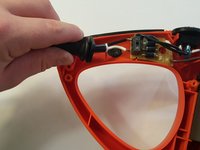
    • Using the plastic tool, detach the handle tab as shown.

    • Make sure the device is unplugged.

  2. Black and Decker WP900 Exterior Casing Replacement: crwdns2935265:02crwdnd2935265:01crwdnd2935265:01crwdne2935265:0
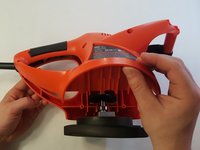
    • Using the Phillips #1 screwdriver, unscrew all of the screws. There should be 8-30mm screws to remove.

    • Be sure to keep track of where each screw was placed in the device for later reassembly.

  3. Black and Decker WP900 Exterior Casing Replacement: crwdns2935265:03crwdnd2935265:01crwdnd2935265:03crwdne2935265:0 Black and Decker WP900 Exterior Casing Replacement: crwdns2935265:03crwdnd2935265:02crwdnd2935265:03crwdne2935265:0 Black and Decker WP900 Exterior Casing Replacement: crwdns2935265:03crwdnd2935265:03crwdnd2935265:03crwdne2935265:0
    • Remove the back panel of the external casing, leaving all internal components resting in the front panel.

    • Remove the black handle from the main external casing.

  4. Black and Decker WP900 Exterior Casing Replacement: crwdns2935265:04crwdnd2935265:01crwdnd2935265:01crwdne2935265:0
    • Using the Phillips #1 screwdriver, remove the two 22mm screws.

    • The metal bracket will detach with the two screws.

    • Using the Flathead 3/32" screwdriver, remove two 22mm screws.

  5. Black and Decker WP900 Exterior Casing Replacement: crwdns2935265:05crwdnd2935265:01crwdnd2935265:02crwdne2935265:0 Black and Decker WP900 Exterior Casing Replacement: crwdns2935265:05crwdnd2935265:02crwdnd2935265:02crwdne2935265:0
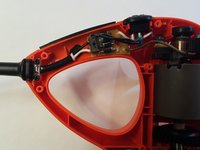
    • Gently pull the power cord out from the control module.

    • Remember, when reassembling the device, the black wire should be on the top.

  6. Black and Decker WP900 Exterior Casing Replacement: crwdns2935265:06crwdnd2935265:01crwdnd2935265:01crwdne2935265:0
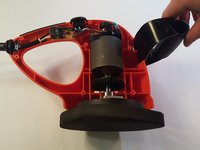
    • Firmly grasping the motor dislodge the internal components from the frontal external casing.

    • Once the motor has been removed, the external casing can now be replaced.

crwdns2915888:0crwdne2915888:0

To reassemble your device, follow these instructions in reverse order.

David Hutchings

crwdns2935283:003/28/16crwdne2935283:0

101 crwdns2915208:0crwdne2915208:0

crwdns2935295:0crwdne2935295:0

crwdns2915084:0crwdne2915084:0

IUPUI, Team 8-8, Wilson Spring 2016 crwdns2935289:0IUPUI, Team 8-8, Wilson Spring 2016crwdne2935289:0

IUPUI-WILSON-S16S8G8

crwdns2931471:04crwdne2931471:0

crwdns2935297:04crwdne2935297:0

crwdns2917034:0crwdne2917034:0

Hello, this is Adam Kinnett from Group 7. You have done an excellent job on your photos as well as the descriptions and formatting.

**One of your Wiki pages on the search says "Back and Decker".

Adam Kinnett - crwdns2934203:0crwdne2934203:0

crwdns2917038:0crwdne2917038:0

crwdns2936625:0crwdne2936625:0:

crwdns2936751:024crwdne2936751:0 0

crwdns2936753:07crwdne2936753:0 0

crwdns2936753:030crwdne2936753:0 10

crwdns2942667:0crwdne2942667:0 871