crwdns2915892:0crwdne2915892:0
Use this guide to replace the battery in your Beats Studio3 Wireless headphones (model number: A1914).
The battery helps the Beats Studio3 Wireless headphones to power on. It's designed for long battery life of up to 22 hours for all-day. A failed battery will cause your Beats Studio3 Wireless to not turn on. You can take a look at the bottom right ear pad to check if the five lights are on. In some cases, your Beats Studio3 Wireless will have faulty charging due to a deteriorated battery.
crwdns2942213:0crwdne2942213:0
-
-
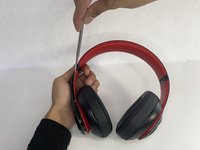
Use a pointed nylon spudger to remove the center circular panel on the right side of your device.
 crwdns2952109:0crwdne2952109:0
-
-
-
Remove the four 3.5 mm screws using a Phillips #0 screwdriver.
-
-
-
-
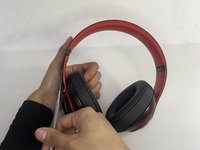
Using a pointed nylon spudger, remove the tab located on the inner part of the headband labeled "R."
-
Place the nylon spudger in between the side panels and push inward going from bottom to top to separate both sides of the panel.
-
-
-
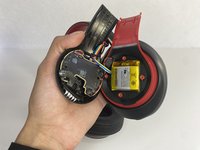
Place the nylon spudger underneath the battery, push inward and separate the battery from the inside.
-
-
-
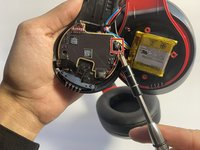
Use a nylon spudger to lift up the glue sticking the wires down.
-
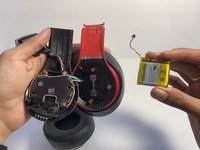
Use a nylon spudger to lift the connector to disconnect the battery.
-


To reassemble your device, follow these instructions in reverse order.
crwdns2935221:0crwdne2935221:0
crwdns2935229:07crwdne2935229:0
crwdns2935287:0crwdne2935287:0

UMass Dartmouth, Team 7-4, Ryckebusch Spring 2023 crwdns2935289:0UMass Dartmouth, Team 7-4, Ryckebusch Spring 2023crwdne2935289:0
UMASSD-RYCKEBUSCH-S23S7G4
crwdns2931471:03crwdne2931471:0
crwdns2935297:09crwdne2935297:0
crwdns2947412:04crwdne2947412:0
Should the glue be reapplied or is it okay to simply place back on?
Jake Allen - crwdns2934203:0crwdne2934203:0 crwdns2950251:0crwdne2950251:0
the replacement batteries usually come with a gluepad on the back.
The connector its up to you - you risk the chance of the connector coming lose and u have to reopen the headset. But ill take the chance for now, lets see how it holds up without new glue.
seb - crwdns2934203:0crwdne2934203:0 crwdns2950251:0crwdne2950251:0
Tengo una duda mis audífonos la batería esta full de voltaje pero me marca un rojo y no me prenden q podría ser o que solución podría darle
luis m cruz - crwdns2934203:0crwdne2934203:0 crwdns2950251:0crwdne2950251:0
My beats studio 3 proplem was it plink whit when i connect it with the charger, but when i press to start it it blinks full red .
My Qus is .. is the battery are dameged ..?!
Hmam - crwdns2934203:0crwdne2934203:0 crwdns2950251:0crwdne2950251:0