crwdns2933423:0crwdne2933423:0

Beats Studio 2 Wireless Speaker Replacement

crwdns2942213:0crwdne2942213:0

  1. Beats Studio 2 Wireless Speaker Replacement, Ear Cushion: crwdns2935265:01crwdnd2935265:01crwdnd2935265:02crwdne2935265:0 Beats Studio 2 Wireless Speaker Replacement, Ear Cushion: crwdns2935265:01crwdnd2935265:02crwdnd2935265:02crwdne2935265:0
    • Insert a spudger between the plastic part of the left headphone and the ear cushion.

    • Work the spudger around the periphery of the base of the cushion and gently pry it off the head phone.

  2. Beats Studio 2 Wireless Speaker Replacement: crwdns2935265:02crwdnd2935265:01crwdnd2935265:03crwdne2935265:0 Beats Studio 2 Wireless Speaker Replacement: crwdns2935265:02crwdnd2935265:02crwdnd2935265:03crwdne2935265:0 Beats Studio 2 Wireless Speaker Replacement: crwdns2935265:02crwdnd2935265:03crwdnd2935265:03crwdne2935265:0
    • Pull the rest of the cushion away from the adhesive with your hands.

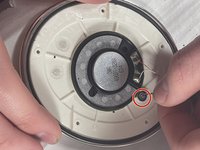
  3. Beats Studio 2 Wireless Speaker Replacement, Speaker: crwdns2935265:03crwdnd2935265:01crwdnd2935265:02crwdne2935265:0 Beats Studio 2 Wireless Speaker Replacement, Speaker: crwdns2935265:03crwdnd2935265:02crwdnd2935265:02crwdne2935265:0
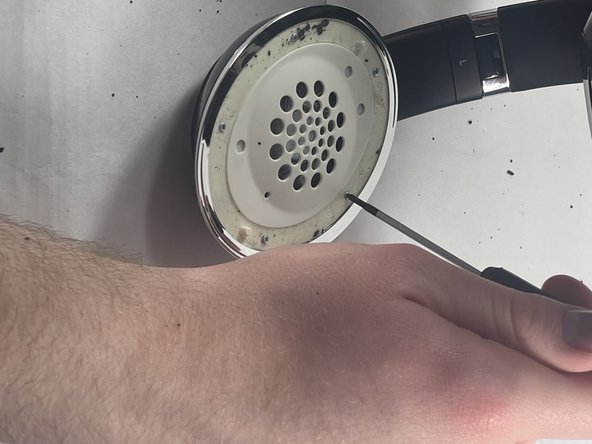
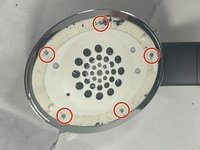
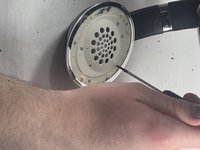
    • Using the Phillips #00 screwdriver, remove the screws holding the speaker in place.

    • If the speaker is on the side with the charging port be sure to keep the two screws holding the charging port separate.

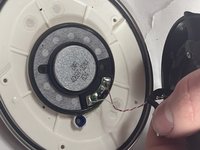
  4. Beats Studio 2 Wireless Speaker Replacement: crwdns2935265:04crwdnd2935265:01crwdnd2935265:01crwdne2935265:0
    • Gently separate the speaker from the headphones.

    • Don't pull or yank the speaker from the headphones. They are connected together by wires that might be damaged.

  5. Beats Studio 2 Wireless Speaker Replacement: crwdns2935265:05crwdnd2935265:01crwdnd2935265:02crwdne2935265:0 Beats Studio 2 Wireless Speaker Replacement: crwdns2935265:05crwdnd2935265:02crwdnd2935265:02crwdne2935265:0
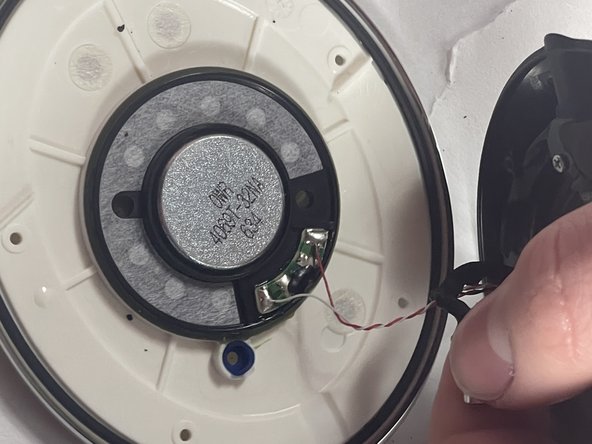
    • Gently pull the wire with rubber connectors off of the speaker.

  6. Beats Studio 2 Wireless Speaker Replacement: crwdns2935265:06crwdnd2935265:01crwdnd2935265:01crwdne2935265:0
    • Use a soldering iron to desolder the two connections.

    • For details on how to solder and desolder, refer to the How to Solder and Desolder Connections guide.

    • A soldering iron can produce very high temperatures, and can burn skin. Use with caution.

    • Note the position of the speaker in its housing, then carefully remove the faulty speaker.

crwdns2915888:0crwdne2915888:0

After soldering the new speaker, reassemble your device by following the steps in reverse order.

crwdns2935229:03crwdne2935229:0

Mike Rosiello

crwdns2935283:003/20/23crwdne2935283:0

313 crwdns2915208:0crwdne2915208:0

crwdns2935297:02crwdne2935297:0

crwdns2915084:0crwdne2915084:0

UMass Dartmouth, Team 5-3, Ramos Spring 2023 crwdns2935289:0UMass Dartmouth, Team 5-3, Ramos Spring 2023crwdne2935289:0

UMASSD-RAMOS-S23S5G3

crwdns2931471:03crwdne2931471:0

crwdns2935297:04crwdne2935297:0

crwdns2917034:0crwdne2917034:0

I didn't need to replace a speaker but just touch up the solder joints, this was a great guide! Thank you!

William Pryor - crwdns2934203:0crwdne2934203:0

crwdns2917038:0crwdne2917038:0

crwdns2936625:0crwdne2936625:0:

crwdns2936751:024crwdne2936751:0 3

crwdns2936753:07crwdne2936753:0 5

crwdns2936753:030crwdne2936753:0 16

crwdns2942667:0crwdne2942667:0 270