crwdns2933423:0crwdne2933423:0
crwdns2947577:0crwdnd2947577:0crwdne2947577:0

Beats Studio 2 Wireless Battery Replacement

crwdns2942213:0crwdne2942213:0

    1. Beats Studio 2 Wireless Battery Replacement, Battery: crwdns2935265:01crwdnd2935265:01crwdnd2935265:02crwdne2935265:0 Beats Studio 2 Wireless Battery Replacement, Battery: crwdns2935265:01crwdnd2935265:02crwdnd2935265:02crwdne2935265:0
      • Using a spudger, remove the panel circling the ‘b’ Beats logo on the right earphone by applying pressure upwards under the panel until it is removed.

      crwdns2952109:0crwdne2952109:0

      crwdns2917038:0crwdne2917038:0

    2. Beats Studio 2 Wireless Battery Replacement: crwdns2935265:02crwdnd2935265:01crwdnd2935265:02crwdne2935265:0 Beats Studio 2 Wireless Battery Replacement: crwdns2935265:02crwdnd2935265:02crwdnd2935265:02crwdne2935265:0
      • Remove the four screws securing the housing with a Phillips #00 screwdriver.

      crwdns2952109:0crwdne2952109:0

      crwdns2917038:0crwdne2917038:0

    3. Beats Studio 2 Wireless Battery Replacement: crwdns2935265:03crwdnd2935265:01crwdnd2935265:01crwdne2935265:0
      • Use a spudger to release the clip in the seam under the silver “studio” label.

      • Remove the right side of the headband.

      crwdns2952109:0crwdne2952109:0

      crwdns2917038:0crwdne2917038:0

    4. Beats Studio 2 Wireless Battery Replacement: crwdns2935265:04crwdnd2935265:01crwdnd2935265:01crwdne2935265:0
      • Gently remove the right earphone speaker from the headband by sliding the speaker downwards.

      crwdns2952109:0crwdne2952109:0

      crwdns2917038:0crwdne2917038:0

    5. Beats Studio 2 Wireless Battery Replacement: crwdns2935265:05crwdnd2935265:01crwdnd2935265:03crwdne2935265:0 Beats Studio 2 Wireless Battery Replacement: crwdns2935265:05crwdnd2935265:02crwdnd2935265:03crwdne2935265:0 Beats Studio 2 Wireless Battery Replacement: crwdns2935265:05crwdnd2935265:03crwdnd2935265:03crwdne2935265:0
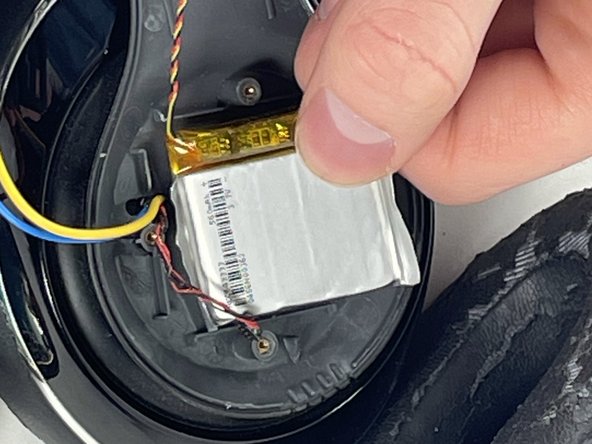
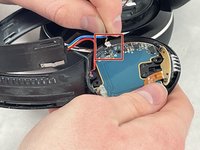
      • Use the pointed tip of a spudger to carefully push on each side of the connector to release it from the socket on the motherboard.

      • Be gentle with the connectors as they can break easily.

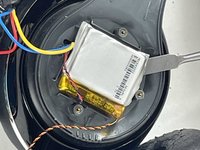
      • Don't use a metal spudger to remove a battery or any internal component. This is potentially dangerous as it could puncture the battery and cause a fire or worse.

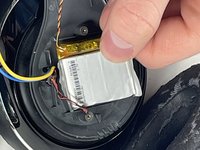
      • Use a nylon spudger to remove the battery from the headphones.

      crwdns2952109:0crwdne2952109:0

      crwdns2917038:0crwdne2917038:0

crwdns2915888:0crwdne2915888:0

To reassemble your device, follow these instructions in reverse order.

crwdns2935221:0crwdne2935221:0

crwdns2935229:07crwdne2935229:0

Jack Wilson

crwdns2935283:003/20/23crwdne2935283:0

617 crwdns2915208:0crwdne2915208:0

crwdns2935297:02crwdne2935297:0

crwdns2935287:0crwdne2935287:0

UMass Dartmouth, Team 5-3, Ramos Spring 2023 crwdns2935289:0UMass Dartmouth, Team 5-3, Ramos Spring 2023crwdne2935289:0

UMASSD-RAMOS-S23S5G3

crwdns2931471:03crwdne2931471:0

crwdns2935297:048crwdne2935297:0

crwdns2947412:00crwdne2947412:0

crwdns2917038:0crwdne2917038:0

crwdns2936625:0crwdne2936625:0:

crwdns2936751:024crwdne2936751:0 2

crwdns2936753:07crwdne2936753:0 34

crwdns2936753:030crwdne2936753:0 183

crwdns2942667:0crwdne2942667:0 7,165