crwdns2933423:0crwdne2933423:0

Base

crwdns2862623:0crwdne2862623:0
crwdns2942641:0crwdne2942641:0
  1. Base, Lower the device down: crwdns2935265:01crwdnd2935265:01crwdnd2935265:03crwdne2935265:0 Base, Lower the device down: crwdns2935265:01crwdnd2935265:02crwdnd2935265:03crwdne2935265:0 Base, Lower the device down: crwdns2935265:01crwdnd2935265:03crwdnd2935265:03crwdne2935265:0
    • Before beginning repairs, disconnect the device from power, disconnect all hoses, drain and depressurize the system, and let the device cool if the heater was recently used.

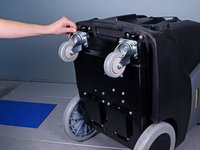
    • Lower the device down so it is laying on its backside, bottom facing out.

  2. Base, Remove the wing nuts: crwdns2935265:02crwdnd2935265:01crwdnd2935265:01crwdne2935265:0
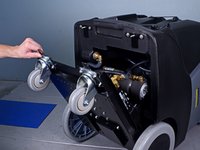
    • Remove the two wing nuts securing the base to the device.

    • The base is heavy, so be prepared to lower it down slowly once the wing nuts are removed.

  3. Base, Lower the base down: crwdns2935265:03crwdnd2935265:01crwdnd2935265:03crwdne2935265:0 Base, Lower the base down: crwdns2935265:03crwdnd2935265:02crwdnd2935265:03crwdne2935265:0 Base, Lower the base down: crwdns2935265:03crwdnd2935265:03crwdnd2935265:03crwdne2935265:0
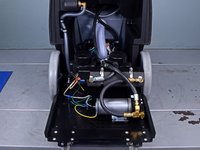
    • Lower the base down until the swivel wheels touch the ground.
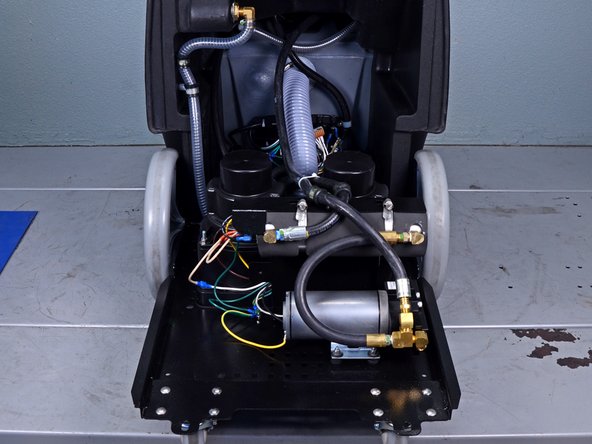
crwdns2915888:0crwdne2915888:0

To reassemble your device, follow these instructions in reverse order.

Carsten Frauenheim

crwdns2935283:003/10/20crwdne2935283:0

141 557 crwdns2915208:0crwdne2915208:0

crwdns2935297:0422crwdne2935297:0

crwdns2915084:0crwdne2915084:0

iFixit crwdns2935289:0iFixitcrwdne2935289:0

Staff

crwdns2931471:0120crwdne2931471:0

crwdns2935297:020 002crwdne2935297:0

crwdns2947412:00crwdne2947412:0

crwdns2917038:0crwdne2917038:0

crwdns2936625:0crwdne2936625:0:

crwdns2936751:024crwdne2936751:0 0

crwdns2936753:07crwdne2936753:0 0

crwdns2936753:030crwdne2936753:0 11

crwdns2942667:0crwdne2942667:0 20