crwdns2933423:0crwdne2933423:0

BLU R2 Plus Rear-Facing Camera Replacement

crwdns2942213:0crwdne2942213:0

  1. BLU R2 Plus Rear-Facing Camera Replacement, Power Off: crwdns2935265:01crwdnd2935265:01crwdnd2935265:01crwdne2935265:0
    • Be sure that your BLU R2 Plus is completely powered off and has less than 25% battery left. This will lower the chance of your battery catching fire and your logic board/motherboard shorting out.

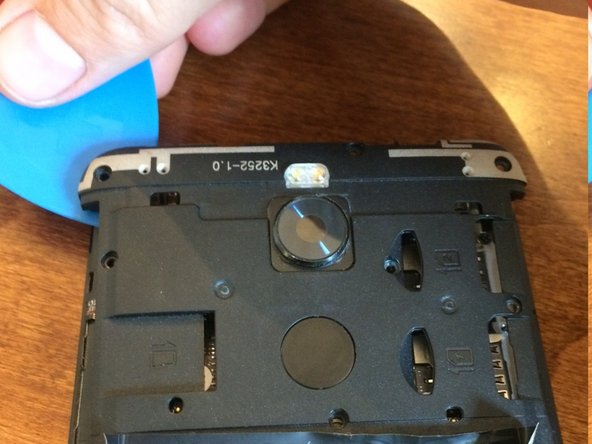
  2. BLU R2 Plus Rear-Facing Camera Replacement, Releasing the Back Cover: crwdns2935265:02crwdnd2935265:01crwdnd2935265:03crwdne2935265:0 BLU R2 Plus Rear-Facing Camera Replacement, Releasing the Back Cover: crwdns2935265:02crwdnd2935265:02crwdnd2935265:03crwdne2935265:0 BLU R2 Plus Rear-Facing Camera Replacement, Releasing the Back Cover: crwdns2935265:02crwdnd2935265:03crwdnd2935265:03crwdne2935265:0
    • Insert your pick in the top left-hand corner where the little indent is.

    • Slide the pick all the way around the phone until the back cover is loose and ready to be released.

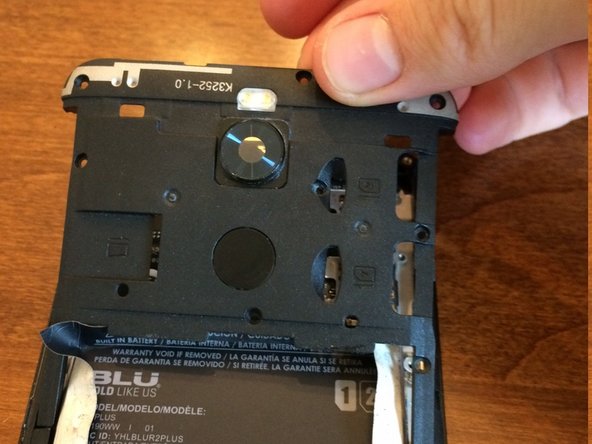
  3. BLU R2 Plus Rear-Facing Camera Replacement, Remove Back Cover: crwdns2935265:03crwdnd2935265:01crwdnd2935265:01crwdne2935265:0
    • Remove the Back Cover to gain access to sim card trays, the memory card slot, or just to replace it.

  4. BLU R2 Plus Rear-Facing Camera Replacement, Unscrew Upper Plastic Plate: crwdns2935265:04crwdnd2935265:01crwdnd2935265:02crwdne2935265:0 BLU R2 Plus Rear-Facing Camera Replacement, Unscrew Upper Plastic Plate: crwdns2935265:04crwdnd2935265:02crwdnd2935265:02crwdne2935265:0
    crwdns2935267:0crwdne2935267:0
    Magnetic Project Mat
    $19.95
    crwdns2942207:0crwdne2942207:0
    • Use a Phillips #00 screwdriver to remove the 9 screws from the upper plastic plate.

    • Use a magnetic mat to organize your screws and prevent you from losing them.

  5. BLU R2 Plus Rear-Facing Camera Replacement, Upper Plate Removal: crwdns2935265:05crwdnd2935265:01crwdnd2935265:03crwdne2935265:0 BLU R2 Plus Rear-Facing Camera Replacement, Upper Plate Removal: crwdns2935265:05crwdnd2935265:02crwdnd2935265:03crwdne2935265:0 BLU R2 Plus Rear-Facing Camera Replacement, Upper Plate Removal: crwdns2935265:05crwdnd2935265:03crwdnd2935265:03crwdne2935265:0
    • Use an opening pick to unclip the upper plastic plate from the phone.

    • Once unclipped, slide it up and out of the phone.

    • Be careful not to break the small arms of the plate upon removal.

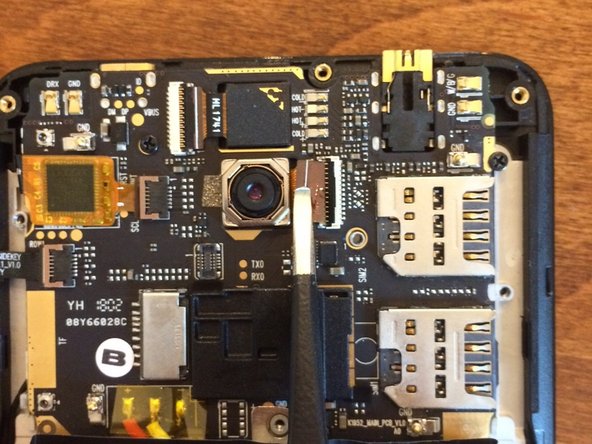
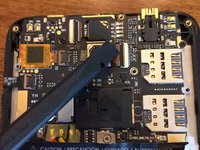
  6. BLU R2 Plus Rear-Facing Camera Replacement, Rear-Facing Camera Removal: crwdns2935265:06crwdnd2935265:01crwdnd2935265:03crwdne2935265:0 BLU R2 Plus Rear-Facing Camera Replacement, Rear-Facing Camera Removal: crwdns2935265:06crwdnd2935265:02crwdnd2935265:03crwdne2935265:0 BLU R2 Plus Rear-Facing Camera Replacement, Rear-Facing Camera Removal: crwdns2935265:06crwdnd2935265:03crwdnd2935265:03crwdne2935265:0
    crwdns2935267:0crwdne2935267:0
    Tweezers
    $4.99
    crwdns2942207:0crwdne2942207:0
    • Use a spudger to unclip the ribbon cable from the motherboard/logic board. Carefully use blunt tweezers or angled tweezers to pull the ribbon cable out of the socket. Then use the tweezers to wiggle the camera out of its socket.

    • Be very careful not to break the ribbon cable as it's very fragile. This doesn't really matter if you're taking the camera out as it's already broken.

crwdns2915888:0crwdne2915888:0

To reassemble your device, follow these instructions in reverse order.

crwdns2935227:0crwdne2935227:0

Derek Thomas

crwdns2935283:009/02/21crwdne2935283:0

772 crwdns2915208:0crwdne2915208:0

crwdns2935297:05crwdne2935297:0

crwdns2944067:00crwdne2944067:0

crwdns2917038:0crwdne2917038:0

crwdns2936625:0crwdne2936625:0:

crwdns2936751:024crwdne2936751:0 0

crwdns2936753:07crwdne2936753:0 4

crwdns2936753:030crwdne2936753:0 5

crwdns2942667:0crwdne2942667:0 28