crwdns2915892:0crwdne2915892:0
Fix the distorted or unclear image in your Blu Life XL.
This guide instructs you on how to remove the back cover of the phone and replace the rear camera.
crwdns2942213:0crwdne2942213:0
-
-
Turn the device off by holding down the power button for up to 5 seconds and then tapping the "Power off" button on the screen.
-
Remove the rear cover using your hands at the lip on the device back cover. No tools required.
-
Remove the battery by lifting the lower edge of the battery up first.
-
-
-
Remove the 12x3mm screws from the rear plate using the Phillips#000 screwdriver.
-
-
-
-
Insert the plastic prying tool in between the plastic frame and the device.
-
Keep the phone on the surface with its screen down.
-
-
-
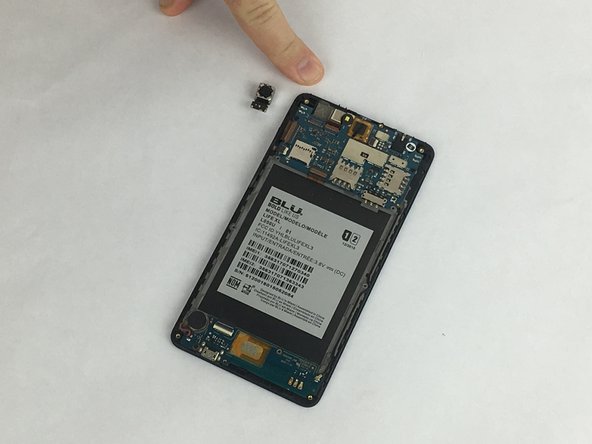
Use the plastic prying tool to gently push the rear camera out from its socket.
-
Take the camera out and set it aside.
-
-
-
Carefully place the new camera in the camera socket.
-
Apply a little force on the top of the camera to slide it in the socket.
-
Pop the camera in the socket and make sure its stable.
-


To reassemble your device, follow these instructions in reverse order.
To reassemble your device, follow these instructions in reverse order.
crwdns2915084:0crwdne2915084:0

USF Tampa, Team S2-G5, Eyestone Spring 2018 crwdns2935289:0USF Tampa, Team S2-G5, Eyestone Spring 2018crwdne2935289:0
USFT-EYESTONE-S18S2G5
crwdns2931471:03crwdne2931471:0
crwdns2935297:05crwdne2935297:0