crwdns2933423:0crwdne2933423:0

Audio-Technica LP60XBT Turntable Gear Replacement

crwdns2942213:0crwdne2942213:0

  1. Audio-Technica LP60XBT Turntable Gear Replacement, Gear: crwdns2935265:01crwdnd2935265:01crwdnd2935265:02crwdne2935265:0 Audio-Technica LP60XBT Turntable Gear Replacement, Gear: crwdns2935265:01crwdnd2935265:02crwdnd2935265:02crwdne2935265:0
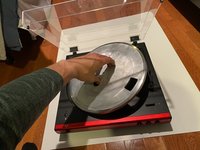
    • Remove the felt pad, and put it to the side.

  2. Audio-Technica LP60XBT Turntable Gear Replacement: crwdns2935265:02crwdnd2935265:01crwdnd2935265:01crwdne2935265:0
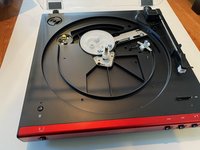
    • Turn the platter so that the brass motor pulley can be seen through one of the two outer holes in the platter.

    • If the drive belt is hooked around the motor pulley, unhook it.

    • When reassembling to device, don't forget to hook the new drive belt to the motor pulley.

  3. Audio-Technica LP60XBT Turntable Gear Replacement: crwdns2935265:03crwdnd2935265:01crwdnd2935265:02crwdne2935265:0 Audio-Technica LP60XBT Turntable Gear Replacement: crwdns2935265:03crwdnd2935265:02crwdnd2935265:02crwdne2935265:0
    • Remove the platter by grasping the platter by its two inner holes and lifting it upwards.

    • If the drive belt is unhooked and the tone arm is safely to the side, don’t be afraid to use a small amount of force in lifting the platter if necessary.

  4. Audio-Technica LP60XBT Turntable Gear Replacement: crwdns2935265:04crwdnd2935265:01crwdnd2935265:01crwdne2935265:0
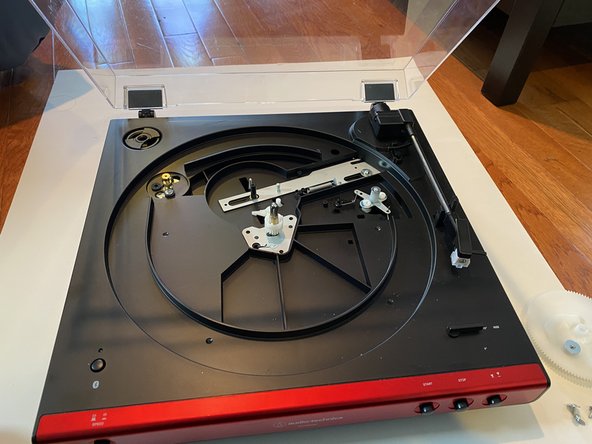
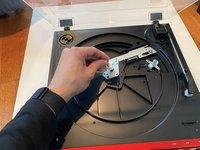
    • Remove the four screws holding in the gears using a Phillips #0 screwdriver.

  5. Audio-Technica LP60XBT Turntable Gear Replacement: crwdns2935265:05crwdnd2935265:01crwdnd2935265:03crwdne2935265:0 Audio-Technica LP60XBT Turntable Gear Replacement: crwdns2935265:05crwdnd2935265:02crwdnd2935265:03crwdne2935265:0 Audio-Technica LP60XBT Turntable Gear Replacement: crwdns2935265:05crwdnd2935265:03crwdnd2935265:03crwdne2935265:0
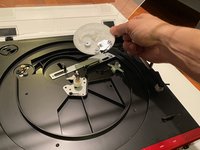
    • Remove the large white gear by pulling it upwards.

    • Remove the small white gear and base by pulling them upwards.

  6. Audio-Technica LP60XBT Turntable Gear Replacement: crwdns2935265:06crwdnd2935265:01crwdnd2935265:01crwdne2935265:0
    • Insert the small replacement gear first, then the large replacement gear second.

    • When replacing the smaller gear and base, be sure to feed the black ground wire through the hole in the base.

crwdns2915888:0crwdne2915888:0

To reassemble your device, follow these instructions in reverse order.

Devon Ferreira

crwdns2935283:003/22/21crwdne2935283:0

133 crwdns2915208:0crwdne2915208:0

crwdns2935295:0crwdne2935295:0

crwdns2915084:0crwdne2915084:0

UMass Dartmouth, Team S1-G8, Sinclaire Spring 2021 crwdns2935289:0UMass Dartmouth, Team S1-G8, Sinclaire Spring 2021crwdne2935289:0

UMASSD-SINCLAIRE-S21S1G8

crwdns2934841:01crwdne2934841:0

crwdns2935303:01crwdne2935303:0

crwdns2944067:00crwdne2944067:0

crwdns2917038:0crwdne2917038:0

crwdns2936625:0crwdne2936625:0:

crwdns2936751:024crwdne2936751:0 1

crwdns2936753:07crwdne2936753:0 7

crwdns2936753:030crwdne2936753:0 27

crwdns2942667:0crwdne2942667:0 1,450