crwdns2915892:0crwdne2915892:0
Replace or upgrade your hard drive in your laptop to gain more storage space!
crwdns2942213:0crwdne2942213:0
-
crwdns2935267:0crwdne2935267:0T5 Torx Screwdriver$9.99
-
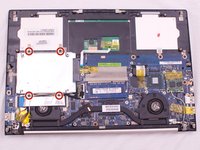
Remove the twelve 3 mm bottom panel screws with a T5 Torx Screwdriver.
-
-
-
Use a plastic opening tool to pry along the perimeter of the bottom panel until it can be easily removed.
-
Remove the bottom panel from the body of the laptop.
-
Set aside the bottom panel.
-
-
-
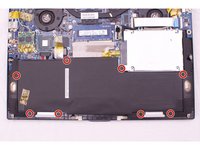
Remove the eight 3 mm Phillips #0 screws on the bottom panel.
-
-
-
-
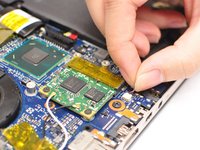
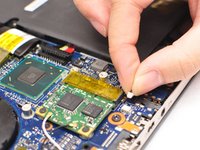
Pry up each side of the flat connectors by hand or with a plastic opening tool.
-
Lift the connector straight up from its socket.
-
-
-
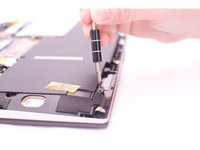
Unplug the two bundled cable connectors on each side of the battery.
-
Pull the cable away from the connector in the same direction as the individual wires are running.
-
-
crwdns2935267:0crwdne2935267:0Phillips #0 Screwdriver$5.49
-
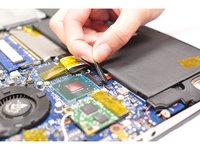
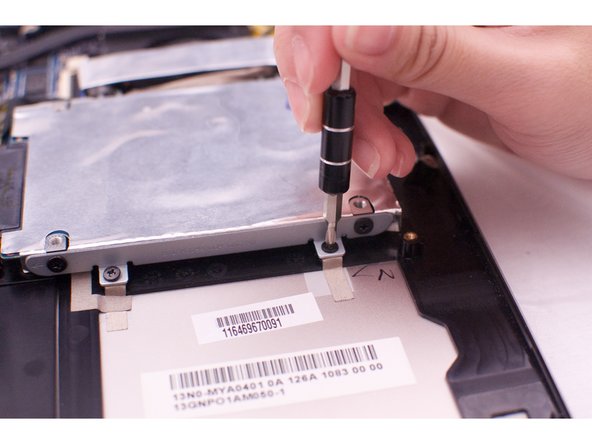
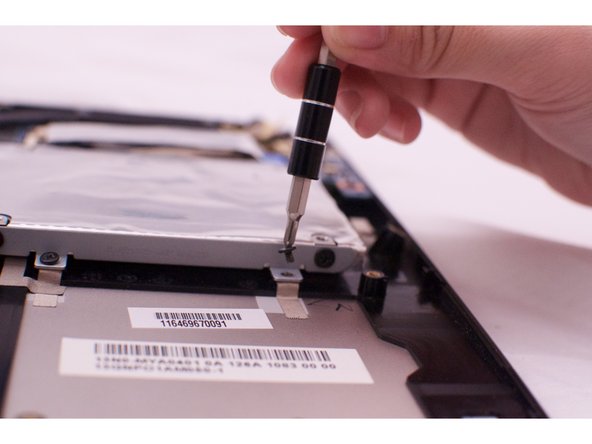
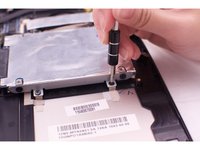
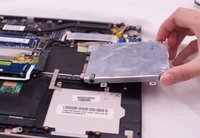
Remove the four 3mm hard drive screws with a Phillips #0 Screwdriver.
-
-
-
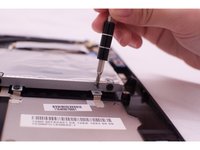
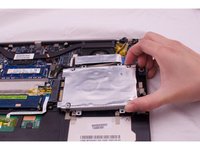
Lift the hard drive slightly and gently pull the hard drive from the socket.
-
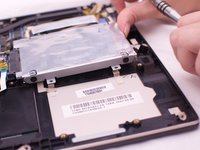
Remove the hard drive completely.
-


To reassemble your device, follow these instructions in reverse order.
To reassemble your device, follow these instructions in reverse order.
crwdns2935221:0crwdne2935221:0
crwdns2935229:012crwdne2935229:0
crwdns2915084:0crwdne2915084:0

CSU Fullerton, Team 2-2, Bruce Fall 2015 crwdns2935289:0CSU Fullerton, Team 2-2, Bruce Fall 2015crwdne2935289:0
CSUF-BRUCE-F15S2G2
crwdns2931471:04crwdne2931471:0
crwdns2935297:06crwdne2935297:0
crwdns2947412:04crwdne2947412:0
Installed a new WD Blue 3D NAND 500GB PC SSD - SATA III 6 Gb/s 2.5"/7mm Solid State Drive into my UX32VD using this guide. It works like charm! Thanks for the guide
Excellent! Precise and concise to the point!Thank you!
Exzellent Guide, Thank you so much!
can someone confirm to me that samsung evo 860 will work or not for this asus please