
Asus ZenPad Z8 Camera Replacement

crwdns2959932:0crwdnd2959932:0mohamed sharifcrwdnd2959932:0crwdnd2959932:0crwdnd2959932:04crwdnd2959932:0crwdne2959932:0
crwdns2959936:0Kul 24, 2021crwdne2959936:0
crwdns2869540:0crwdne2869540:0: 1.5K
crwdns2959988:0crwdne2959988:0
- crwdns2959990:0crwdne2959990:0
- 1
- crwdns2959992:0crwdne2959992:0
- 20
- crwdns2959994:0crwdne2959994:0
- 66
- crwdns2959996:0crwdne2959996:0
- 1,538
crwdns2955950:0crwdne2955950:0: 2
crwdns2960004:02crwdne2960004:0.
crwdns2959984:0crwdne2959984:0: 1 2
crwdns2959972:01crwdne2959972:0
crwdns2959970:02crwdne2959970:0
crwdns2959986:0crwdne2959986:0: 0 1
crwdns2959958:0crwdne2959958:0
crwdns2959976:01crwdne2959976:0
crwdns2862615:0crwdne2862615:0
crwdns2862616:0crwdne2862616:0
crwdns2915892:0crwdne2915892:0
crwdns2959928:0crwdne2959928:0 ↓This guide will show you how to replace the Asus ZenPad Z8 Tablet's back-camera. If you have followed all of the other steps on the troubleshooting guide and they've failed to solve the problem, replacing the camera may be your best bet.
crwdns2959930:0crwdne2959930:0
crwdns2943215:0crwdne2943215:0
-
-
Spudger4.9


-
-
-
Turn off the power. The tablet has a hard power switch located on the right side.
 crwdns2952109:0crwdne2952109:0
-
-
-
Unscrew the screws located on the bottom and use the prying tool to open the tablet.
-
-
-
-
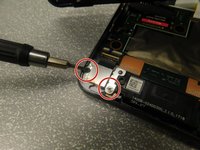
Unscrew the two screws that hold the camera onto the back cover. Each screw is located on either side of the camera.
-
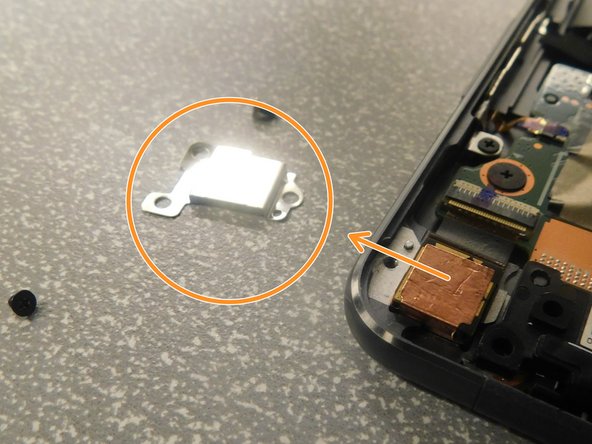
Remove the camera cover piece.
-
-
-
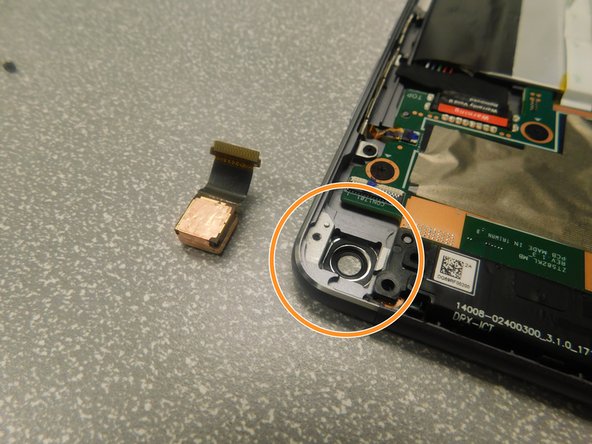
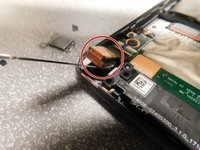
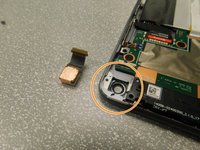
Use a prying tool to separate the camera, then pull to completely remove it.
-
Reinstall the new camera, camera cover, and screws.
-
-



To reassemble your device, follow these instructions in reverse order.
crwdns2935221:0crwdne2935221:0
crwdns2935227:0crwdne2935227:0

crwdns2935287:0crwdne2935287:0

Gateway, Team S1-G4, Saknee Spring 2019 crwdns2935289:0Gateway, Team S1-G4, Saknee Spring 2019crwdne2935289:0
GCC-SAKNEE-S19S1G4
crwdns2931471:04crwdne2931471:0
crwdns2935297:012crwdne2935297:0
