crwdns2933423:0crwdne2933423:0

Asus X751MA-DH01TQ Fan Replacement

crwdns2942213:0crwdne2942213:0

  1. Asus X751MA-DH01TQ Fan Replacement, Fan: crwdns2935265:01crwdnd2935265:01crwdnd2935265:02crwdne2935265:0 Asus X751MA-DH01TQ Fan Replacement, Fan: crwdns2935265:01crwdnd2935265:02crwdnd2935265:02crwdne2935265:0
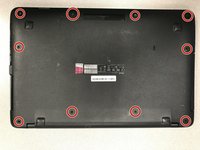
    • Turn the laptop upside down.

    • Remove all ten screws using a 00 Phillips head screwdriver.

  2. Asus X751MA-DH01TQ Fan Replacement: crwdns2935265:02crwdnd2935265:01crwdnd2935265:01crwdne2935265:0
    • Use a plastic opening tool to take the keyboard off of the base.

    • Gently take off the keyboard from the base.

  3. Asus X751MA-DH01TQ Fan Replacement: crwdns2935265:03crwdnd2935265:01crwdnd2935265:02crwdne2935265:0 Asus X751MA-DH01TQ Fan Replacement: crwdns2935265:03crwdnd2935265:02crwdnd2935265:02crwdne2935265:0
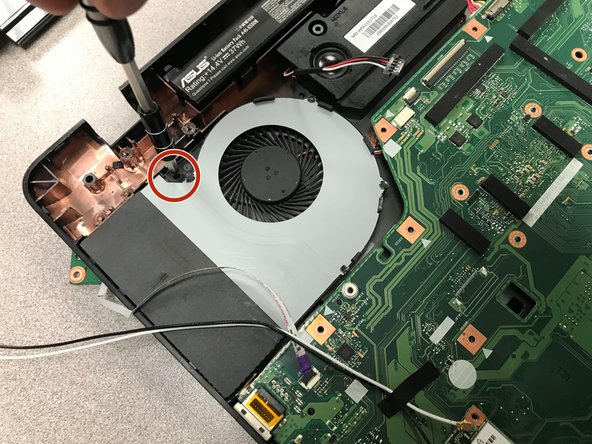
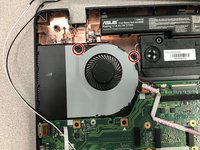
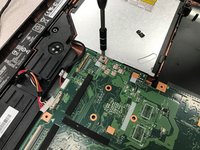
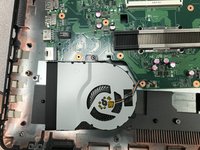
    • Remove the two screws directly above the fan.

  4. Asus X751MA-DH01TQ Fan Replacement: crwdns2935265:04crwdnd2935265:01crwdnd2935265:02crwdne2935265:0 Asus X751MA-DH01TQ Fan Replacement: crwdns2935265:04crwdnd2935265:02crwdnd2935265:02crwdne2935265:0
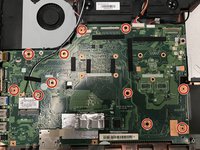
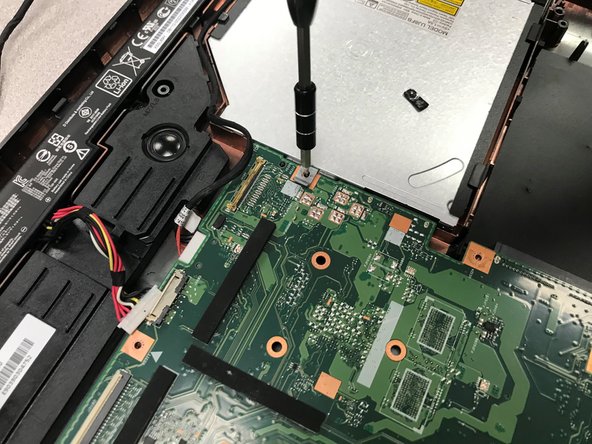
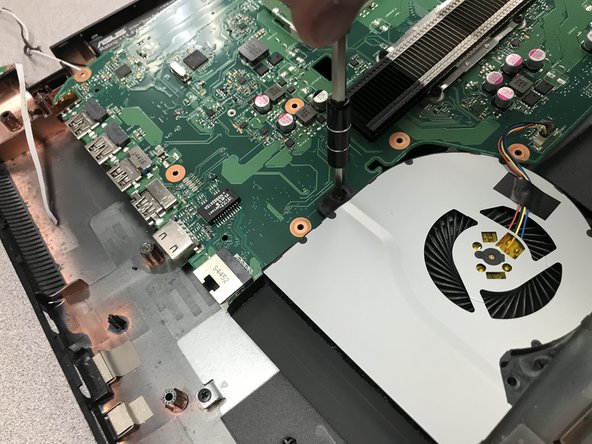
    • Unscrew the 11 screws that hold the motherboard to the base of the computer with a 00 Phillips screwdriver.

  5. Asus X751MA-DH01TQ Fan Replacement: crwdns2935265:05crwdnd2935265:01crwdnd2935265:02crwdne2935265:0 Asus X751MA-DH01TQ Fan Replacement: crwdns2935265:05crwdnd2935265:02crwdnd2935265:02crwdne2935265:0
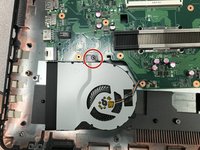
    • Remove the one screw on the right side of the motherboard that keeps the cd tray in place.

  6. Asus X751MA-DH01TQ Fan Replacement: crwdns2935265:06crwdnd2935265:01crwdnd2935265:02crwdne2935265:0 Asus X751MA-DH01TQ Fan Replacement: crwdns2935265:06crwdnd2935265:02crwdnd2935265:02crwdne2935265:0
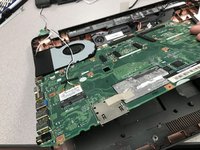
    • Gently take the motherboard off the base and flip it over.

    • Remove the screws securing the fan to the motherboard.

  7. Asus X751MA-DH01TQ Fan Replacement: crwdns2935265:07crwdnd2935265:01crwdnd2935265:02crwdne2935265:0 Asus X751MA-DH01TQ Fan Replacement: crwdns2935265:07crwdnd2935265:02crwdnd2935265:02crwdne2935265:0
    • Remove the Phillips #00 screw that holds the fan to the motherboard.

  8. Asus X751MA-DH01TQ Fan Replacement: crwdns2935265:08crwdnd2935265:01crwdnd2935265:02crwdne2935265:0 Asus X751MA-DH01TQ Fan Replacement: crwdns2935265:08crwdnd2935265:02crwdnd2935265:02crwdne2935265:0
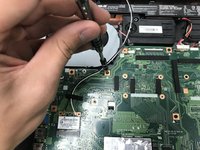
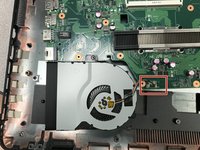
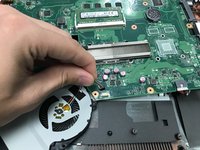
    • On the bottom of the motherboard, locate the wire plugged in and pull it out to completely detach the fan from the motherboard.

crwdns2915888:0crwdne2915888:0

To reassemble your device, follow these instructions in reverse order.

crwdns2935227:0crwdne2935227:0

Darren Kim

crwdns2935283:009/18/18crwdne2935283:0

657 crwdns2915208:0crwdne2915208:0

crwdns2935297:03crwdne2935297:0

crwdns2915084:0crwdne2915084:0

University of North Texas, Team S1-G1, Thomas Spring 2020 crwdns2935289:0University of North Texas, Team S1-G1, Thomas Spring 2020crwdne2935289:0

UNT-THOMAS-S20S1G1

crwdns2931471:03crwdne2931471:0

crwdns2935297:03crwdne2935297:0

crwdns2944067:00crwdne2944067:0

crwdns2917038:0crwdne2917038:0

crwdns2936625:0crwdne2936625:0:

crwdns2936751:024crwdne2936751:0 0

crwdns2936753:07crwdne2936753:0 0

crwdns2936753:030crwdne2936753:0 17

crwdns2942667:0crwdne2942667:0 361