crwdns2915892:0crwdne2915892:0
This guide will will walk you through the process of removing and replacing a faulty DVD Drive.
crwdns2942213:0crwdne2942213:0
-
-
With the screen closed, place your laptop upside-down with the front facing you.
-
Remove the six 14.6mm Phillips #00 screws.
-
Remove the four 6.6mm Phillips #00 screws.
-
-
-
Flip the laptop over and open the lid.
-
Pry around the edges of the laptop base using the plastic opening tool.
-
-
-
-
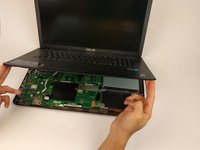
Carefully lift the keyboard up.
-
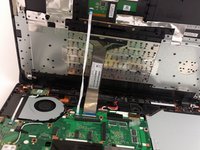
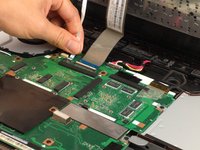
Disconnect the two ZIF connectors from the motherboard using your fingernail to lift the cream-colored tab.
-
-
-
With the keyboard panel open, face the laptop with the internal components facing towards you.
-
Remove the single 4.6mm Phillips #00 screw.
-
To reassemble your device, follow these instructions in reverse order.
To reassemble your device, follow these instructions in reverse order.
crwdns2935221:0crwdne2935221:0
crwdns2935229:02crwdne2935229:0
crwdns2947410:01crwdne2947410:0
Spot on, took away any worries…………


