crwdns2933423:0crwdne2933423:0

Asus X550CA Speakers or Motherboard Replacement

crwdns2942213:0crwdne2942213:0

  1. Asus X550CA Speakers or Motherboard Replacement, Remove battery: crwdns2935265:01crwdnd2935265:01crwdnd2935265:02crwdne2935265:0 Asus X550CA Speakers or Motherboard Replacement, Remove battery: crwdns2935265:01crwdnd2935265:02crwdnd2935265:02crwdne2935265:0
    • Amongst the easiest of steps. Turn the laptop upside-down, with its lid on the work surface, with the battery facing you.

    • First, push the left latch from the right to the left. You can let go, as this latch holds its position, unlike the next one.

    • Then, push the right latch to the right. This latch has a spring, so keep it held.

    • Next, with the other hand, pull the battery out and back towards you.

  2. Asus X550CA Speakers or Motherboard Replacement, Remove the HDD/RAM panel: crwdns2935265:02crwdnd2935265:01crwdnd2935265:02crwdne2935265:0 Asus X550CA Speakers or Motherboard Replacement, Remove the HDD/RAM panel: crwdns2935265:02crwdnd2935265:02crwdnd2935265:02crwdne2935265:0
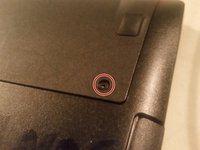
    • Remove the two crazily-long screws from the bottom panel.

    • Then, push the panel forwards, away from you.

  3. Asus X550CA Speakers or Motherboard Replacement, Remove HDD: crwdns2935265:03crwdnd2935265:01crwdnd2935265:03crwdne2935265:0 Asus X550CA Speakers or Motherboard Replacement, Remove HDD: crwdns2935265:03crwdnd2935265:02crwdnd2935265:03crwdne2935265:0 Asus X550CA Speakers or Motherboard Replacement, Remove HDD: crwdns2935265:03crwdnd2935265:03crwdnd2935265:03crwdne2935265:0
    • Remove the three short screws holding the HDD caddy down.

    • Pull the caddy to the right using the flap on the left of the caddy. The caddy will slide to the right.

  4. Asus X550CA Speakers or Motherboard Replacement, Remove palmrest screws: crwdns2935265:04crwdnd2935265:01crwdnd2935265:03crwdne2935265:0 Asus X550CA Speakers or Motherboard Replacement, Remove palmrest screws: crwdns2935265:04crwdnd2935265:02crwdnd2935265:03crwdne2935265:0 Asus X550CA Speakers or Motherboard Replacement, Remove palmrest screws: crwdns2935265:04crwdnd2935265:03crwdnd2935265:03crwdne2935265:0
    • Remove the five additional short screws from under the HDD/RAM panel.

    • Then remove each crazily-long screw at each corner of the bottom of the laptop.

  5. Asus X550CA Speakers or Motherboard Replacement, Remove two more palmrest screws: crwdns2935265:05crwdnd2935265:01crwdnd2935265:02crwdne2935265:0 Asus X550CA Speakers or Motherboard Replacement, Remove two more palmrest screws: crwdns2935265:05crwdnd2935265:02crwdnd2935265:02crwdne2935265:0
    • Remove the two additional short screws from under where the battery was.

  6. Asus X550CA Speakers or Motherboard Replacement, Remove palmrest: crwdns2935265:06crwdnd2935265:01crwdnd2935265:01crwdne2935265:0
    • Next, use a guitar pick or the like to separate the palmrest from the base. As you can see, I chose to simply use my fingernails, as I have nothing else. I'd suggest avoiding the use of a flathead screwdriver.

    • Never pull any palmrest too far up! There are always cables attached to them. Simply set the palmrest down after you've finished disengaging the clips, and read on.

  7. Asus X550CA Speakers or Motherboard Replacement, Remove power button cable: crwdns2935265:07crwdnd2935265:01crwdnd2935265:03crwdne2935265:0 Asus X550CA Speakers or Motherboard Replacement, Remove power button cable: crwdns2935265:07crwdnd2935265:02crwdnd2935265:03crwdne2935265:0 Asus X550CA Speakers or Motherboard Replacement, Remove power button cable: crwdns2935265:07crwdnd2935265:03crwdnd2935265:03crwdne2935265:0
    • Pick up the palmrest and shift it to the left just a bit, then put it down, so that it looks just like the picture.

    • Stick your fingernail under the black lock on J6201 (inside of the square in the picture), and then pull upwards gently.

    • Next, pull the cable out of the connector.

  8. Asus X550CA Speakers or Motherboard Replacement, Remove touchpad cable: crwdns2935265:08crwdnd2935265:01crwdnd2935265:01crwdne2935265:0
    • Lift the palmrest slowly and carefully, and look inside. Don't worry, there probably aren't any jumping spiders hiding inside.

    • Git yo' fingas in there and disengage the lock for the touchpad cable, and then pull the cable out.

  9. Asus X550CA Speakers or Motherboard Replacement, Remove keyboard cable: crwdns2935265:09crwdnd2935265:01crwdnd2935265:01crwdne2935265:0
    • Pick up the palmrest again, slowly and gracefully, then move it downwards so that you see the keyboard connector, like in the picture.

    • Disengage the lock, then pull the keyboard cable out.

    • There are no more cables. You may lift the palmrest, and put it aside.

  10. Asus X550CA Speakers or Motherboard Replacement, Free the motherboard: crwdns2935265:010crwdnd2935265:01crwdnd2935265:03crwdne2935265:0 Asus X550CA Speakers or Motherboard Replacement, Free the motherboard: crwdns2935265:010crwdnd2935265:02crwdnd2935265:03crwdne2935265:0 Asus X550CA Speakers or Motherboard Replacement, Free the motherboard: crwdns2935265:010crwdnd2935265:03crwdnd2935265:03crwdne2935265:0
    • Yes, you really have to remove the motherboard, I'm sorry. But we haven't gone this far just to stop! Let's take it out.

    • Remove the nine short screws circled in the picture.

    • Remove the Wi-Fi card antennas by pulling up on the connectors.

    • Remove the Wi-Fi card by pulling it away from its slot.

    • Remove the optical drive by sliding it to your right, and out.

    • Remove the power jack connection by pulling it back, away from the motherboard.

    • Remove the speaker connection the same way as the power jack connection.

    • Pull the motherboard towards you and to the right, slowly, and then we'll talk about the rest of it.

  11. Asus X550CA Speakers or Motherboard Replacement, Remove the video cable: crwdns2935265:011crwdnd2935265:01crwdnd2935265:03crwdne2935265:0 Asus X550CA Speakers or Motherboard Replacement, Remove the video cable: crwdns2935265:011crwdnd2935265:02crwdnd2935265:03crwdne2935265:0 Asus X550CA Speakers or Motherboard Replacement, Remove the video cable: crwdns2935265:011crwdnd2935265:03crwdnd2935265:03crwdne2935265:0
    • Pull the video cable tape up from the motherboard.

    • Pull the video cable back, away from you, firmly, making sure that you grab the tape with it. It will come out suddenly, so don't get scared.

    • Inspect the video cable carefully to make sure you didn't damage it. Damaged video cables, when used, can damage your motherboard or screen! I learnt that the hard way on another laptop.

  12. Asus X550CA Speakers or Motherboard Replacement, Free the speakers: crwdns2935265:012crwdnd2935265:01crwdnd2935265:02crwdne2935265:0 Asus X550CA Speakers or Motherboard Replacement, Free the speakers: crwdns2935265:012crwdnd2935265:02crwdnd2935265:02crwdne2935265:0
    • Pull the LCD cable from the left speaker's plastic tabs holding it down.

    • Pull the Wi-Fi antenna cables from the right speaker.

    • Pry the speakers from their adhesive. Using a flathead screwdriver, work your way around the speakers. It won't look too pretty, don't worry about it.

    • Celebrate. You're done!

crwdns2915888:0crwdne2915888:0

To reassemble your device, follow these instructions in reverse order.

crwdns2935229:02crwdne2935229:0

Joseph Sctbunio

crwdns2935283:009/23/17crwdne2935283:0

7 332 crwdns2915208:0crwdne2915208:0

crwdns2935297:042crwdne2935297:0

crwdns2944067:02crwdne2944067:0

Good morning sir;

I have an asus x550cc laptop that I want to upgrade; Can I replace the motherboard with a new one model x550 Jx?

Jaafar Sami - crwdns2934203:0crwdne2934203:0

board replace on a laptop isnt that simple like it is on desktop if you replace board make sure cpu you plan to use is compatible with it

EXPERT - crwdns2934203:0crwdne2934203:0

crwdns2917038:0crwdne2917038:0

crwdns2936625:0crwdne2936625:0:

crwdns2936751:024crwdne2936751:0 0

crwdns2936753:07crwdne2936753:0 10

crwdns2936753:030crwdne2936753:0 62

crwdns2942667:0crwdne2942667:0 3,096