crwdns2915892:0crwdne2915892:0
This device will show you how to replace a faulty ethernet port with a new working one.
crwdns2942213:0crwdne2942213:0
-
-
Remove the 9 1.2mm phillips head screws on the bottom of the computer using a small Phillips head screw driver.
-
-
-
-
Use a plastic opening tool to open the components of the laptop. In order to do this, insert the plastic opening tool in between the two covers then pry open with your fingers
-
-
-
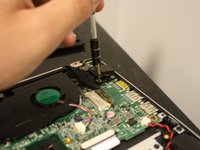
Remove the 4 1.2mm phillips head screws with a small phillips head screw driver that held the Ethernet port in place.
-
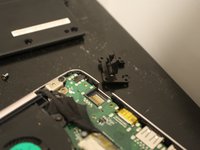
Lift and remove the Ethernet port
-


To reassemble your device, follow these instructions in reverse order.
crwdns2935287:0crwdne2935287:0

Western Carolina University, Team S1-G5, Virtue Fall 2017 crwdns2935289:0Western Carolina University, Team S1-G5, Virtue Fall 2017crwdne2935289:0
WCU-VIRTUE-F17S1G5
crwdns2931471:04crwdne2931471:0
crwdns2935297:05crwdne2935297:0