crwdns2915892:0crwdne2915892:0
The power port is where the power cable plugs into to send power to the battery and the motherboard. If this port is damaged, it may be impossible to charge the battery or power the computer. Replacing this component must be done with care, as any loose or crossed connections may result in device failure.
crwdns2942213:0crwdne2942213:0
-
-
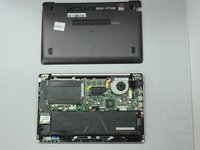
Flip the device such that the labels are on top.
-
Use a Phillips #1 screwdriver to remove the four 8mm screws near the back.
-
Use the same screwdriver to remove the four 5mm screws in the front.
-
Use the same screwdriver to remove the single 9mm screw in the center.
-
-
-
Remove the back cover by gently prying with a spudger.
-
-
-
Remove the eight 5mm screws using a Phillips #1 screwdriver.
-
-
-
Disconnect the battery ribbon cable from the motherboard.
-
-
-
Unscrew the three 4mm screws holding the hard drive to the board.
-
-
-
-
Pull on the tab on the left side of the hard drive and slowly disconnect it from the board.
-
-
-
Unscrew the five 5mm screws holding the left board together.
-
-
-
Unplug the two connectors on the left board.
-
-
-
Remove the single 3mm screw from the sound chip.
-
Unplug the sound chip.
-
Remove the sound chip.
-
-
-
Remove the six 4mm screws holding the fan and CPU cover.
-
-
-
Unplug the fan.
-
Remove the fan and CPU cover.
-
-
-
Unscrew the nine 4mm screws holding the right board together.
-
-
-
Remove the two remaining connectors on the board.
-
-
-
Locate the power port on the right board near the internet port.
-
-
-
De-solder the pins of the port from the board
-
See this guide on how to use a soldering iron.
-
Remove the port from the board.
-


To reassemble your device, follow these instructions in reverse order.
To reassemble your device, follow these instructions in reverse order.
crwdns2935221:0crwdne2935221:0
crwdns2935229:02crwdne2935229:0

crwdns2915084:0crwdne2915084:0

Eastern Washington University, Team S1-G5, Crawford Winter 2019 crwdns2935289:0Eastern Washington University, Team S1-G5, Crawford Winter 2019crwdne2935289:0
EWU-CRAWFORD-W19S1G5
crwdns2931471:04crwdne2931471:0
crwdns2935297:07crwdne2935297:0