crwdns2933423:0crwdne2933423:0

Asus VivoBook X202E-DB21T Display Replacement

crwdns2942213:0crwdne2942213:0

  1. Asus VivoBook X202E-DB21T Display Replacement, Battery: crwdns2935265:01crwdnd2935265:01crwdnd2935265:02crwdne2935265:0 Asus VivoBook X202E-DB21T Display Replacement, Battery: crwdns2935265:01crwdnd2935265:02crwdnd2935265:02crwdne2935265:0
    • Flip the device such that the labels are on top.

    • Use a Phillips #1 screwdriver to remove the four 8mm screws near the back.

    • Use the same screwdriver to remove the four 5mm screws in the front.

    • Use the same screwdriver to remove the single 9mm screw in the center.

    • Make sure that the device is powered down and unplugged.

  2. Asus VivoBook X202E-DB21T Display Replacement: crwdns2935265:02crwdnd2935265:01crwdnd2935265:02crwdne2935265:0 Asus VivoBook X202E-DB21T Display Replacement: crwdns2935265:02crwdnd2935265:02crwdnd2935265:02crwdne2935265:0
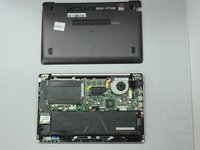
    • Remove the back cover by gently prying with a spudger.

  3. Asus VivoBook X202E-DB21T Display Replacement: crwdns2935265:03crwdnd2935265:01crwdnd2935265:02crwdne2935265:0 Asus VivoBook X202E-DB21T Display Replacement: crwdns2935265:03crwdnd2935265:02crwdnd2935265:02crwdne2935265:0
    • Remove the eight 5mm screws using a Phillips #1 screwdriver.

    • Do not puncture the battery.

  4. Asus VivoBook X202E-DB21T Display Replacement: crwdns2935265:04crwdnd2935265:01crwdnd2935265:01crwdne2935265:0
    • Disconnect the battery ribbon cable from the motherboard.

  5. Asus VivoBook X202E-DB21T Display Replacement: crwdns2935265:05crwdnd2935265:01crwdnd2935265:01crwdne2935265:0
    • Remove the battery from the laptop.

  6. Asus VivoBook X202E-DB21T Display Replacement, Hard Drive: crwdns2935265:06crwdnd2935265:01crwdnd2935265:02crwdne2935265:0 Asus VivoBook X202E-DB21T Display Replacement, Hard Drive: crwdns2935265:06crwdnd2935265:02crwdnd2935265:02crwdne2935265:0
    • Unscrew the three 4mm screws holding the hard drive to the board.

  7. Asus VivoBook X202E-DB21T Display Replacement: crwdns2935265:07crwdnd2935265:01crwdnd2935265:02crwdne2935265:0 Asus VivoBook X202E-DB21T Display Replacement: crwdns2935265:07crwdnd2935265:02crwdnd2935265:02crwdne2935265:0
    • Pull on the tab on the left side of the hard drive and slowly disconnect it from the board.

  8. Asus VivoBook X202E-DB21T Display Replacement, Motherboard: crwdns2935265:08crwdnd2935265:01crwdnd2935265:02crwdne2935265:0 Asus VivoBook X202E-DB21T Display Replacement, Motherboard: crwdns2935265:08crwdnd2935265:02crwdnd2935265:02crwdne2935265:0
    • Unscrew the five 5mm screws holding the left board together.

  9. Asus VivoBook X202E-DB21T Display Replacement: crwdns2935265:09crwdnd2935265:01crwdnd2935265:02crwdne2935265:0 Asus VivoBook X202E-DB21T Display Replacement: crwdns2935265:09crwdnd2935265:02crwdnd2935265:02crwdne2935265:0
    • Unplug the two connectors on the left board.

  10. Asus VivoBook X202E-DB21T Display Replacement: crwdns2935265:010crwdnd2935265:01crwdnd2935265:03crwdne2935265:0 Asus VivoBook X202E-DB21T Display Replacement: crwdns2935265:010crwdnd2935265:02crwdnd2935265:03crwdne2935265:0 Asus VivoBook X202E-DB21T Display Replacement: crwdns2935265:010crwdnd2935265:03crwdnd2935265:03crwdne2935265:0
    • Remove the single 3mm screw from the sound chip.

    • Unplug the sound chip.

    • Remove the sound chip.

  11. Asus VivoBook X202E-DB21T Display Replacement: crwdns2935265:011crwdnd2935265:01crwdnd2935265:01crwdne2935265:0
    • Remove the six 4mm screws holding the fan and CPU cover.

  12. Asus VivoBook X202E-DB21T Display Replacement: crwdns2935265:012crwdnd2935265:01crwdnd2935265:02crwdne2935265:0 Asus VivoBook X202E-DB21T Display Replacement: crwdns2935265:012crwdnd2935265:02crwdnd2935265:02crwdne2935265:0
    • Unplug the fan.

    • Remove the fan and CPU cover.

  13. Asus VivoBook X202E-DB21T Display Replacement: crwdns2935265:013crwdnd2935265:01crwdnd2935265:01crwdne2935265:0
    • Unscrew the nine 4mm screws holding the right board together.

  14. Asus VivoBook X202E-DB21T Display Replacement: crwdns2935265:014crwdnd2935265:01crwdnd2935265:01crwdne2935265:0
    • Remove the two remaining connectors on the board.

  15. Asus VivoBook X202E-DB21T Display Replacement: crwdns2935265:015crwdnd2935265:01crwdnd2935265:01crwdne2935265:0
    • Remove the right board.

  16. Asus VivoBook X202E-DB21T Display Replacement, Display: crwdns2935265:016crwdnd2935265:01crwdnd2935265:01crwdne2935265:0
    • Unscrew the three 5mm screws holding the display to the main body of the computer.

  17. Asus VivoBook X202E-DB21T Display Replacement: crwdns2935265:017crwdnd2935265:01crwdnd2935265:02crwdne2935265:0 Asus VivoBook X202E-DB21T Display Replacement: crwdns2935265:017crwdnd2935265:02crwdnd2935265:02crwdne2935265:0
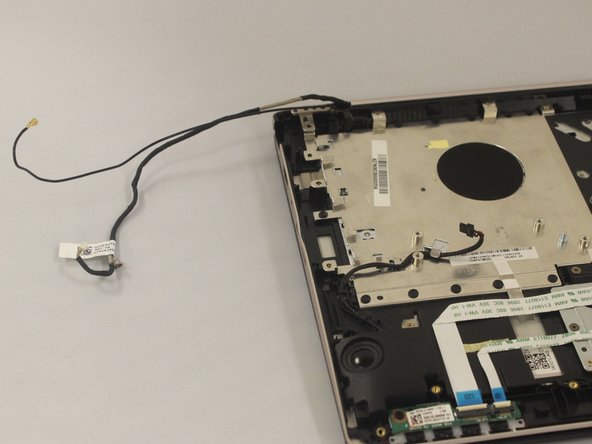
    • Unhook the cables coming from the display.

  18. Asus VivoBook X202E-DB21T Display Replacement: crwdns2935265:018crwdnd2935265:01crwdnd2935265:01crwdne2935265:0
    • Tilt the screen away from the main body of the computer.

    • Remove the screen.

crwdns2915888:0crwdne2915888:0

To reassemble your device, follow these instructions in reverse order.

John Thomas

crwdns2935283:001/13/19crwdne2935283:0

756 crwdns2915208:0crwdne2915208:0

crwdns2935297:06crwdne2935297:0

crwdns2915084:0crwdne2915084:0

Eastern Washington University, Team S1-G5, Crawford Winter 2019 crwdns2935289:0Eastern Washington University, Team S1-G5, Crawford Winter 2019crwdne2935289:0

EWU-CRAWFORD-W19S1G5

crwdns2931471:04crwdne2931471:0

crwdns2935297:07crwdne2935297:0

crwdns2944067:00crwdne2944067:0

crwdns2917038:0crwdne2917038:0

crwdns2936625:0crwdne2936625:0:

crwdns2936751:024crwdne2936751:0 1

crwdns2936753:07crwdne2936753:0 7

crwdns2936753:030crwdne2936753:0 21

crwdns2942667:0crwdne2942667:0 657