crwdns2933423:0crwdne2933423:0

Asus VivoBook S14 Hard Drive Replacement

crwdns2942213:0crwdne2942213:0

  1. Asus VivoBook S14 Hard Drive Replacement, Back Panel: crwdns2935265:01crwdnd2935265:01crwdnd2935265:02crwdne2935265:0 Asus VivoBook S14 Hard Drive Replacement, Back Panel: crwdns2935265:01crwdnd2935265:02crwdnd2935265:02crwdne2935265:0
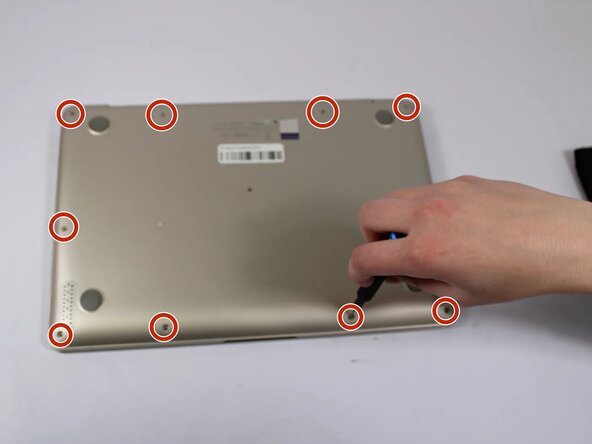
    • Remove all eleven 5 mm screws on the back panel with a JIS #000 screwdriver.

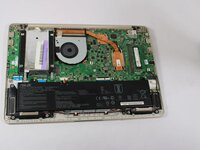
    • Gently pry off the back cover.

  2. Asus VivoBook S14 Hard Drive Replacement, Battery: crwdns2935265:02crwdnd2935265:01crwdnd2935265:01crwdne2935265:0
    • Carefully detach the connector from the motherboard.

    • If the battery is swollen or is need of disposal, please follow this guide.

  3. Asus VivoBook S14 Hard Drive Replacement: crwdns2935265:03crwdnd2935265:01crwdnd2935265:02crwdne2935265:0 Asus VivoBook S14 Hard Drive Replacement: crwdns2935265:03crwdnd2935265:02crwdnd2935265:02crwdne2935265:0
    • Remove the 5 mm screws holding the battery in place with a JIS #000 screwdriver.

  4. Asus VivoBook S14 Hard Drive Replacement: crwdns2935265:04crwdnd2935265:01crwdnd2935265:02crwdne2935265:0 Asus VivoBook S14 Hard Drive Replacement: crwdns2935265:04crwdnd2935265:02crwdnd2935265:02crwdne2935265:0
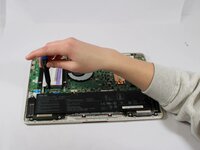
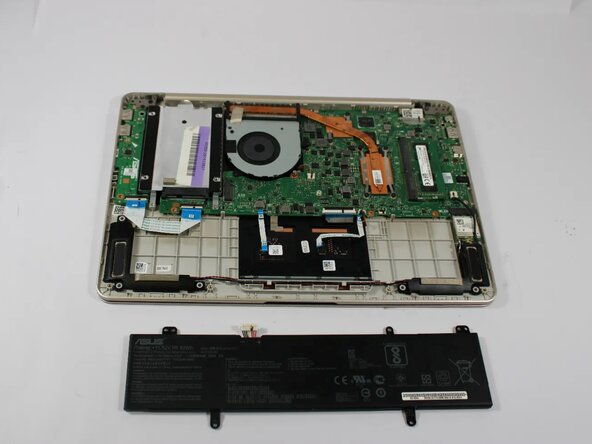
    • Lift the battery out of the battery socket.

  5. Asus VivoBook S14 Hard Drive Replacement, Hard Drive: crwdns2935265:05crwdnd2935265:01crwdnd2935265:01crwdne2935265:0
    • Remove the two 5 mm JIS #000 screws from the hard drive.

  6. Asus VivoBook S14 Hard Drive Replacement: crwdns2935265:06crwdnd2935265:01crwdnd2935265:02crwdne2935265:0 Asus VivoBook S14 Hard Drive Replacement: crwdns2935265:06crwdnd2935265:02crwdnd2935265:02crwdne2935265:0
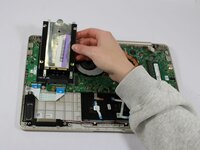
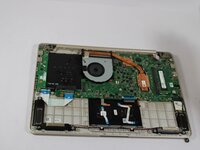
    • Gently remove the hard drive from the laptop.

  7. Asus VivoBook S14 Hard Drive Replacement: crwdns2935265:07crwdnd2935265:01crwdnd2935265:03crwdne2935265:0 Asus VivoBook S14 Hard Drive Replacement: crwdns2935265:07crwdnd2935265:02crwdnd2935265:03crwdne2935265:0 Asus VivoBook S14 Hard Drive Replacement: crwdns2935265:07crwdnd2935265:03crwdnd2935265:03crwdne2935265:0
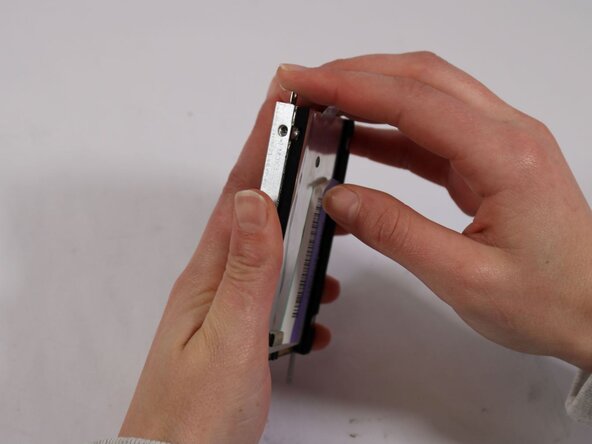
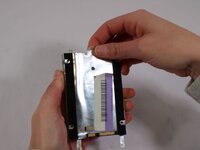
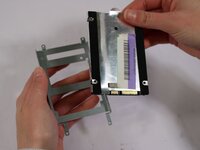
    • Remove the hard drive from the silver casing.

crwdns2915888:0crwdne2915888:0

To reassemble your device, follow these instructions in reverse order.

Sadra Mabey

crwdns2935283:002/25/25crwdne2935283:0

97 crwdns2915208:0crwdne2915208:0

crwdns2935295:0crwdne2935295:0

crwdns2915084:0crwdne2915084:0

Idaho State University, Team 1-5, Watkins Spring 2025 crwdns2935289:0Idaho State University, Team 1-5, Watkins Spring 2025crwdne2935289:0

ISU-WATKINS-S25S1G5

crwdns2931471:04crwdne2931471:0

crwdns2935297:05crwdne2935297:0

crwdns2947412:00crwdne2947412:0

crwdns2917038:0crwdne2917038:0

crwdns2936625:0crwdne2936625:0:

crwdns2936751:024crwdne2936751:0 0

crwdns2936753:07crwdne2936753:0 8

crwdns2936753:030crwdne2936753:0 28

crwdns2942667:0crwdne2942667:0 58